Markdown Syntax
These markdown conventions are carefully constructed for consistent representation of user interface elements, files, data and field input.
Basic markup
The simplest Markdown elements are:
| Format | Syntax | Output |
|---|---|---|
| Italics | *italics* |
italics |
| Bold | **bold** |
bold |
| Monospace | `monospace` |
monospace |
These elements are used for consistent representation of user interface elements, files, data and field input.
| Markdown | Subject | Example |
|---|---|---|
**strong** |
gui label, menu selection | Apply |
`monospace` |
text input, item selection | admin |
*emphasis* |
figure (caption) | Diagram 1 |
***strong-emphasis*** |
application, command | PostGIS |
**`monospace-strong`** |
file, path reference | example.gpkg |
Note
The above conventions are important for consistency, and allow for documentation translation. As an example we do not wish to translate a layer name, so these are represented as monospace text input.
User interface components
Use **button** to name user interface components for interaction (press for buttons, click for link).
User input
Use `item` monospace for user supplied input, or item in a list or tree:
Use `text` monospace for user supplied text input:
Use ++key++ for keyboard keys.
Use definition list to document data entry. The field names use strong as they name a user interface element. Field values to input uses monospace as user input to type in.
-
To login as the GeoServer administrator using the default password:
User :
adminPassword :
geoserverRemember me : Unchecked
Press Login.
Applications, commands and tools
Use ***command*** (combination of bold and italics) for proper names of applications, commands, tools, and products.
Files
Use **`file.txt`** (combine bold monospace) for files and path references:
Icons, Images and Figures
Material for markdown has extensive icon support, for most user interface elements we can directly make use of the appropriate icon in Markdown:
- Use Material for MkDocs Icons, Emojis page to search included icons.
- You can also reference emoji by name
- Add custom icons to
overrides/.icons/silk.
Figures are handled by convention, adding emphasized text after each image, and trust CSS rules to provide a consistent presentation:
- The image has two trailing
space characters, to affect a newline to position the caption under the figure. - The caption uses
*emphasis*appearance.

Raw images are not used very often:
Screenshots
Take consistent screenshots by following these guidelines:
-
Create a responsive design profile of 900 x 800 for consistent size of on screen components. This size allows the user interface to display two-column layout of forms, and avoid responsive design layout changes.
This can be accomplished using responsive design mode in your browser development tools.
The browser may also have a screenshot button to save an image at the requested DPI.
-
Use light appearance in the application, adjust monitor to sRGB.
Be considerate of file size:
-
If taking a screenshot with HiDPI display, process by 50% to 72 DPI.
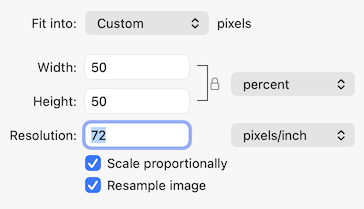
Screenshot scale to 72 DPITip
You may find it faster to adjust monitor resolution in order avoid this step when making a lot of screenshots.
-
No need to include an alpha band when saving PNG
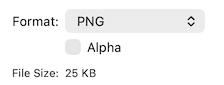
Do not include alpha band when saving
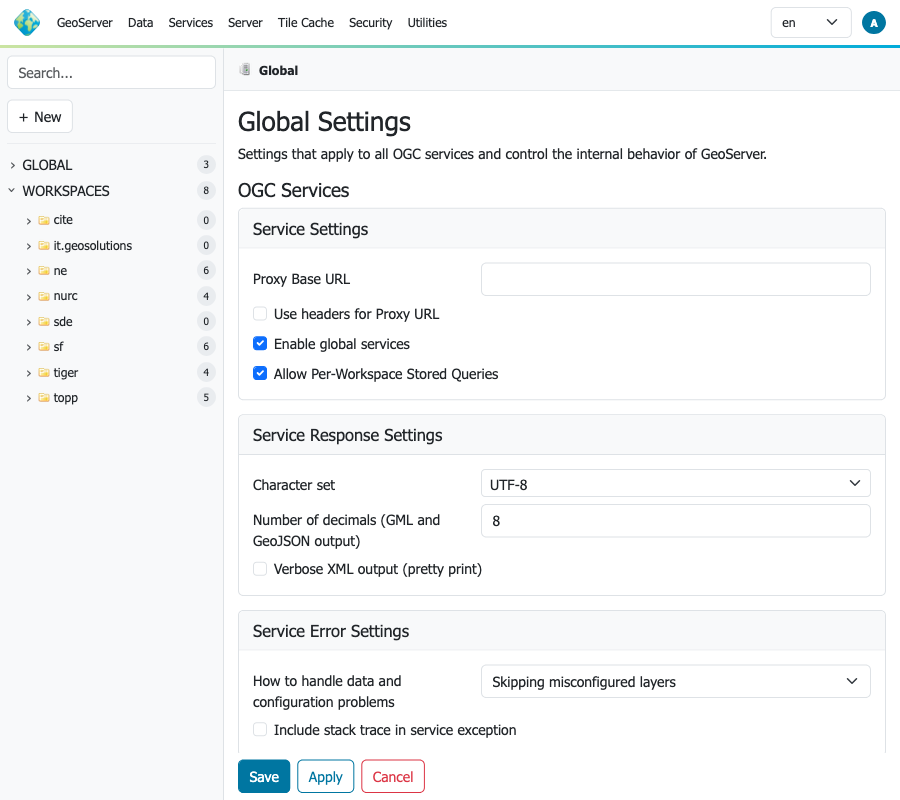
Full screen 900 x 800 is used sparingly, and are presented as figures (with a caption):
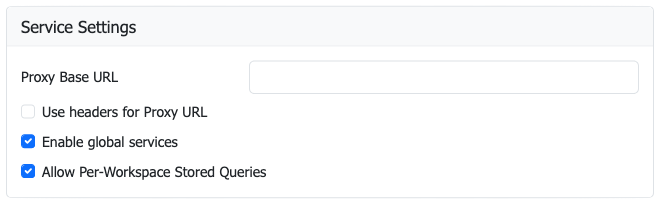
Crop for form and data entry steps:
Scale for smaller elements like dialogs and menus:
Lists
Bulleted lists:
Numbered lists:
- First item
- Second item
- Third item
- First item
- Second item
- Third item
Any additional content must be indented four additional spaces.
Bullet items are defined by -, +, or *. Take care that any indented content is indented four spaces.
Nested bullets are additional content, and require the same indentation of four spaces.
To return to top level, use 0 indentation again. For example:
Tables
Documentation uses pipe-tables only "List-packed" tables as they are supported by both mkdocs and pandoc.
Tables are constructed with Leading / tailing |, and headers separated by ---.
Columns can be Left, Center or Right aligned using : in the --- second row.
Notes and warnings (admonitions)
GeoServer documentation uses the admonition extension in Markdown for notes and warnings.
- default:
note - admonition:
abstract,quote,question,info,tip,example - caution:
warning,danger - result:
success,failure.bug - Reference: Admonitions
Important user guidance:
!!! note,!!! warning, etc. is valid at top level, and in list nesting when indented to the same depth as surrounding list content.- For top-level admonitions, use 0-3 spaces before
!!!and indent block content by 4 spaces. - For nested admonitions in lists, align
!!!with the list item block content (e.g. 4 / 8 / 12 spaces depending on nesting).
This means !!! can be at 12 spaces and still render when it is nested in a list item at that depth.
Changing the title:
Collapsible:
For use of note-like callout inside a list item, use inline emphasis can be an alternative:
1. Register application schema `xsd` location with ``ENTITY_RESOLUTION_ALLOWLIST`` application property.

    The setting ``ENTITY_RESOLUTION_UNRESTRICTED`` can be used to temporarily allow
    local ``xsd`` documents when troubleshooting.

    !!! danger
        Do not rely on this in production.

2. Remember use of ``ENTITY_RESOLUTION_UNRESTRICTED`` intended for troubleshooting only.

    **:material-lightning-bolt-circle: Danger:** Do not rely on this in production.
-
Register application schema
xsdlocation withENTITY_RESOLUTION_ALLOWLISTapplication property.The setting
ENTITY_RESOLUTION_UNRESTRICTEDcan be used to temporarily allow localxsddocuments when troubleshooting.Danger
Do not rely on this in production.
-
Remember use of
ENTITY_RESOLUTION_UNRESTRICTEDintended for troubleshooting only.Danger: Do not rely on this in production.
Headings and anchors
Use #, ##, ###, etc... to define headings within a page:
- Headings are used to establish "Page contents" along the right hand side allowing navigation with page
- Heading text used to auto-generate an anchor for use to link to content within a page.
Define an explicit named anchors (with HTML) as needed:
- Used to provide an anchor for figures and tables
- Also used as an alternative anchor for a heading, Helpful to preserve previous auto generated anchor when heading text changes.
For the heading:
May be referenced using #anchor or #headings-and-anchors.
Linking
Specific kinds of links:
Reference to other section of the document (some care is required to reference a specific heading):
-
Relative paths are used between pages
-
Use of
#anchorto locate anchor within a page, generated from heading text. -
References to
index.mdare converted toindex.html.Note
Use of
directory/index.md, rather thandirectory, is required for documentation to export to work on local file system.
Administrators have option to manage default language.
When linking do not use "here" as link text, instead use the title of the heading being navigated to.
Links to content within a page: anchors, and linking, or link to content on another page: Be concise.
External link:
Local file:
Force download link:
Inline code and code blocks
Inline code is presented as monospace using ` characters.
Fenced block are used to represent code examples:
- Syntax highlighting is available for
bash,Markdown,xml,Java, etc... - Preferable to inline code as the result can directly be used by provided copy button
Include snippets
Use snippet --8<-- include content from another file:
- This is very powerful when used to include code into a code block. When doing so the syntax highlighting from the code block is used.
- Extensions: Snippets
- Snippets Documentation
To include a number of lines into an xml code-block:
xmlis sensitive to dashes, so the single-dash variant-8<-is used instead
To include named section:
- Defined section using comment markers
- GeoServer has configured
snippetswithdedent_subsections: True
Example of comment markers from ResourcesTest.java: