Publishing a style
This tutorial walks through the steps of defining a style and associating it with a layer for use.
Note
This tutorial assumes that GeoServer is running at http://localhost:8080/geoserver.
Data preparation
First let's gather the data that we'll be publishing.
- Complete the previous tutorials:
- Publishing a GeoPackage defining the
tutorial:countrieslayer - Publishing a GeoTIFF defining the
tutorial:shadedlayer - Publishing a Layer Group defining the
tutorial:basemaplayer
- Publishing a GeoPackage defining the
Create a style
-
Navigate to Data > Style page.
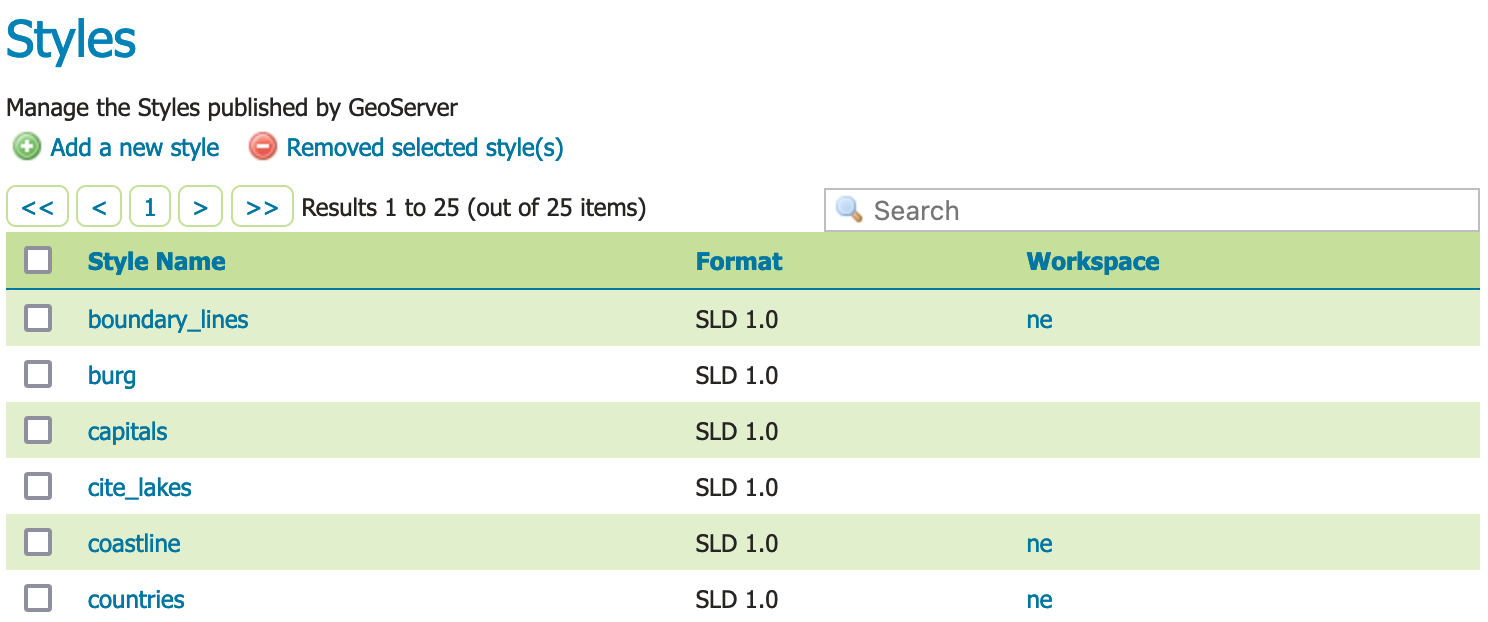
Styles
-
This page displays a list of styles, including the workspace the style belongs to.
Note
Styles groups are allowed to be "global", allowing a style to be defined and be used by any layer.
-
At the top of the list Styles list, locate and click the Add a new style link.
-
Locate Style Data and define the style:
Name backgroundWorkspace tutorialFormat SLD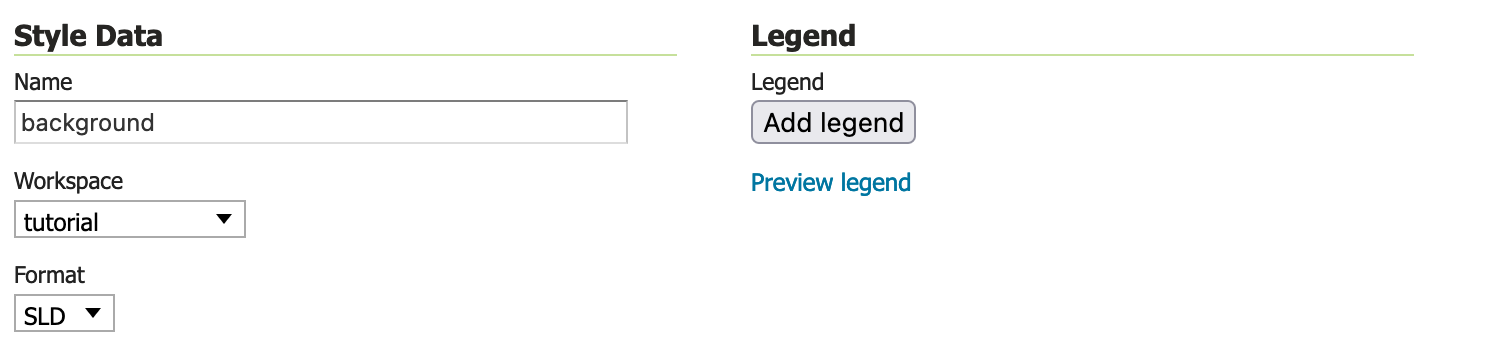
Style data
-
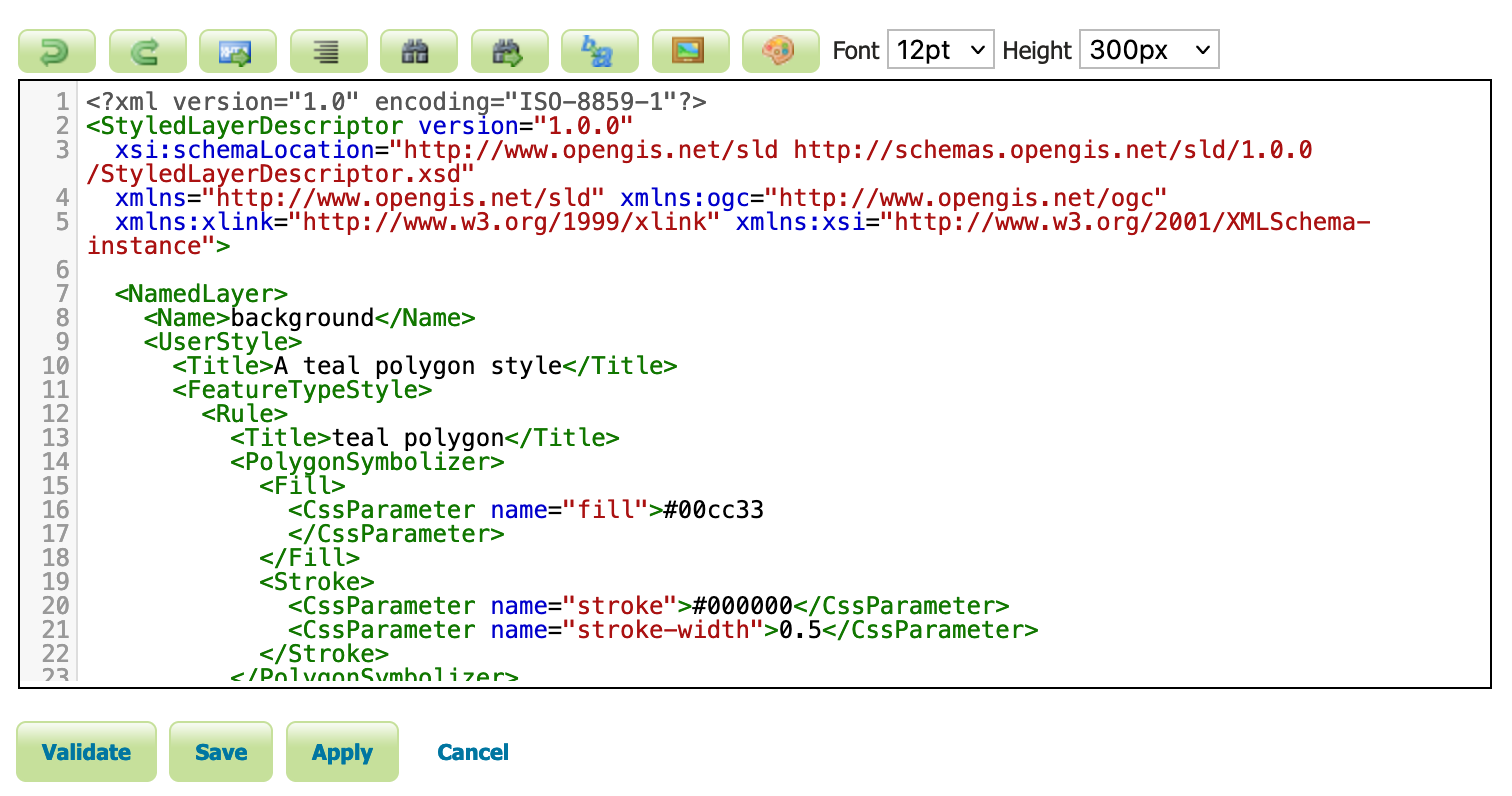
Locate Style Content and carefully:
- Under Generate a default style select
Polygon

Style Content configured to generate a polygon default style.
- Under Generate a default style select
-
Under Generate a default style locate and click the Generate link to populate the style editor with a generated outline of a polygon style.
-
Press the Apply button to define this style.
Now that the style is defined there are more options for interactively working with the style.
-
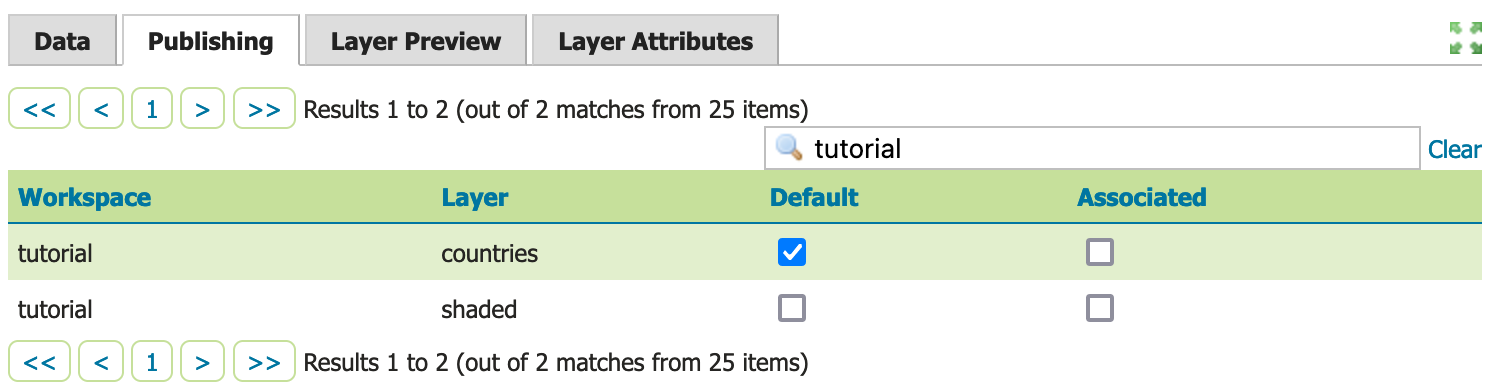
Change to Publishing tab.
- Use the search to filter with
tutorialto locatetutorial:countries. - Check the Default checkbox for
tutorial:countriesto use thetutorial:backgroundstyle the default for this layer.
Style publish
- Use the search to filter with
-
Next to Publishing navigate to the Layer Preview tab.
- Locate the Preview on layer and click on the link to select
tutorial:countriesas a dataset to use when editing the style.
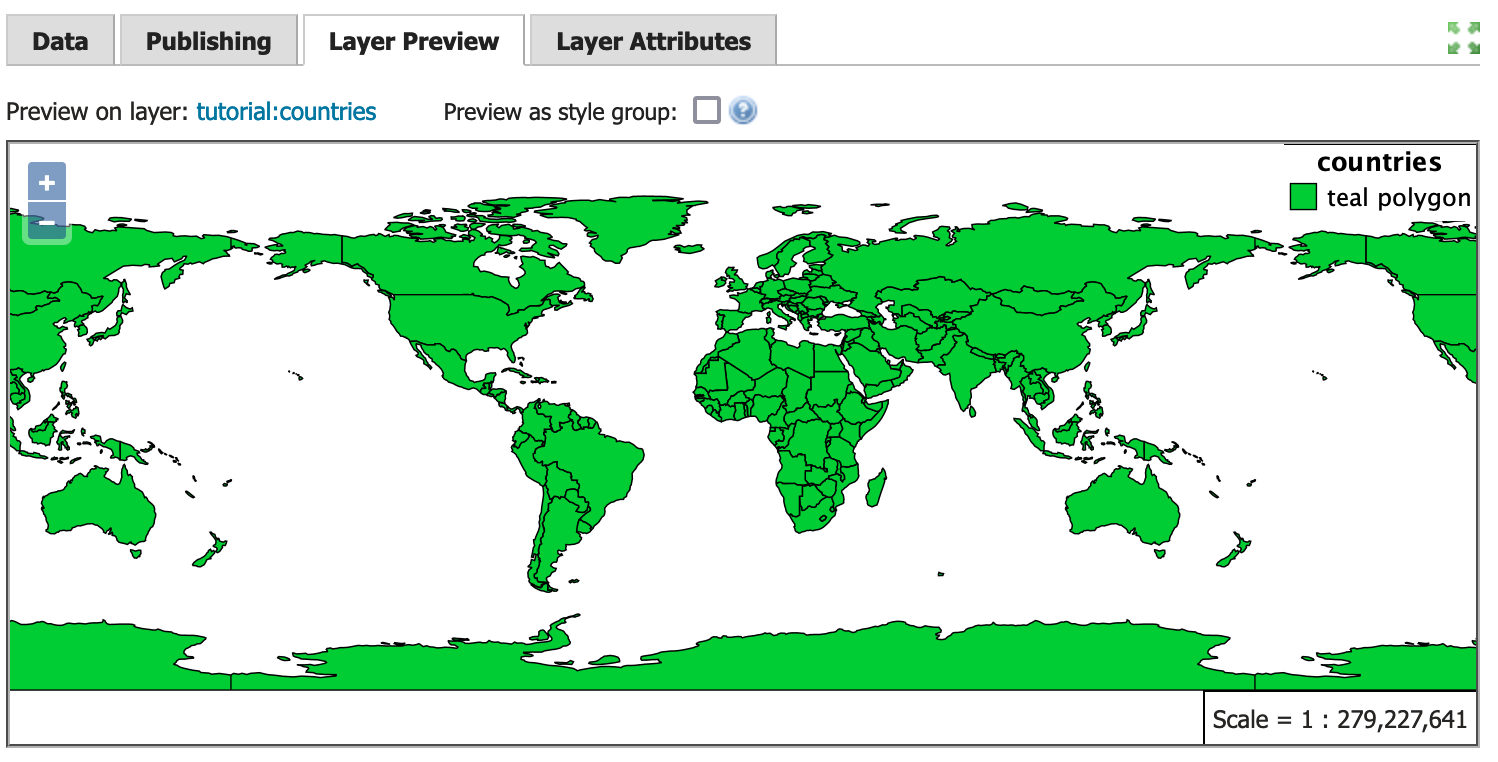
Styled editor Layer Preview tab
- Locate the Preview on layer and click on the link to select
-
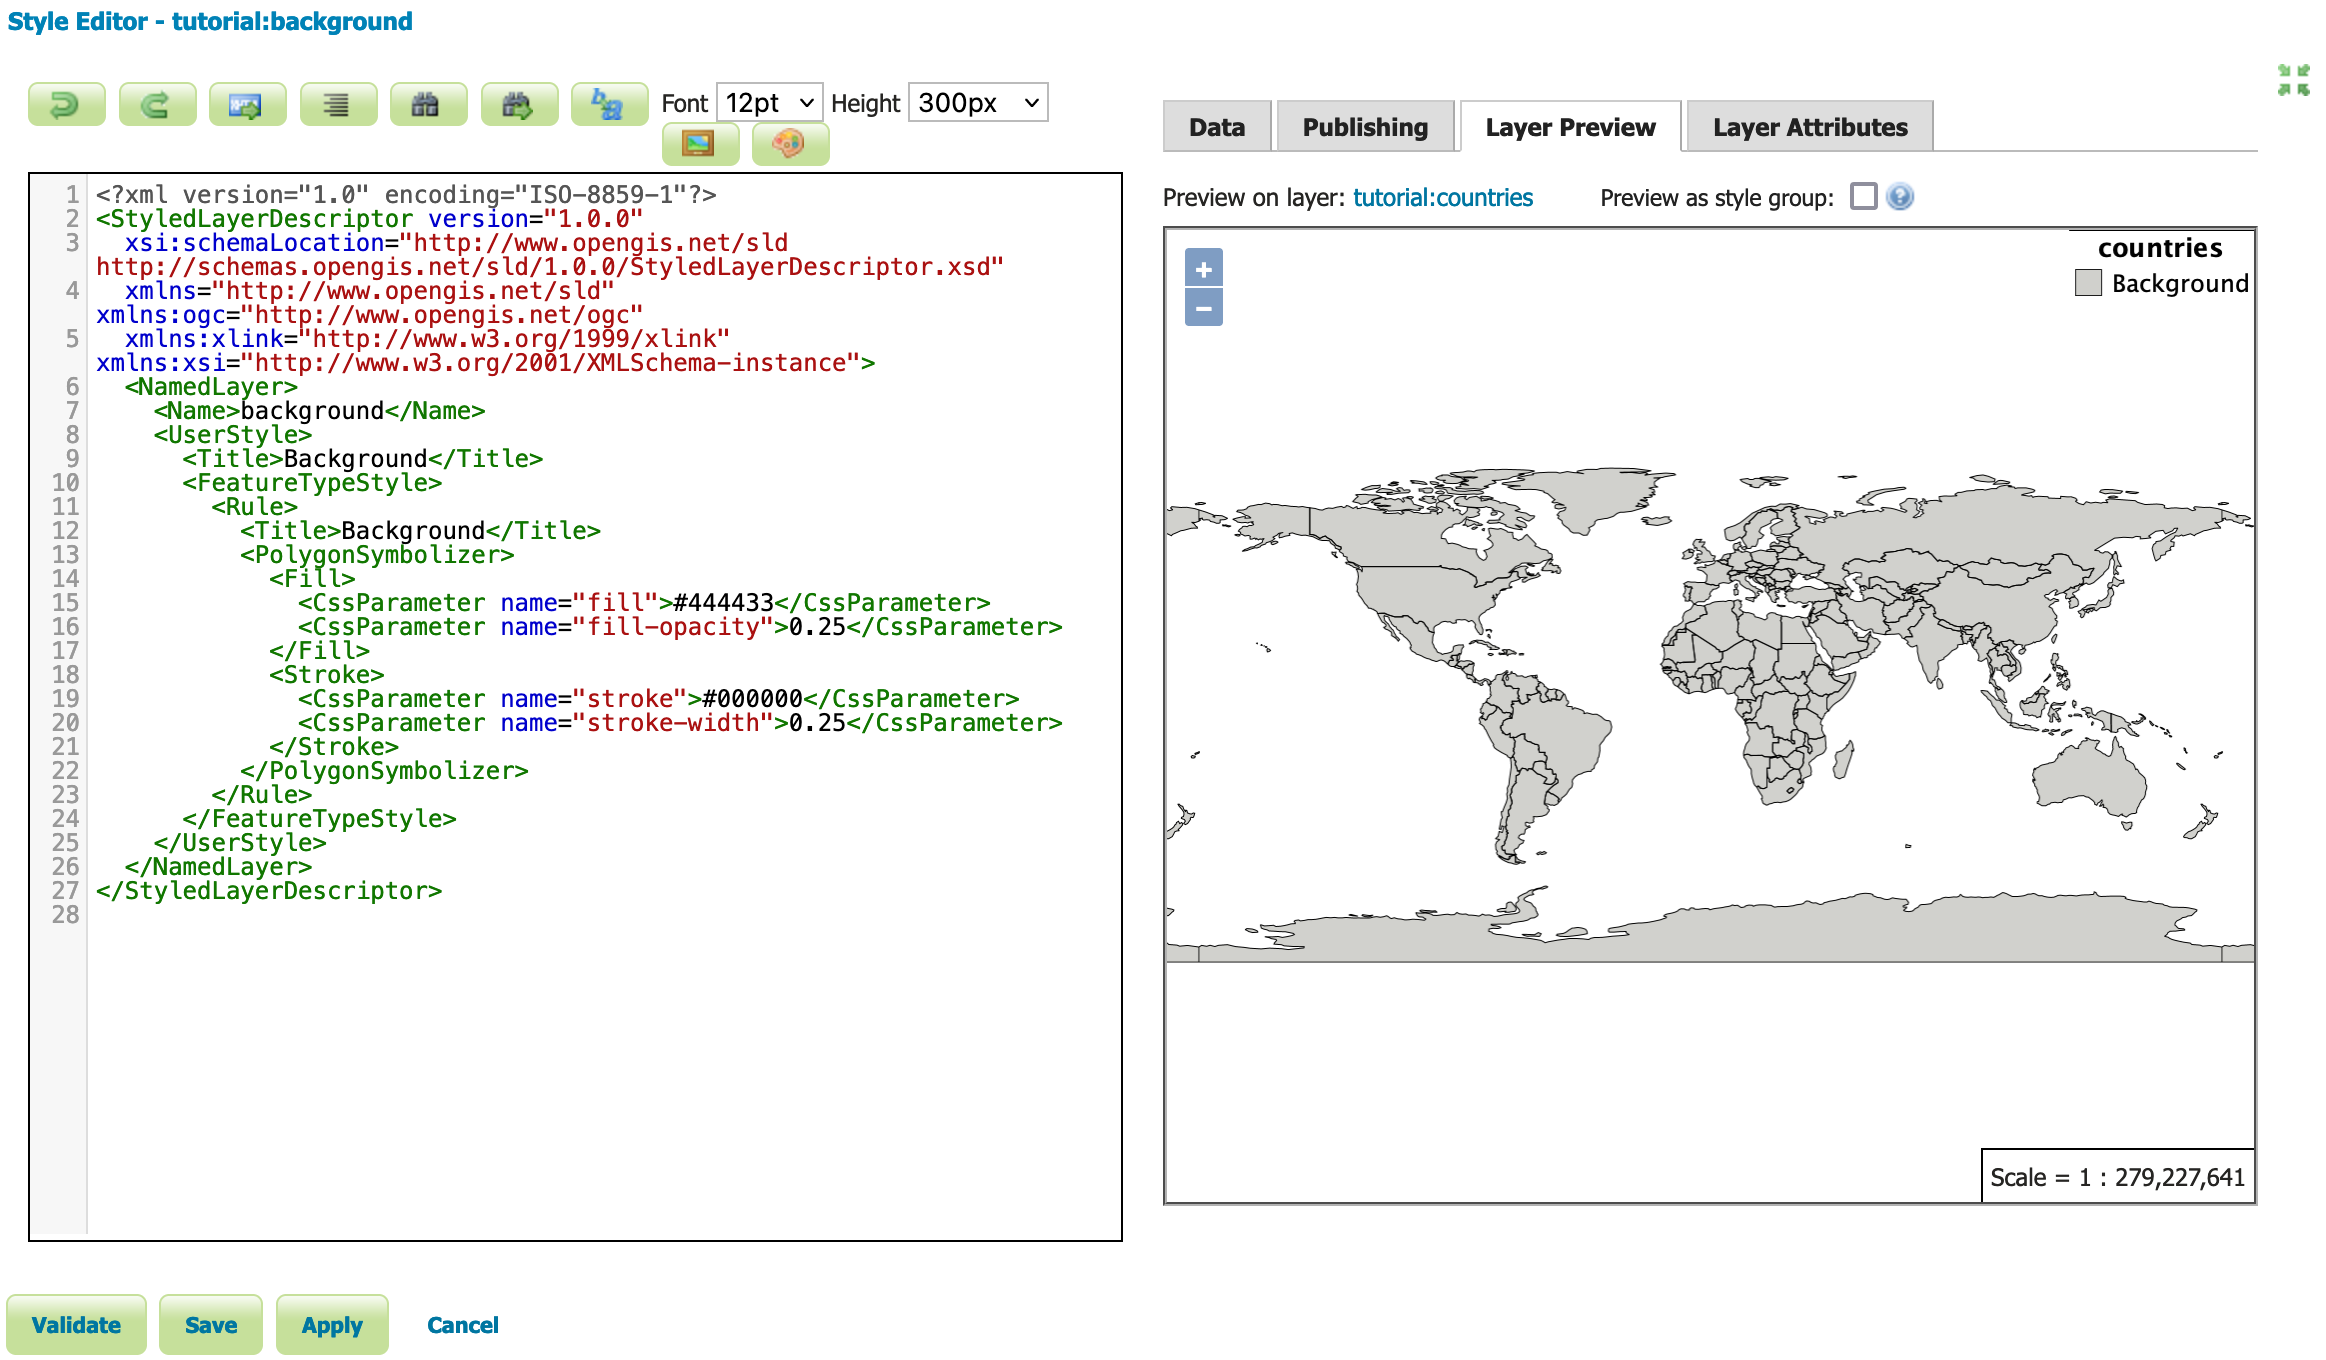
Edit your style by inserting
fill-opacityvalue of0.25.<?xml version="1.0" encoding="ISO-8859-1"?> <StyledLayerDescriptor version="1.0.0" xsi:schemaLocation="http://www.opengis.net/sld http://schemas.opengis.net/sld/1.0.0/StyledLayerDescriptor.xsd" xmlns="http://www.opengis.net/sld" xmlns:ogc="http://www.opengis.net/ogc" xmlns:xlink="http://www.w3.org/1999/xlink" xmlns:xsi="http://www.w3.org/2001/XMLSchema-instance"> <NamedLayer> <Name>background</Name> <UserStyle> <Title>Background</Title> <FeatureTypeStyle> <Rule> <Title>Background</Title> <PolygonSymbolizer> <Fill> <CssParameter name="fill">#444433</CssParameter> <CssParameter name="fill-opacity">0.25</CssParameter> </Fill> <Stroke> <CssParameter name="stroke">#000000</CssParameter> <CssParameter name="stroke-width">0.25</CssParameter> </Stroke> </PolygonSymbolizer> </Rule> </FeatureTypeStyle> </UserStyle> </NamedLayer> </StyledLayerDescriptor> -
Press Apply to edit your style and check the resulting visual change in the layer preview.
-
Experiment with:
- Updating the title information, watching the displayed legend change
- Full screen mode for side-by-side editing
Full screen mode
-
When this style is used as part of the
tutorial::basemapthefill-opacityallows the shaded relief detail to be shown.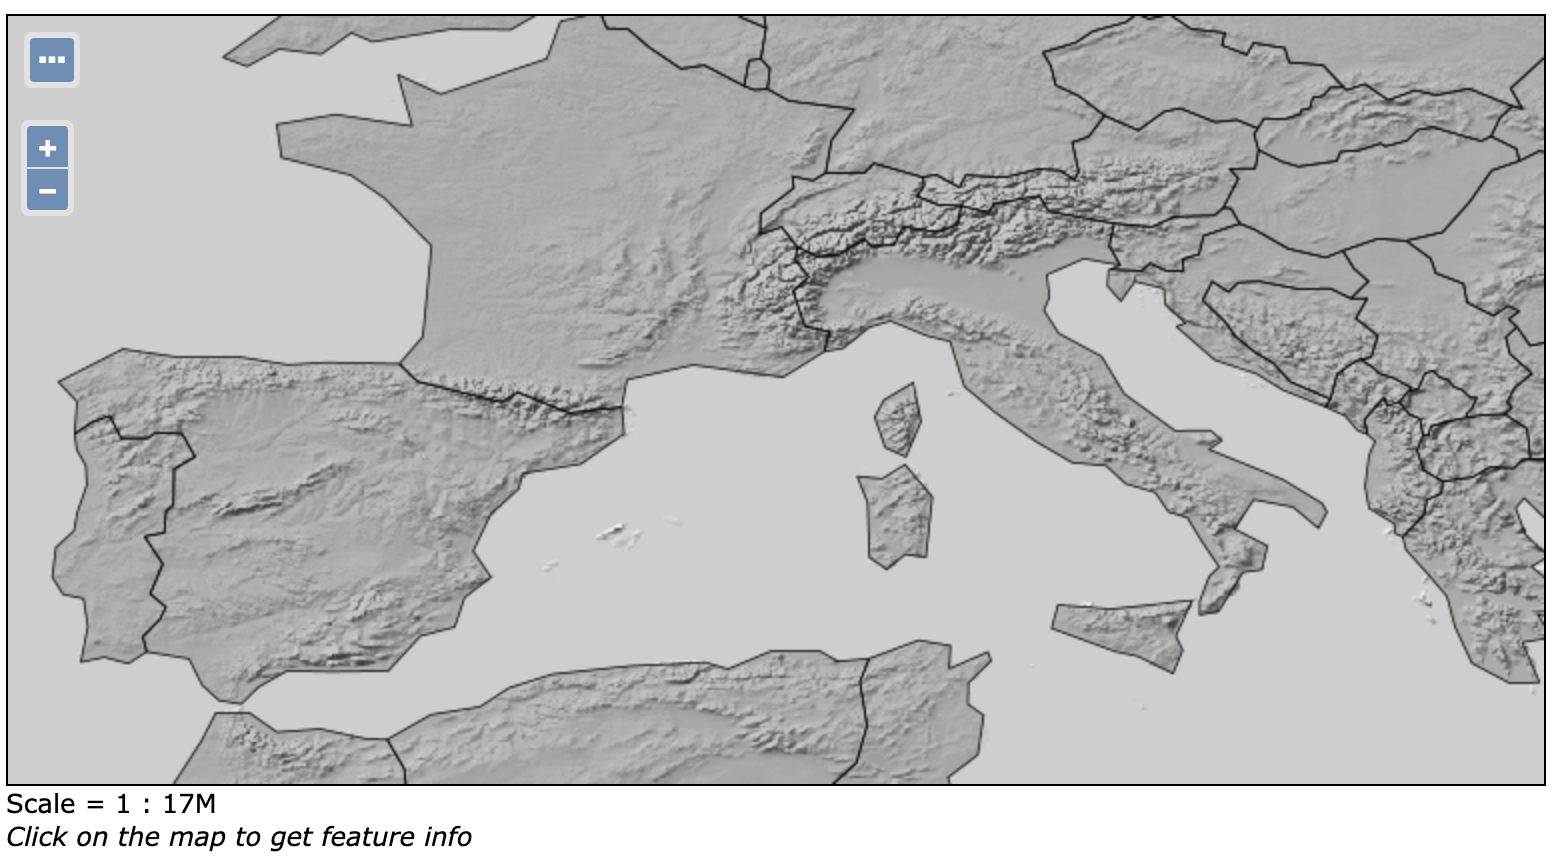
Basemap with background style applied to countries