Configuring with Keycloak
Keycloak is a popular open source Identity and Access Management system that supports OIDC.
In GeoServer, some of the core tests are against keycloak.
This will setup a Keycloak Docker container and manage user's inside Keycloak.
See the Keycloak Documentation for more information on setting up Keycloak. Keycloak can also be use "in between" GeoServer and another OIDC IDP.
Note
If running both GeoServer and Keycloak in Docker, see the Docker networking section in the installation guide for important notes about host.docker.internal and ensuring consistent hostnames.
Configure Keycloak
This will setup a Docker container running Keycloak and setup a Keycloak Realm and Client for GeoServer. For more information on the Keycloak Docker container see here and here and here.
Docker Install and Basic Setup
- Run Keycloak v26.1 as a Docker Container running on port 7777 with the admin login user "geoserver" and admin password "geoserver". This assumes your GeoServer is running on http://localhost:8080.
docker run --name geoserver_keycloak -p 7777:8080 \
   -e KC_BOOTSTRAP_ADMIN_USERNAME=geoserver \
   -e KC_BOOTSTRAP_ADMIN_PASSWORD=geoserver \
   quay.io/keycloak/keycloak:26.1 \
   start-dev
-
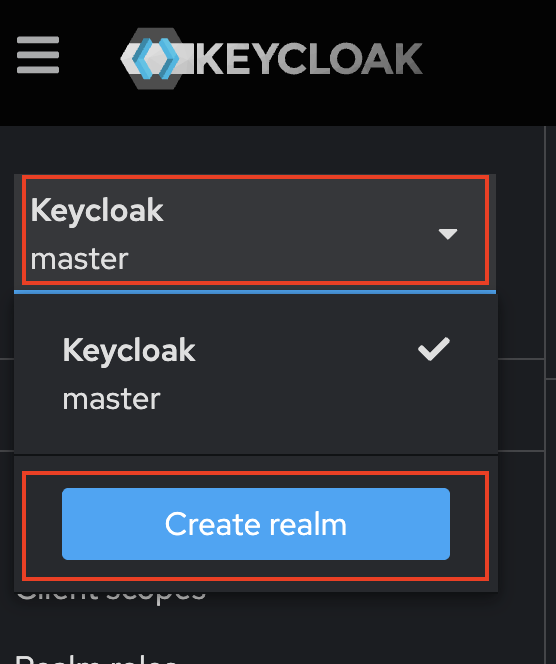
Access the Keycloak administration interface at http://localhost:7777/ and login as "geoserver/geoserver".
-
In the top left corner, click on "Keycloak master" and then "Create realm"
-
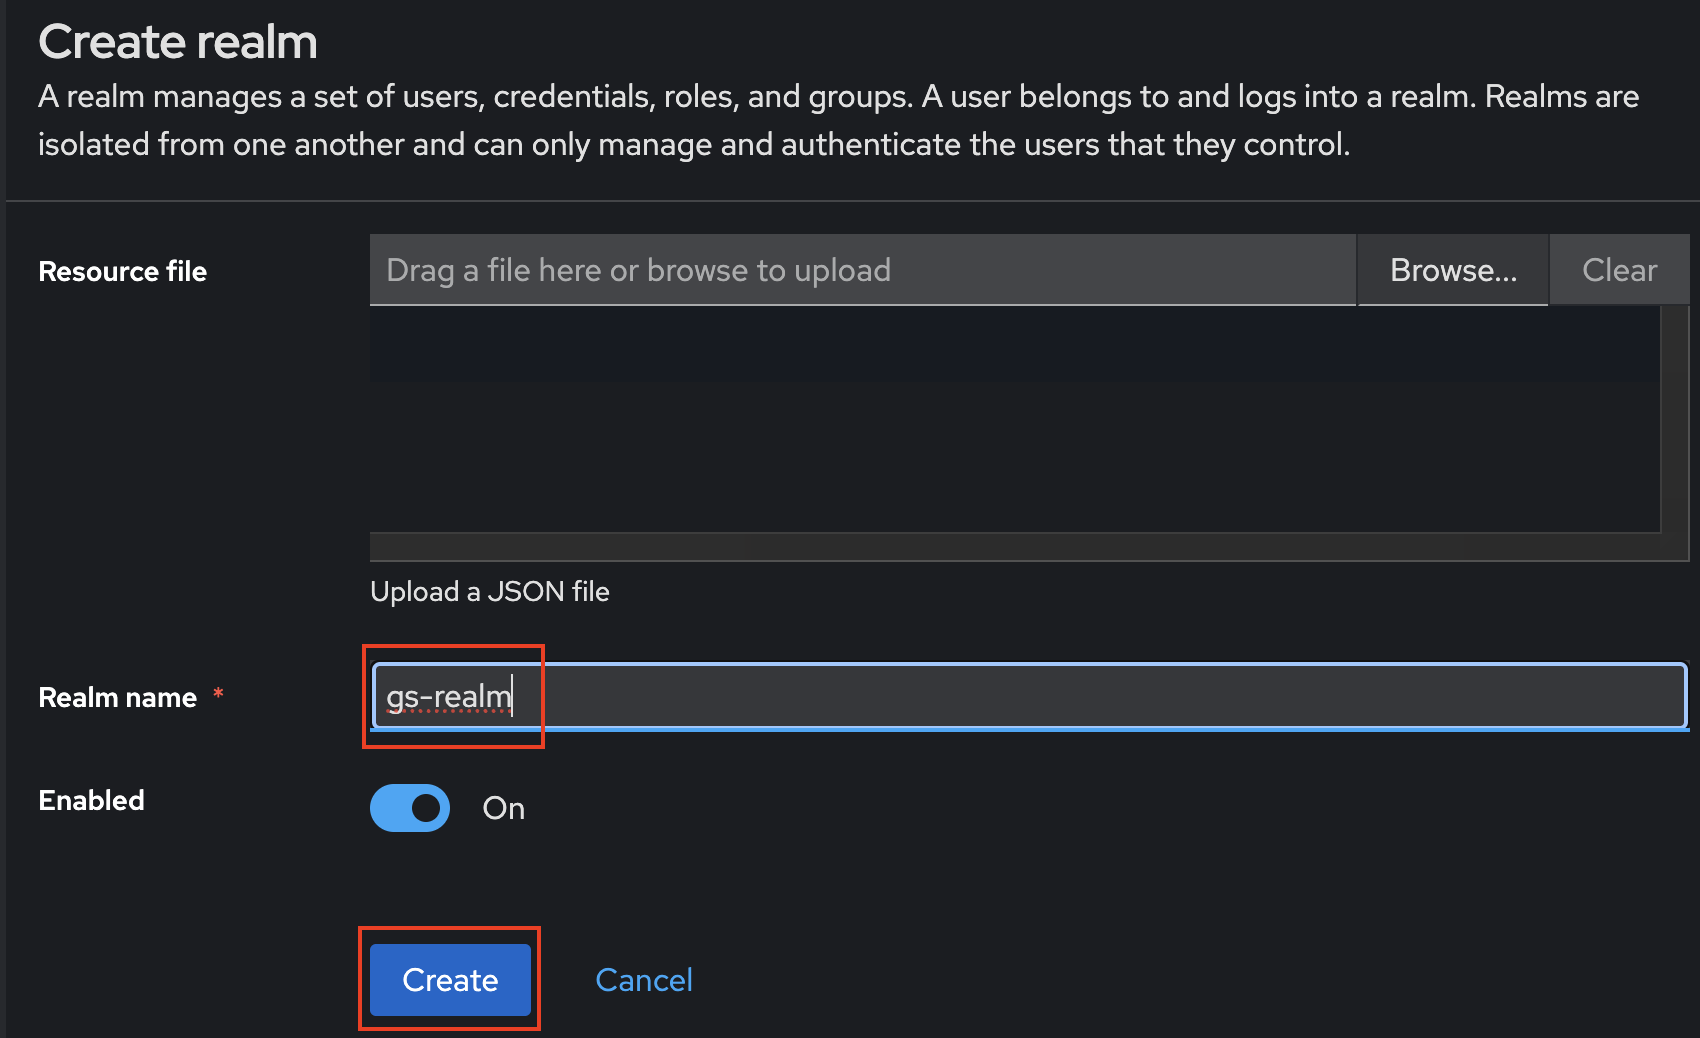
Give the realm a name (i.e. "gs-realm") and then press "Create"
-
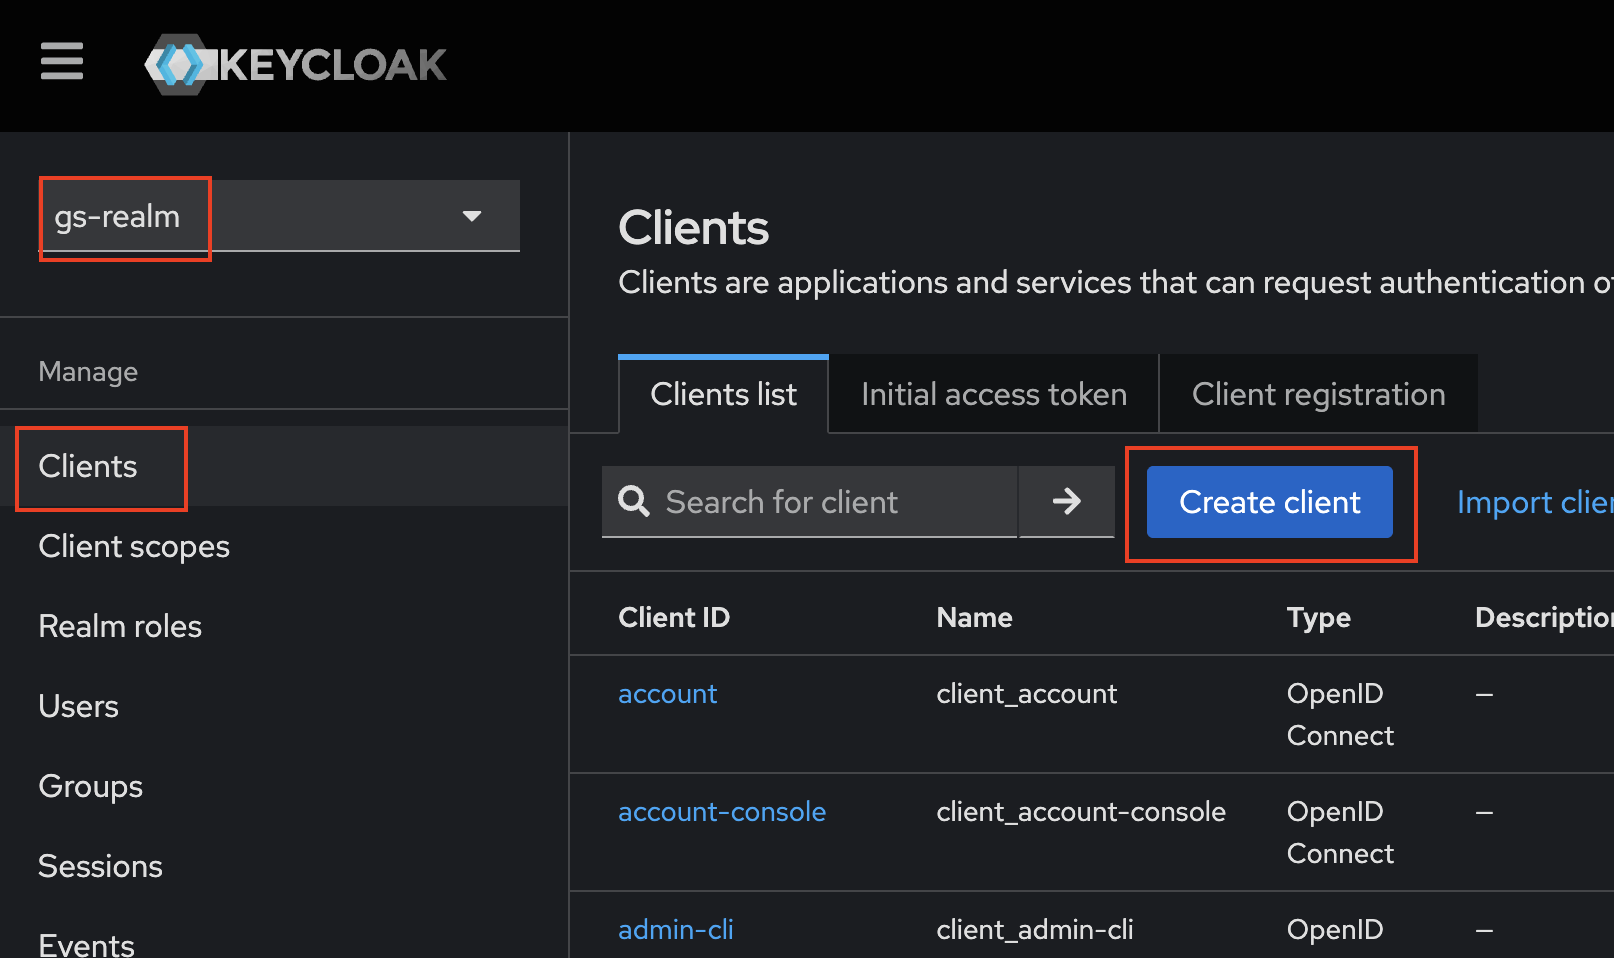
On the left bar, press "Clients" for your new realm, then "Create client"
-
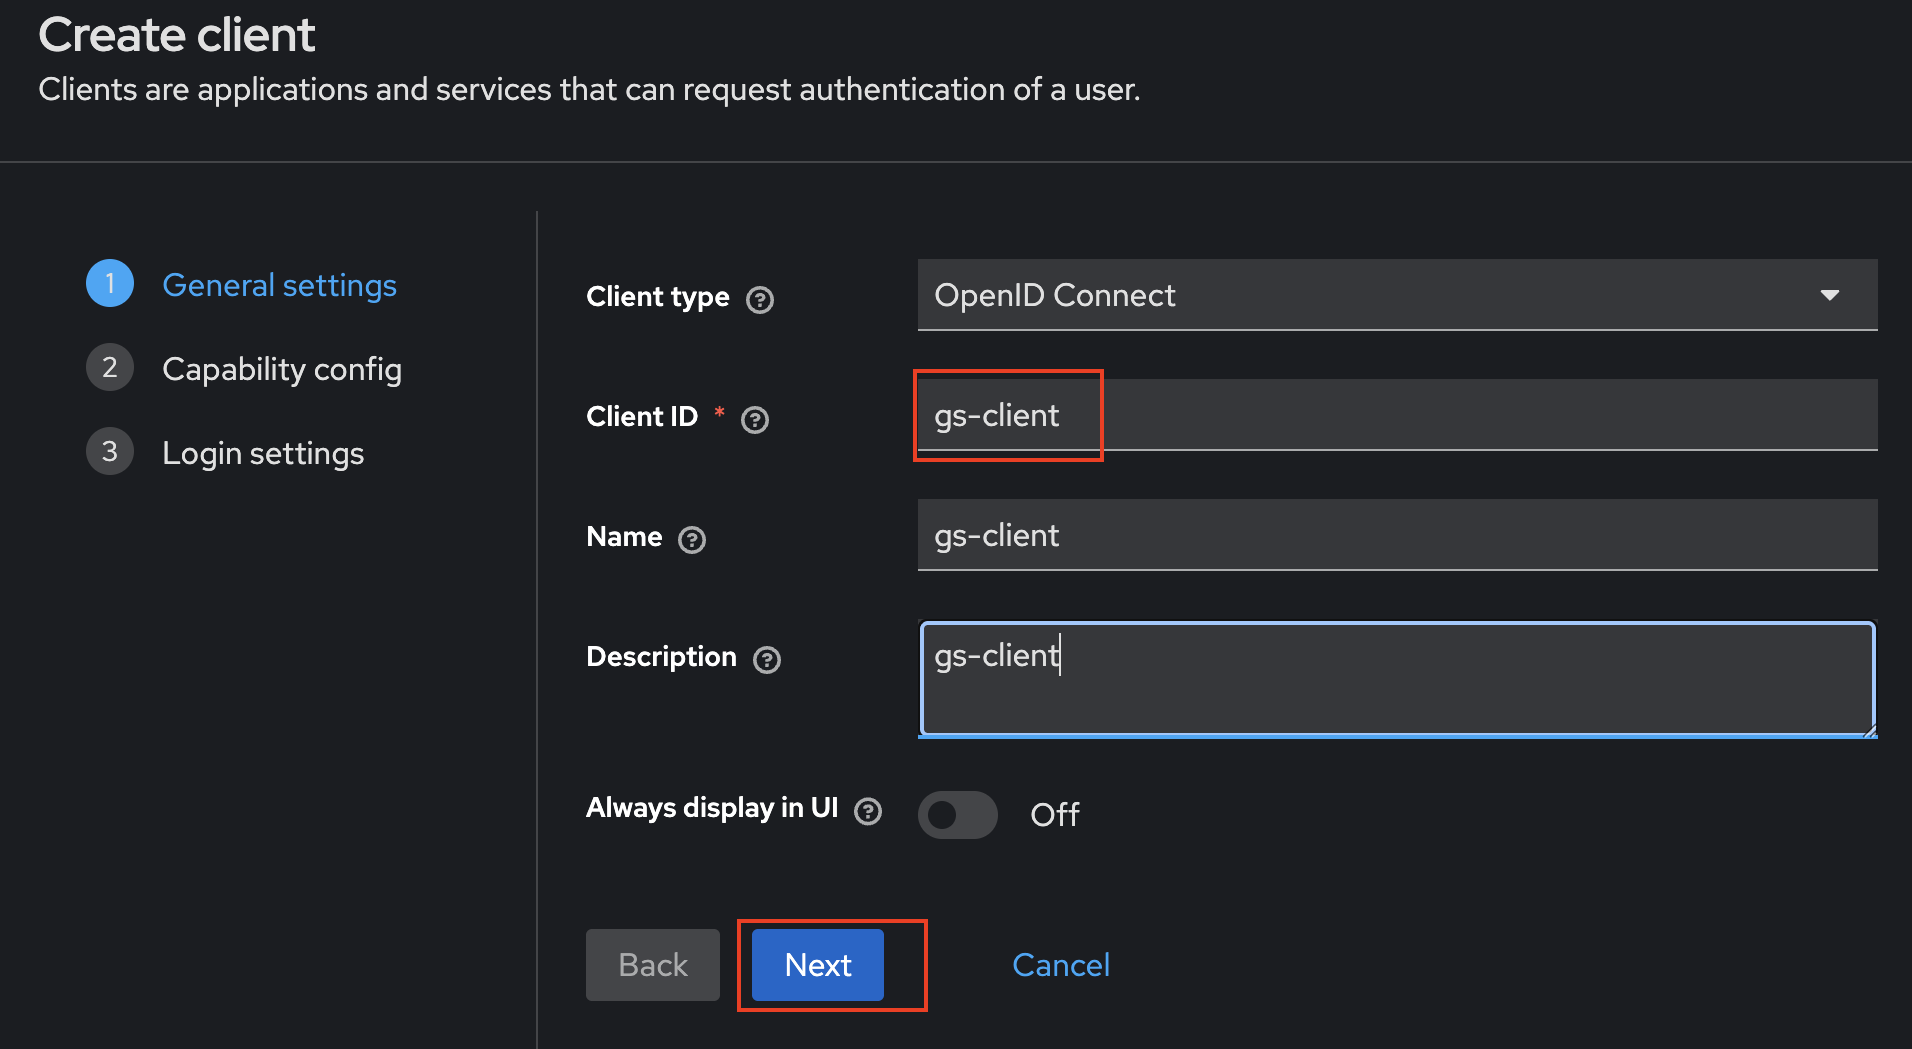
Give the new Client a name ("gs-client") and press "Next"
-
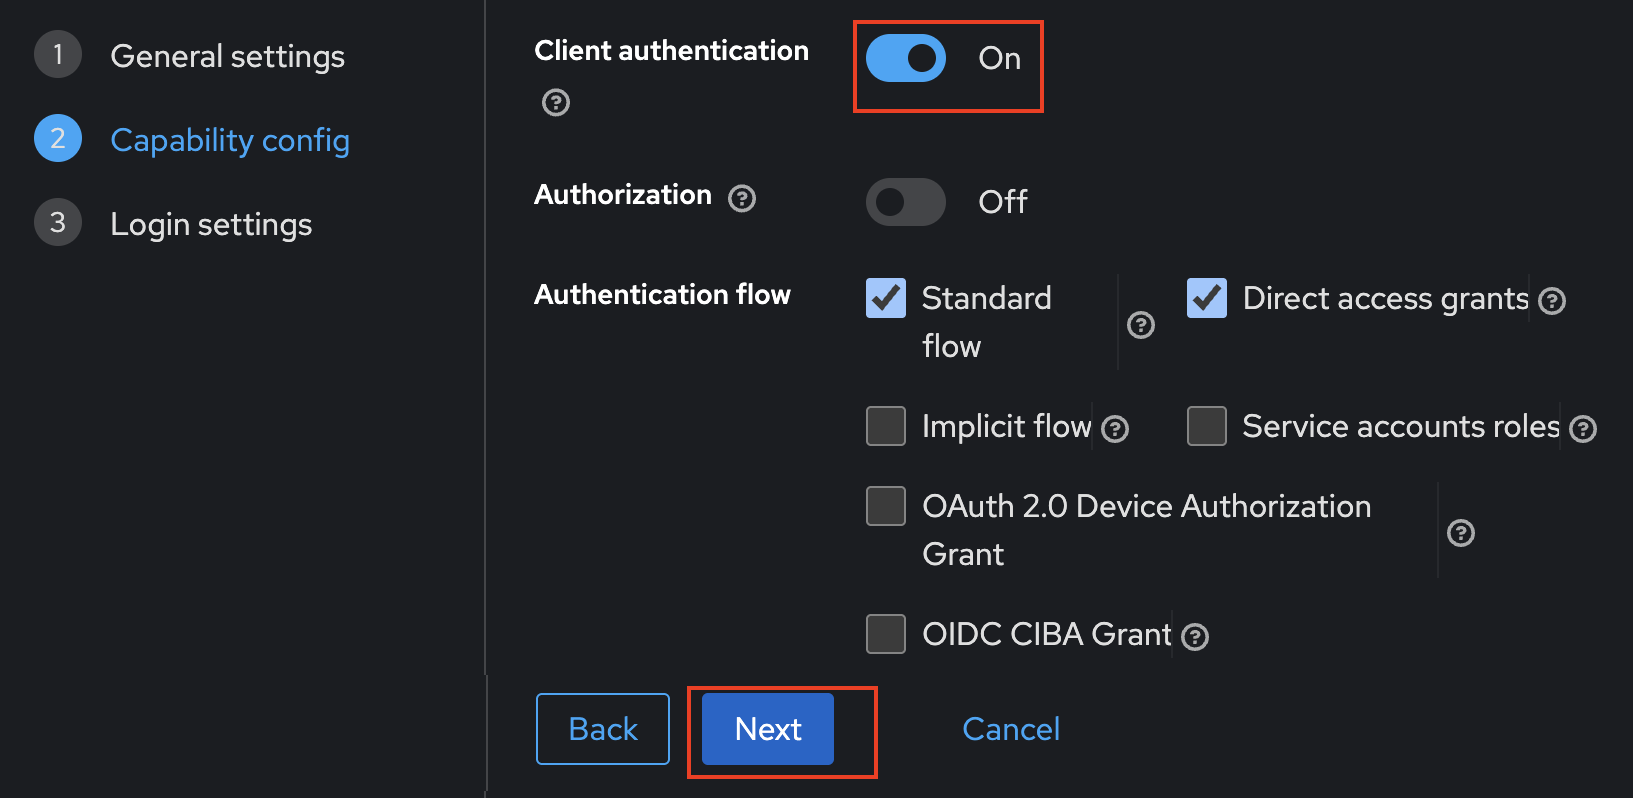
Turn on "Client authentication" and then press "Next"
-
Set the "Root URL" and "Home URL" as "http://localhost:8080". Set the "Valid post logout redirect URIs" and "Valid redirect URIs" as "http://localhost:8080/*". Then press "Save".
Tip
The exact redirect URI that GeoServer will use is shown as the read-only Redirect URI field in the filter configuration form (e.g.
http://localhost:8080/geoserver/web/login/oauth2/code/<filterName>__oidc, where<filterName>is the name of the GeoServer OIDC filter). The filter-name prefix lets several OIDC filters share an IDP without colliding on their redirect URIs. In production, you may want to register only the specific URIs you actually use rather than a wildcard; in that case register one entry per filter you intend to deploy. See Redirect Base URI.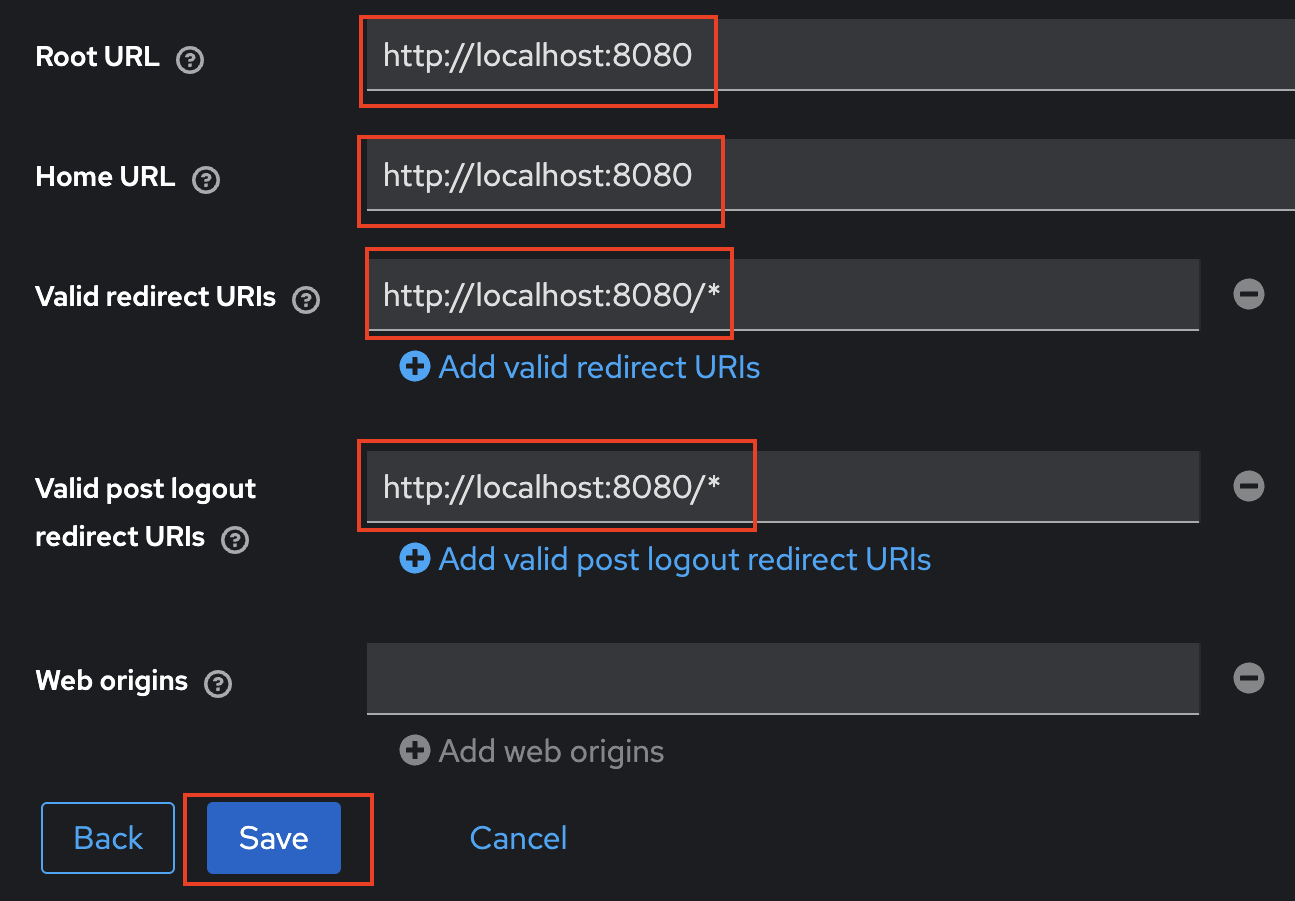
. Press "Save" (again).
You have now configured the "gs-realm" with a "gs-client".
Setting up Roles
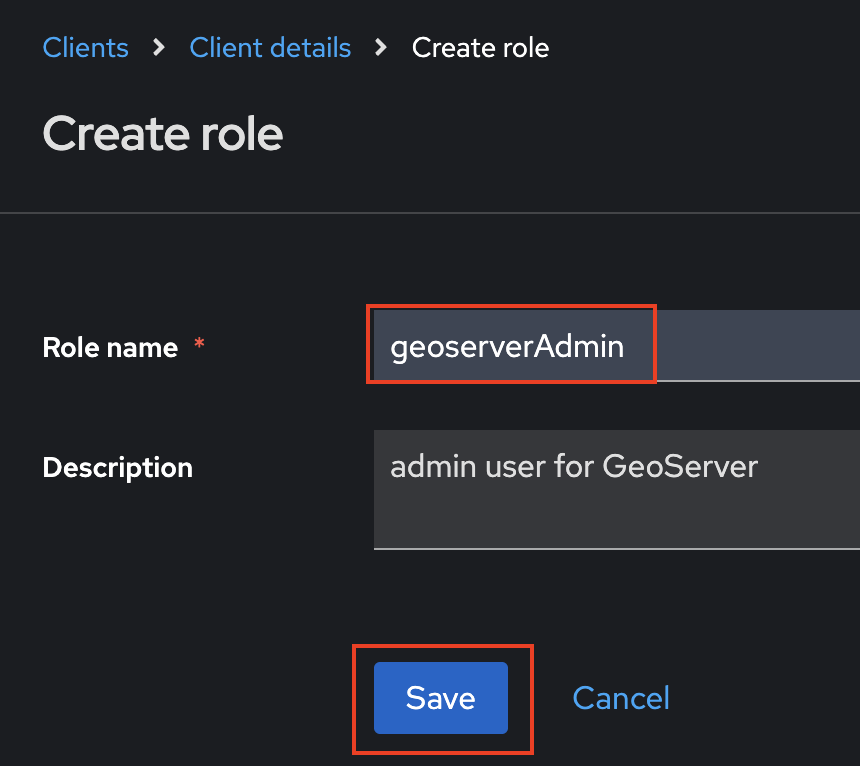
This will create a "geoserverAdmin" role that can be used to give users admin access to GeoServer.
-
Go to your client ("gs-client"):
- Make sure you are in the correct realm ("gs-realm") in the top left corner
- Click on "Clients" (left bar)
- Choose your client ("gs-client")
-
In the client's top bar, press "Roles", then "Create Role".
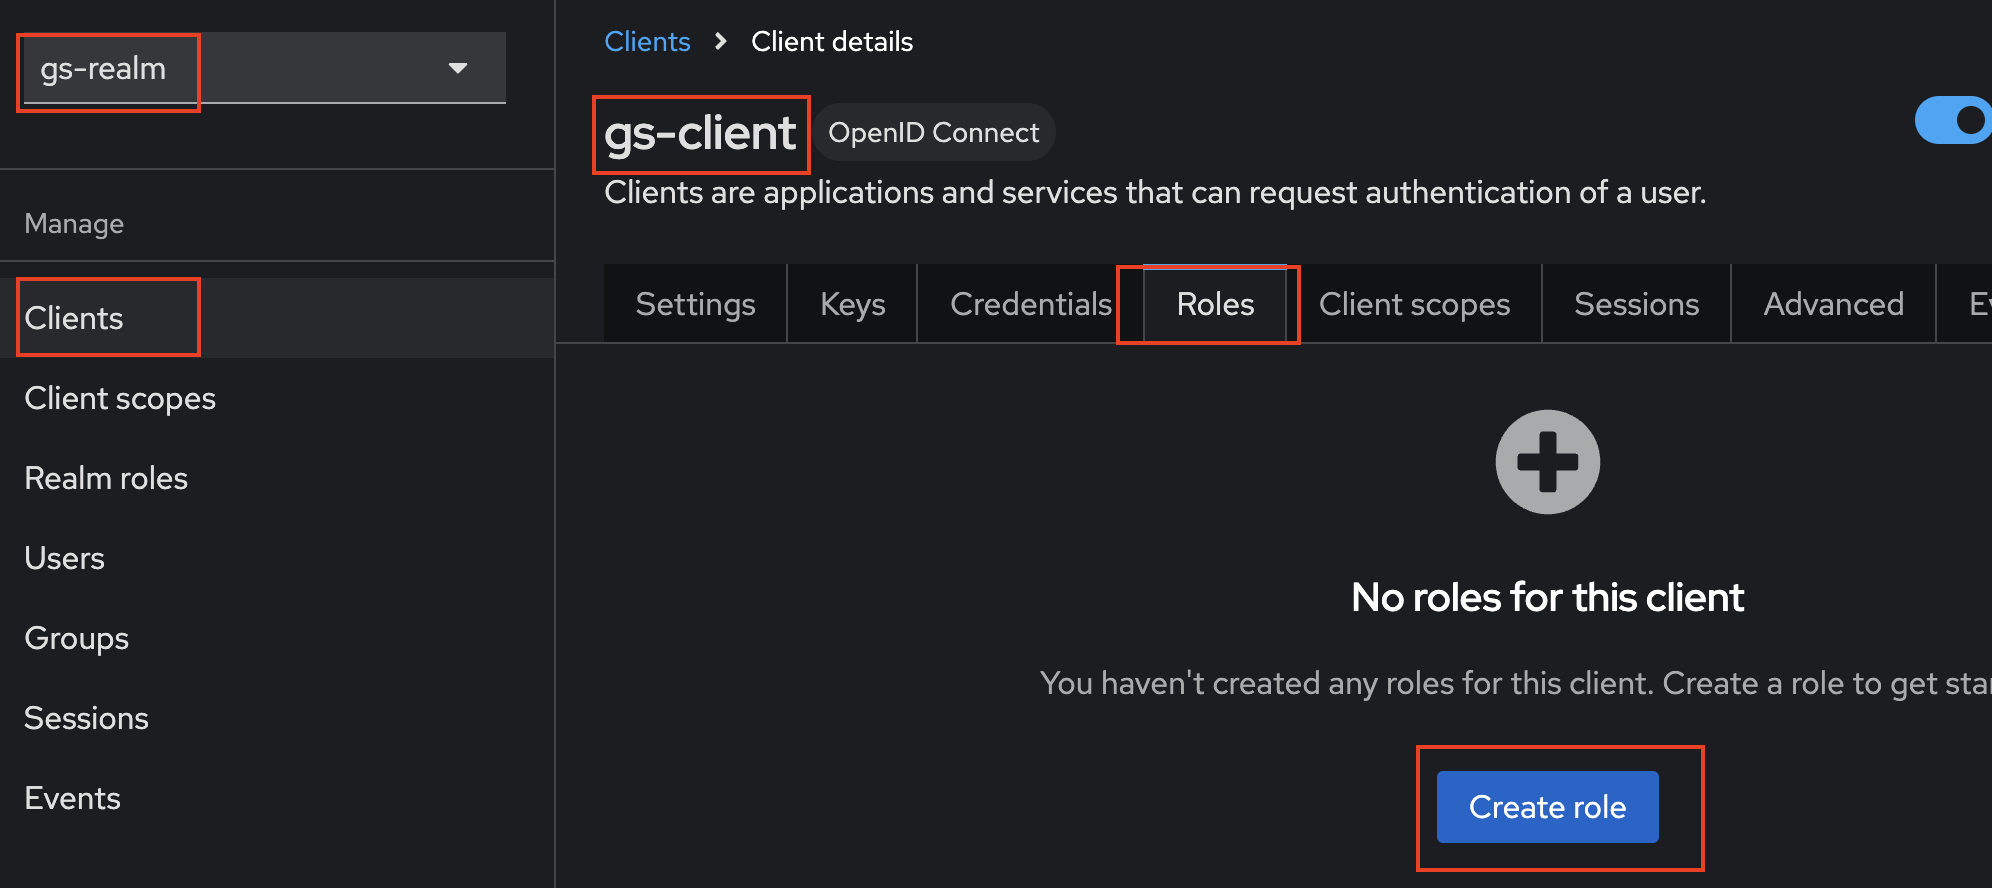
. Set the role's name as "geoserverAdmin" and press "Save"
Setting Up Users
We will create two user:
- "admin/admin" who has administration rights (role "geoserverAdmin")
- "user/user" who does not have administration rights
We will also put the Keycloak roles in the ID Token. By default, keycloak only puts the roles in the Access Token JWT (not in the ID Token).
-
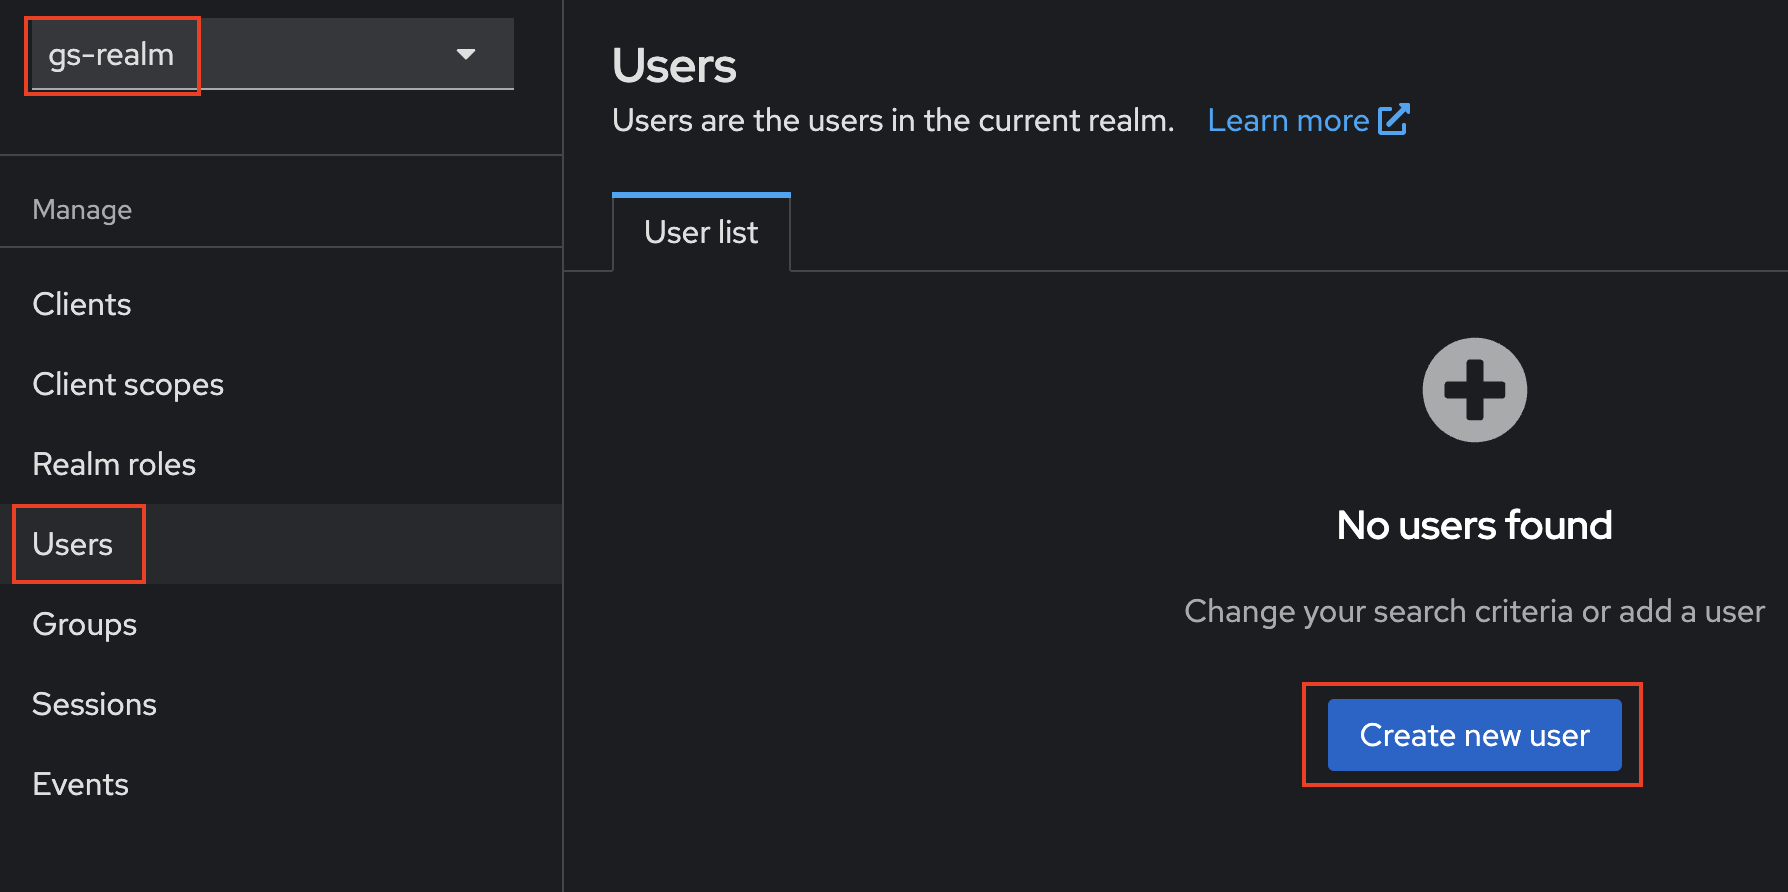
Go to your Realm ("gs-realm") - check the top left corner.
-
Press "Users" (left column) and then "Create new User"
-
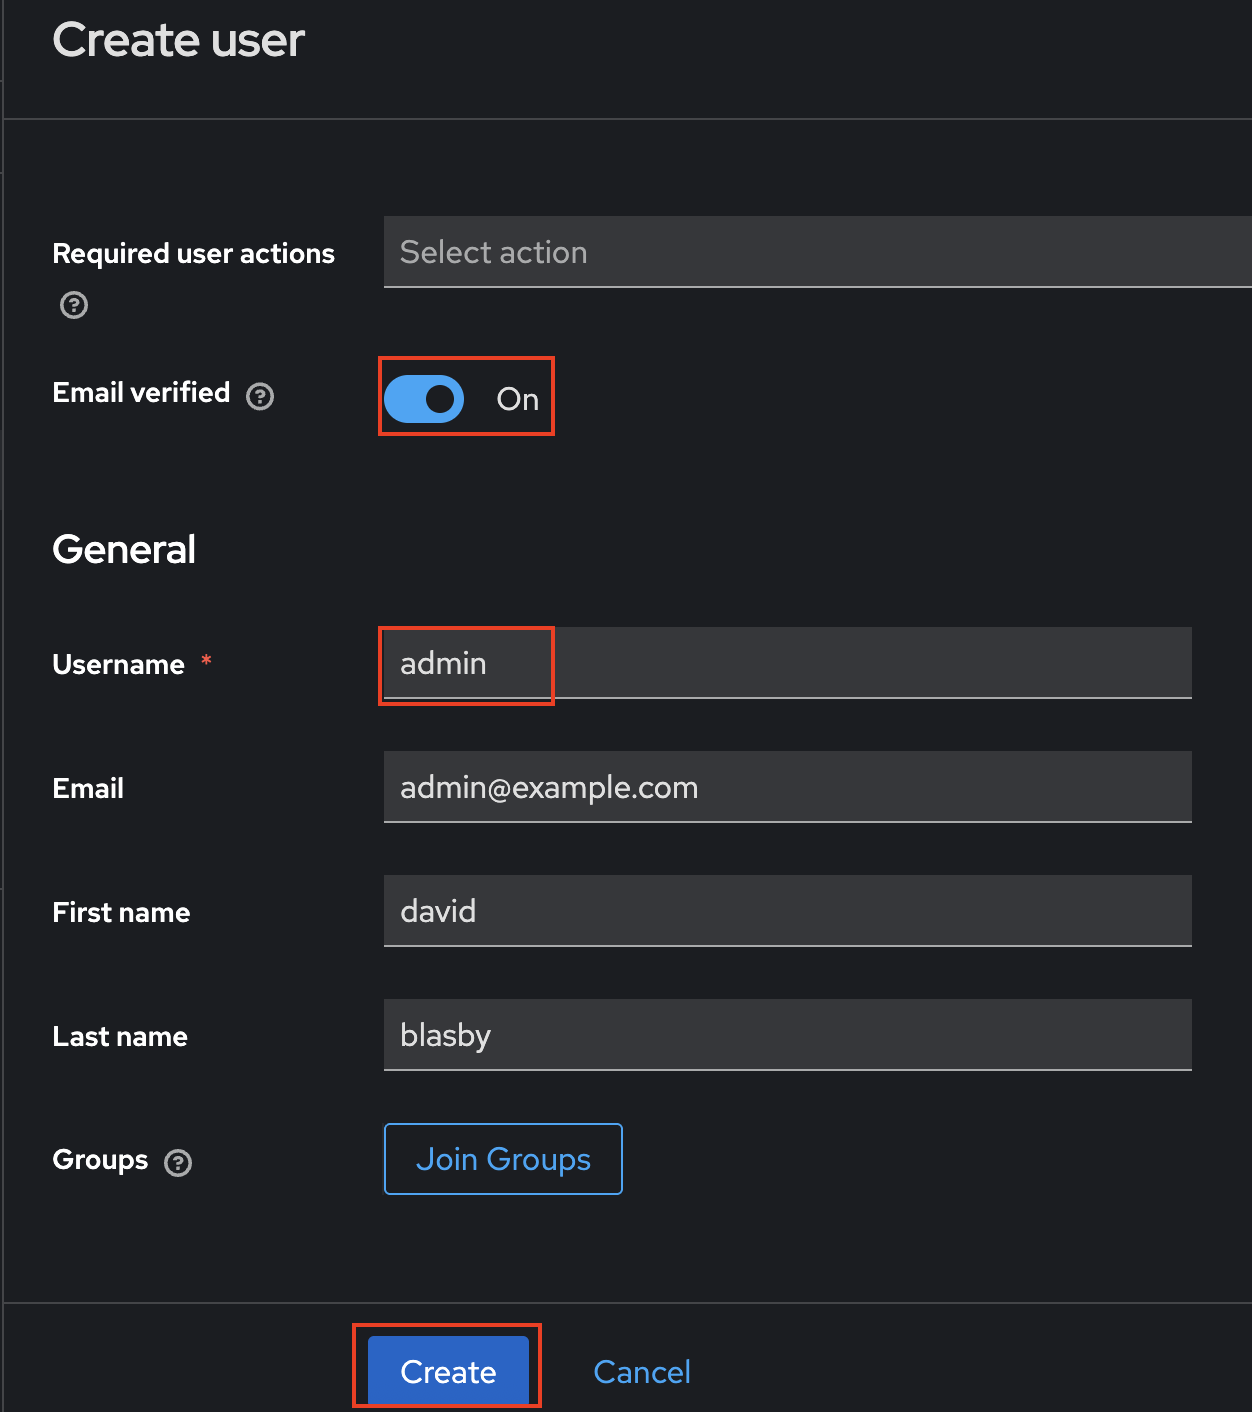
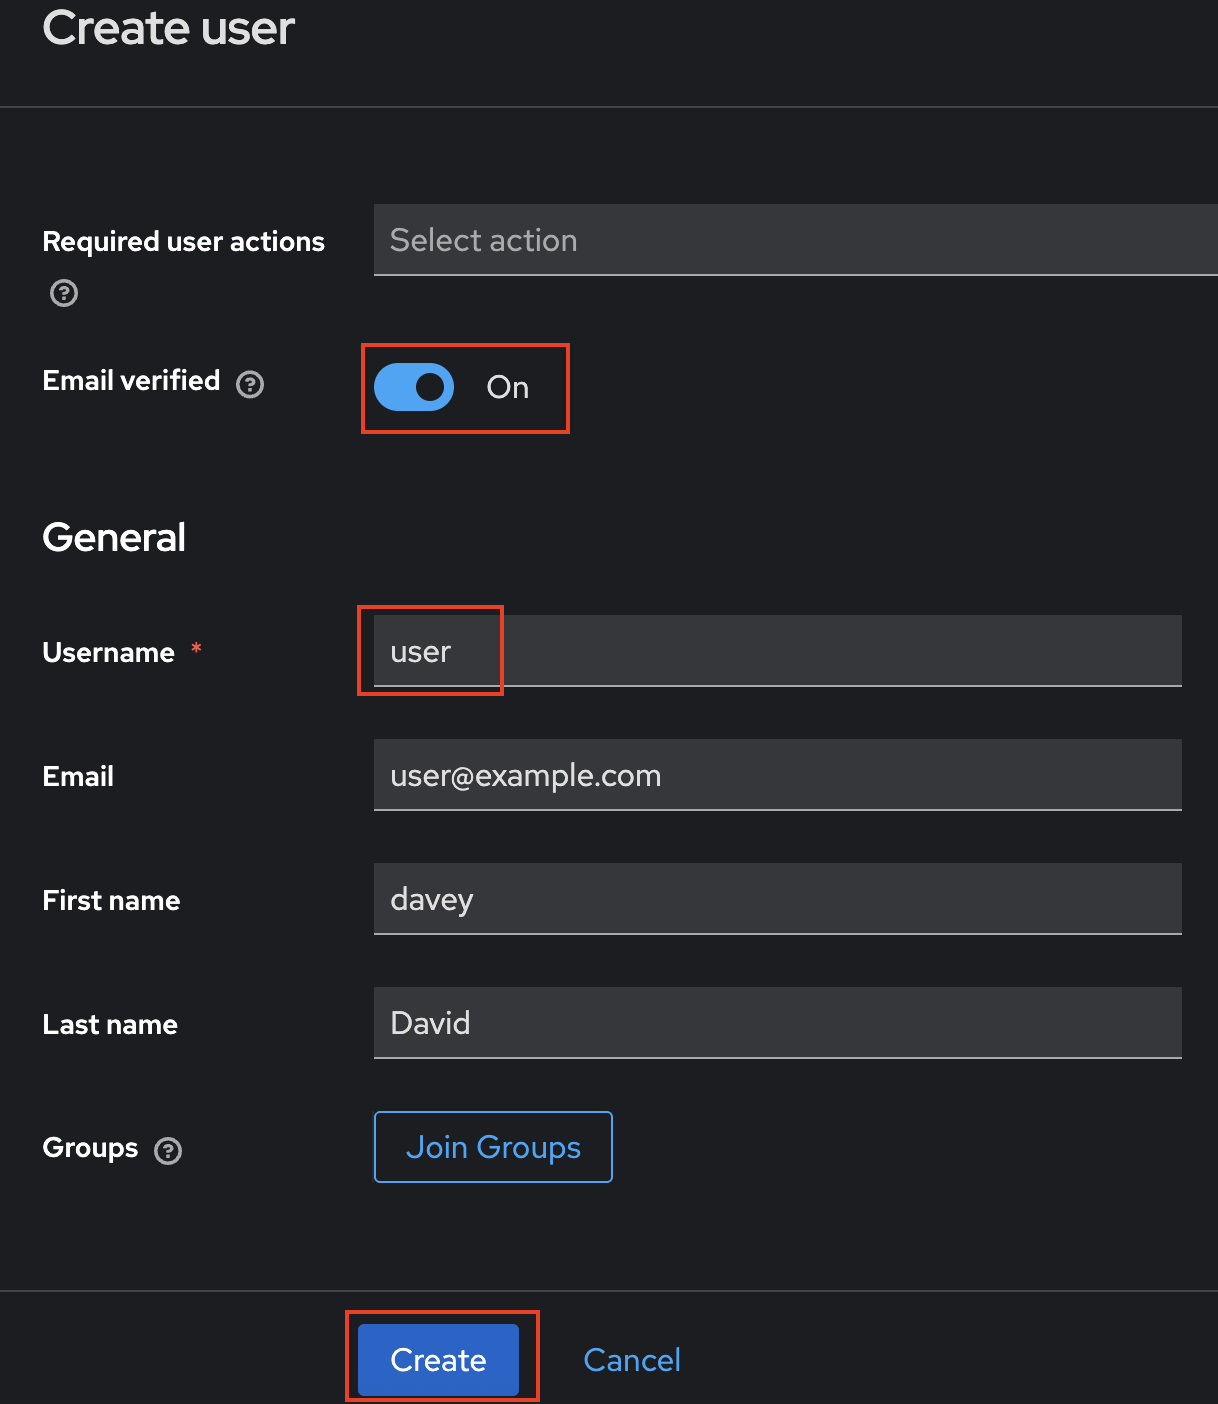
Create the "admin" user - you can use your own name and email if you want. Ensure that the user's email is verified. When finished, press "Create".
-
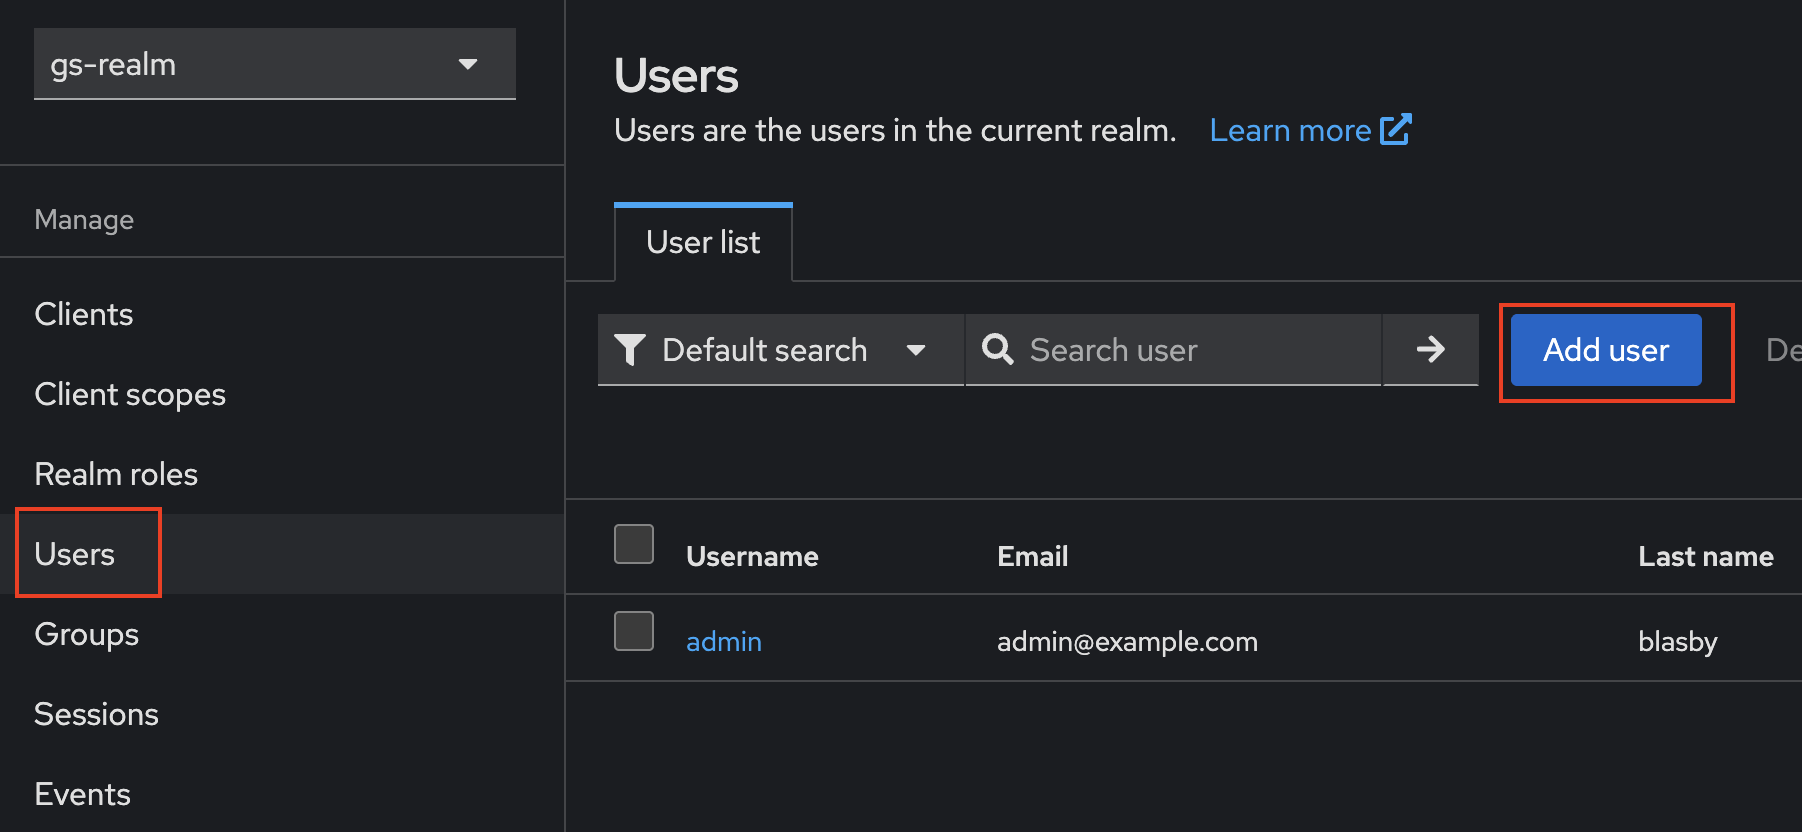
Press the "Users" (left column) again, and then "Add User".
-
Add the "user" user. Ensure that the user's email is verified. When finished, press "Create". On he next screen, press "Save".
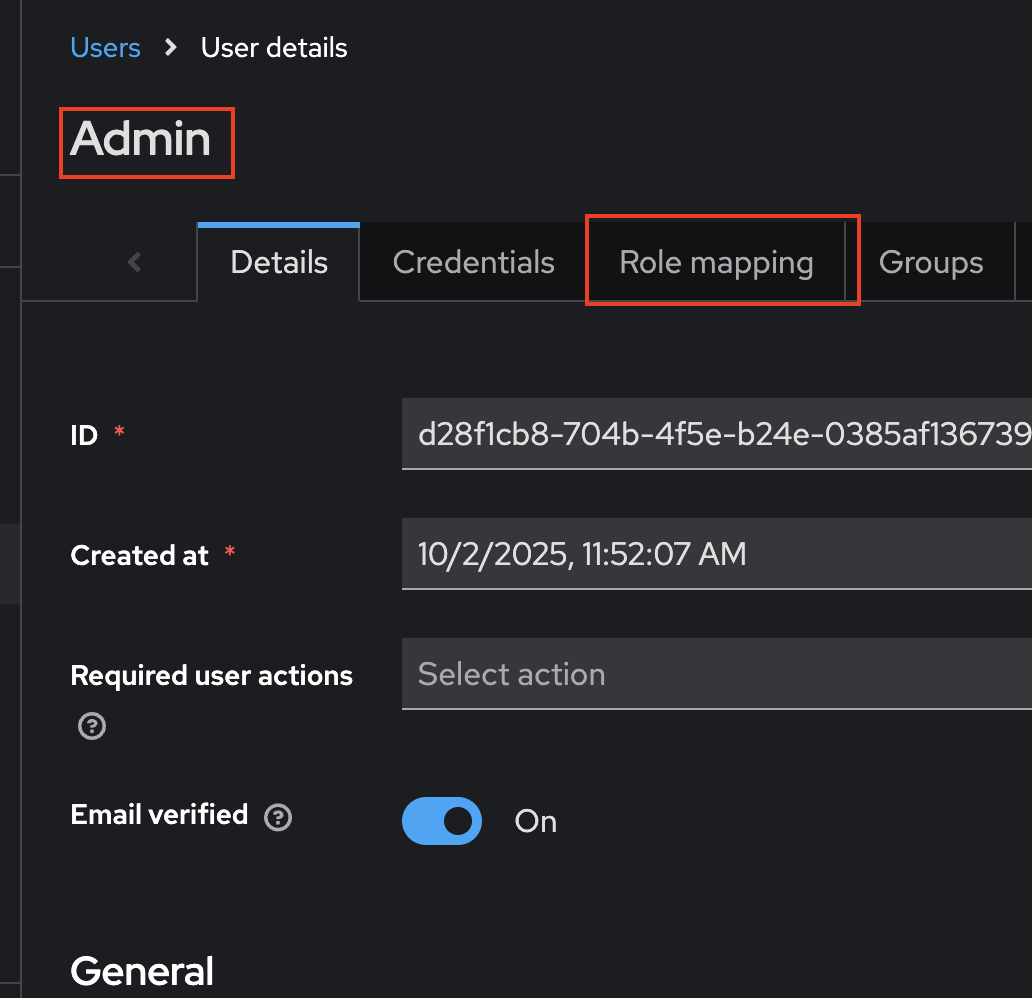
. Press the "Users" (left column) again, then click on the "admin" user.
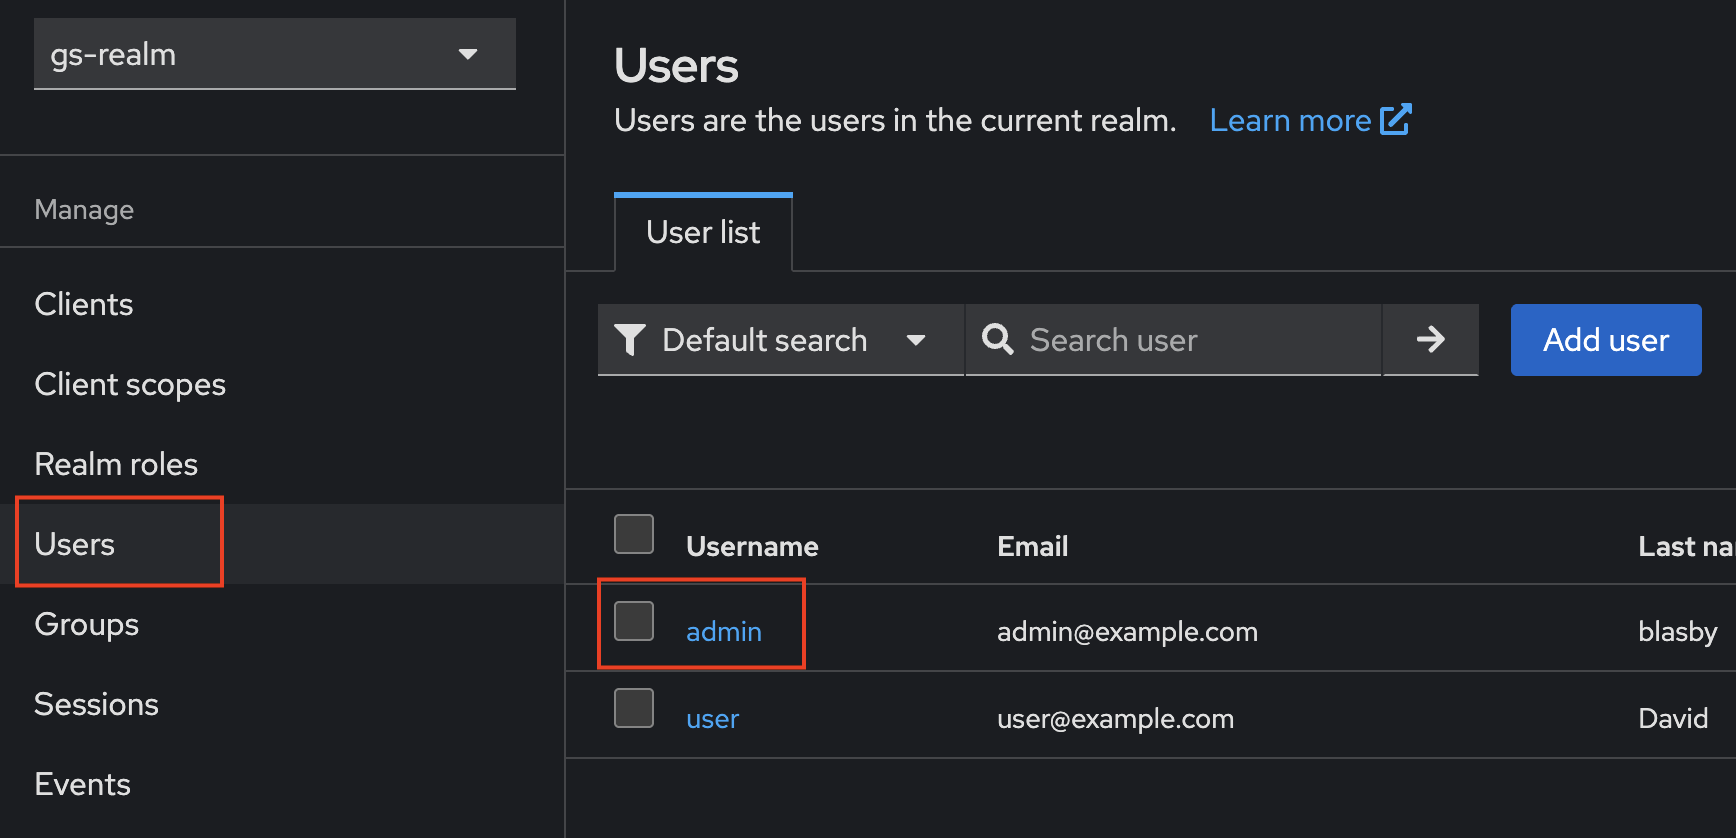
- Press "Role mapping"
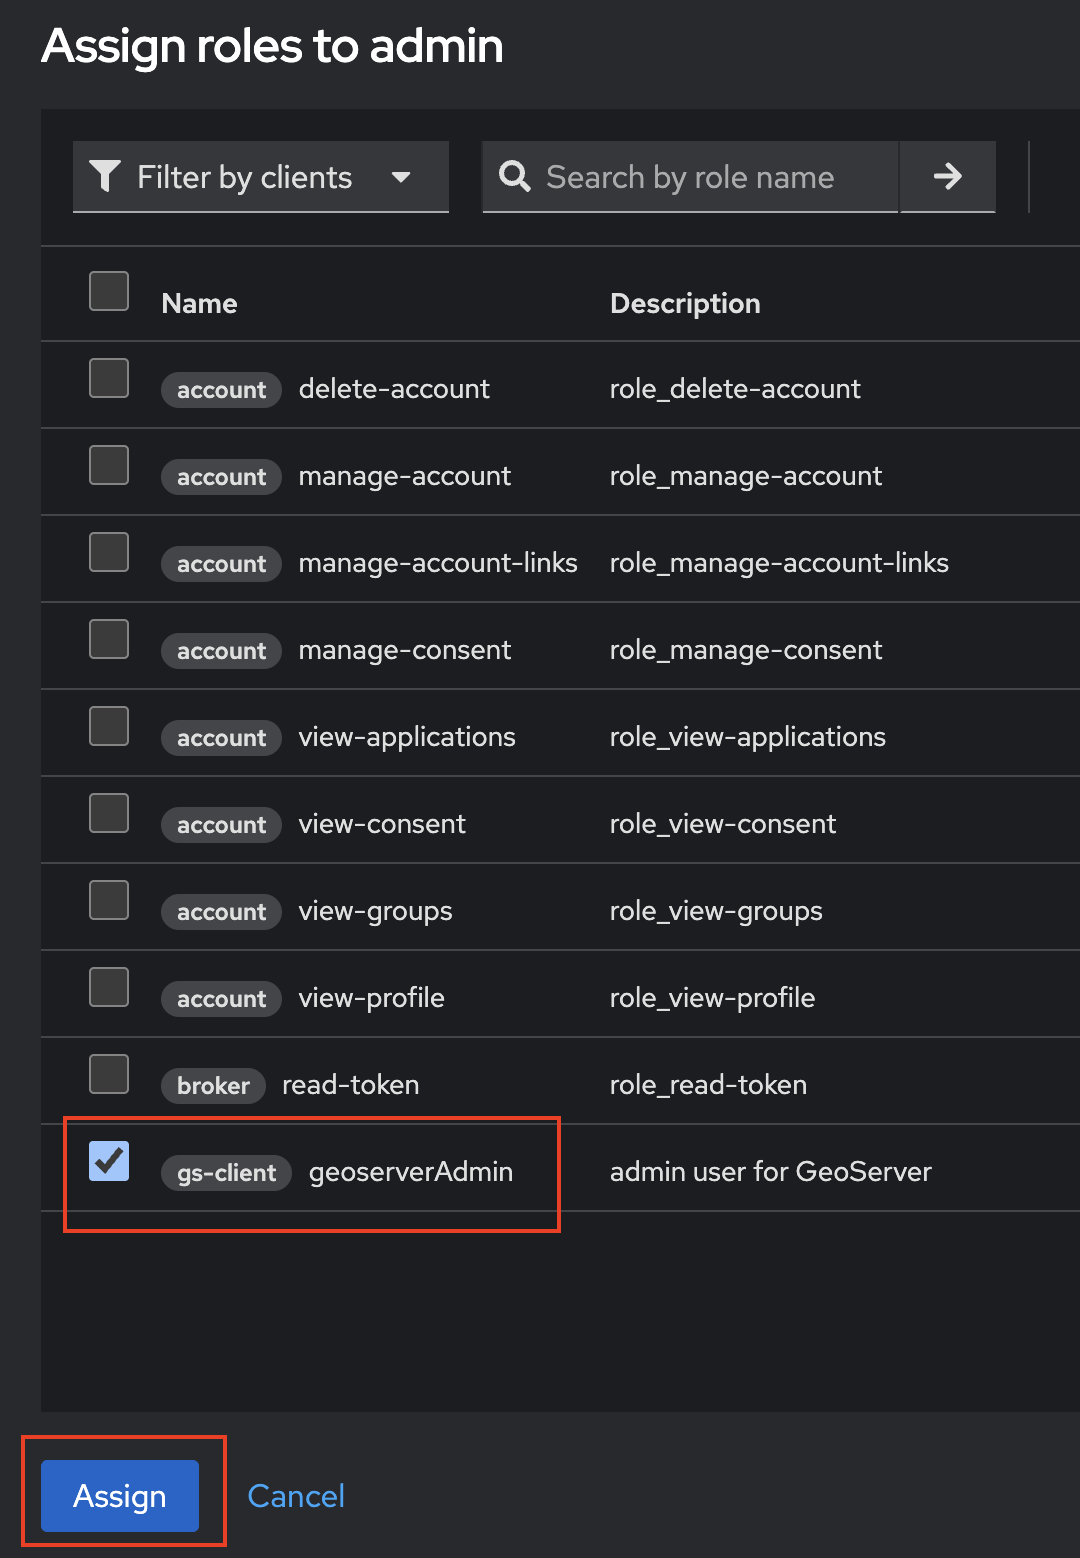
- Press "Assign role" - you will get a pop-up
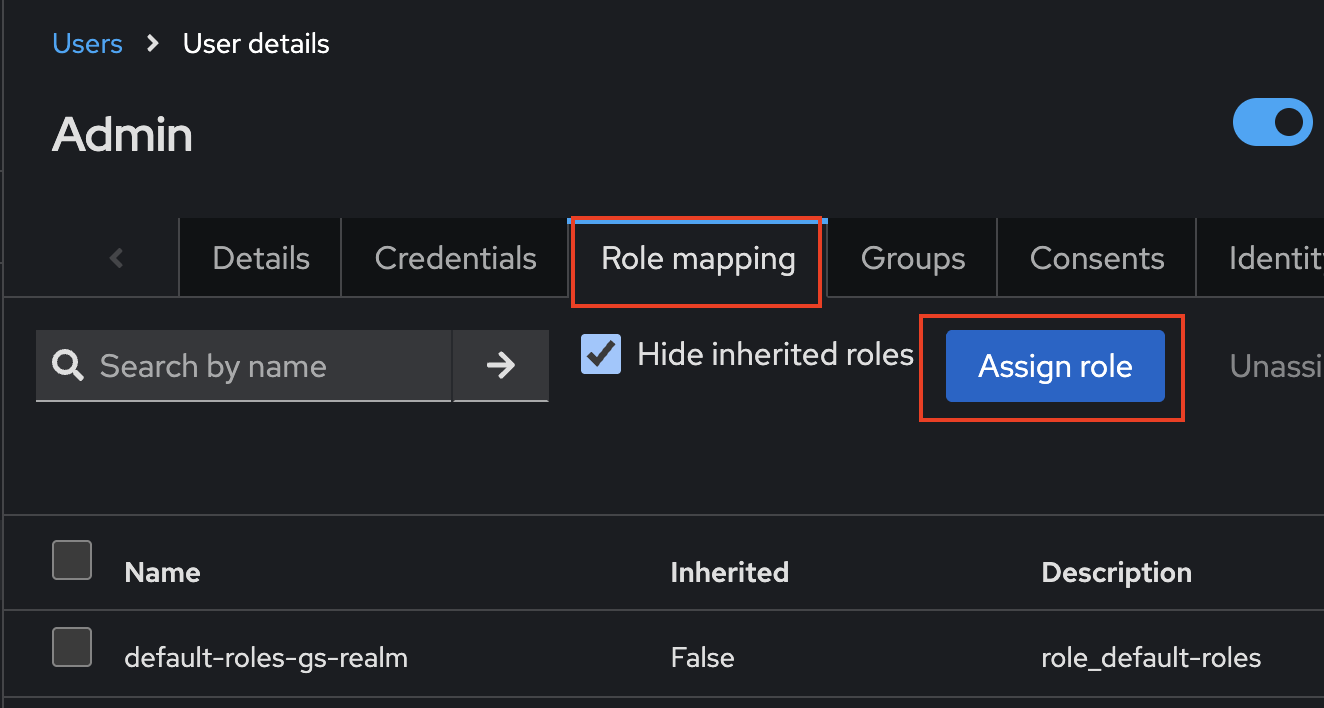
- Check the "geoserverAdmin" role, and then press "Assign"
-
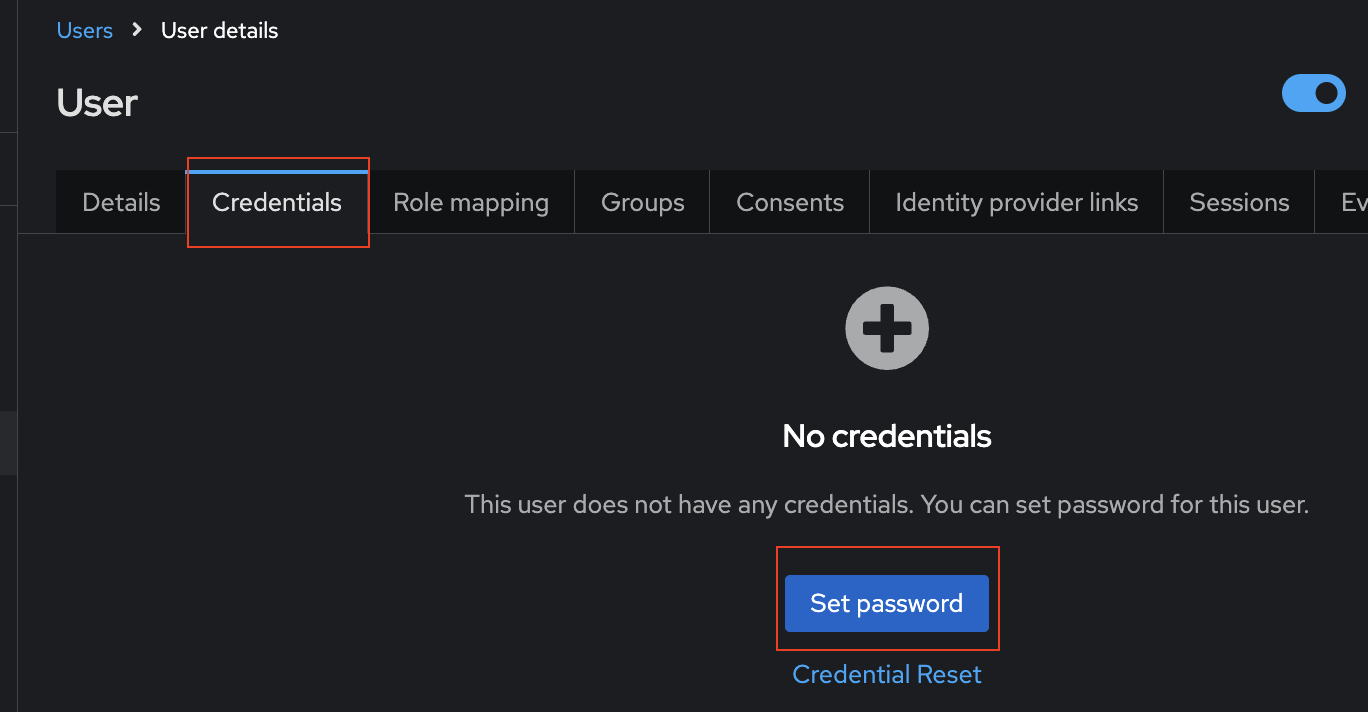
Go to the "Credentials" tab and Press "Set Password"
-
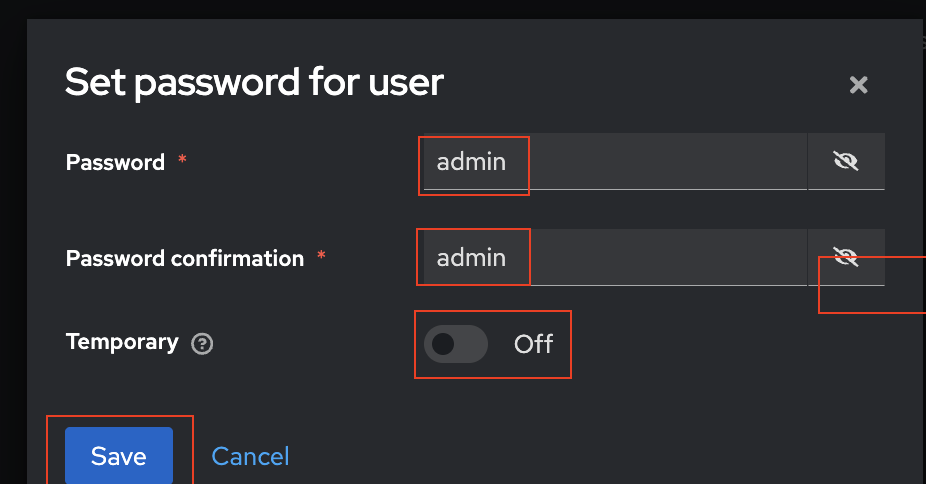
Fill in the Password as "admin" and set "Temporary" to "off". Press "Save" and Confirm setting the password.
-
Do the same for the User "user"
- Press "Users" (left column)
- Select the "user" User
- Press "Credentials"
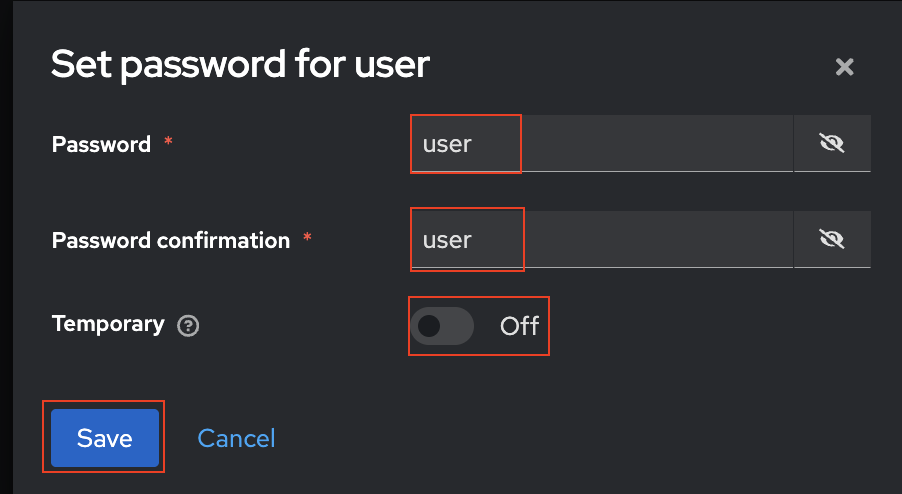
- Press "Set Password"
- Fill in "user" as the password
- Set "Temporary" to "off"
- Press "Save" and Confirm setting the password.
-
One the left column, choose "Client scope". In the search box, enter "roles" and press the "->" search button. In the results, click on "roles".

-
Click on "Mappers" (top), and then "client roles" (middle).
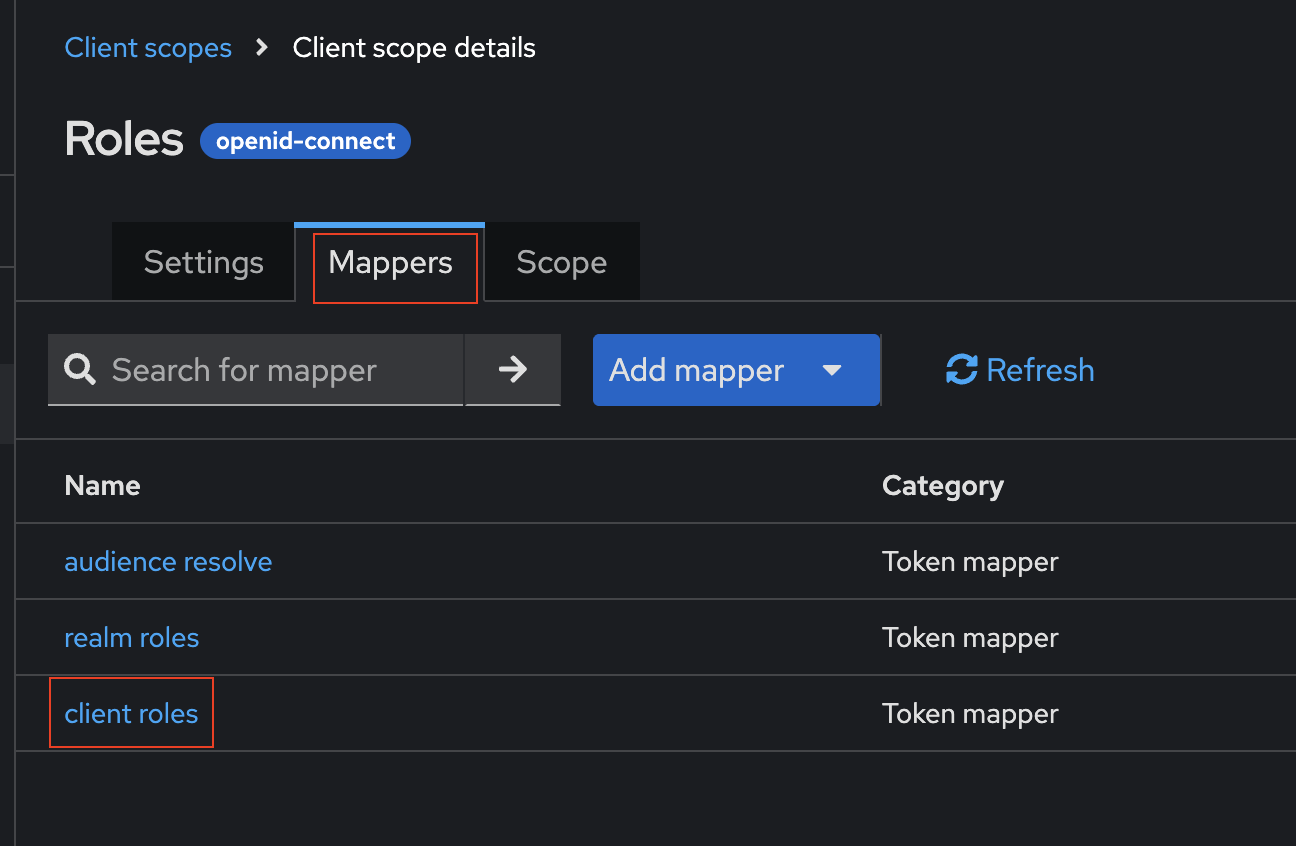
. Turn on "Add to ID token" and "Add to userinfo". Then press "Save".
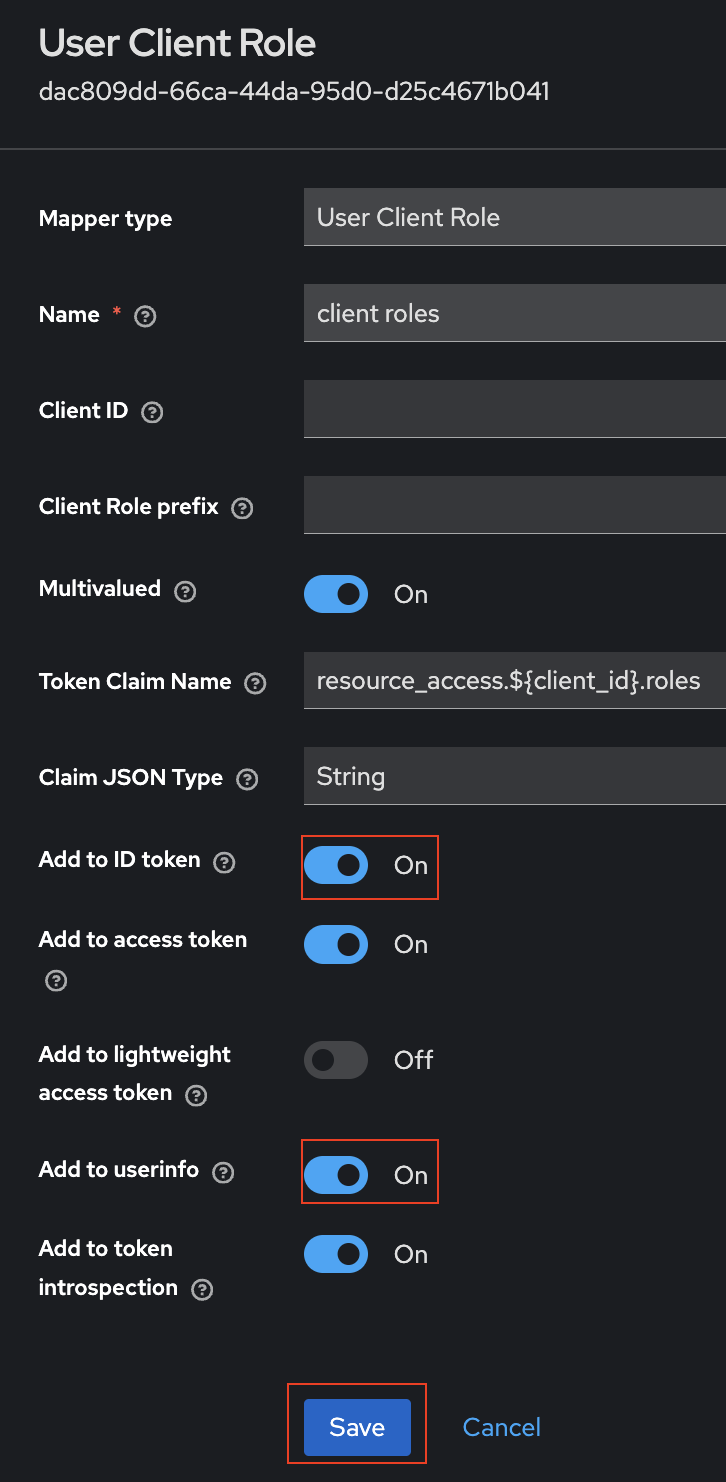
You have now created two users - "admin" and "user". We then attached the "geoserverAdmin" role to the "admin" user. We also added the keycloak roles to the ID Token.
Generate Client Secret
This allow you to get a Client Secret.
-
Navigate to your Client ("gs-client") in your Realm ("gs-realm")
- Make sure you are in the correct realm ("gs-realm") in the top left corner
- Click on "Clients" (left bar)
- Choose your client ("gs-client")
. Click on the "Credentials" tab (top) and then the copy button.
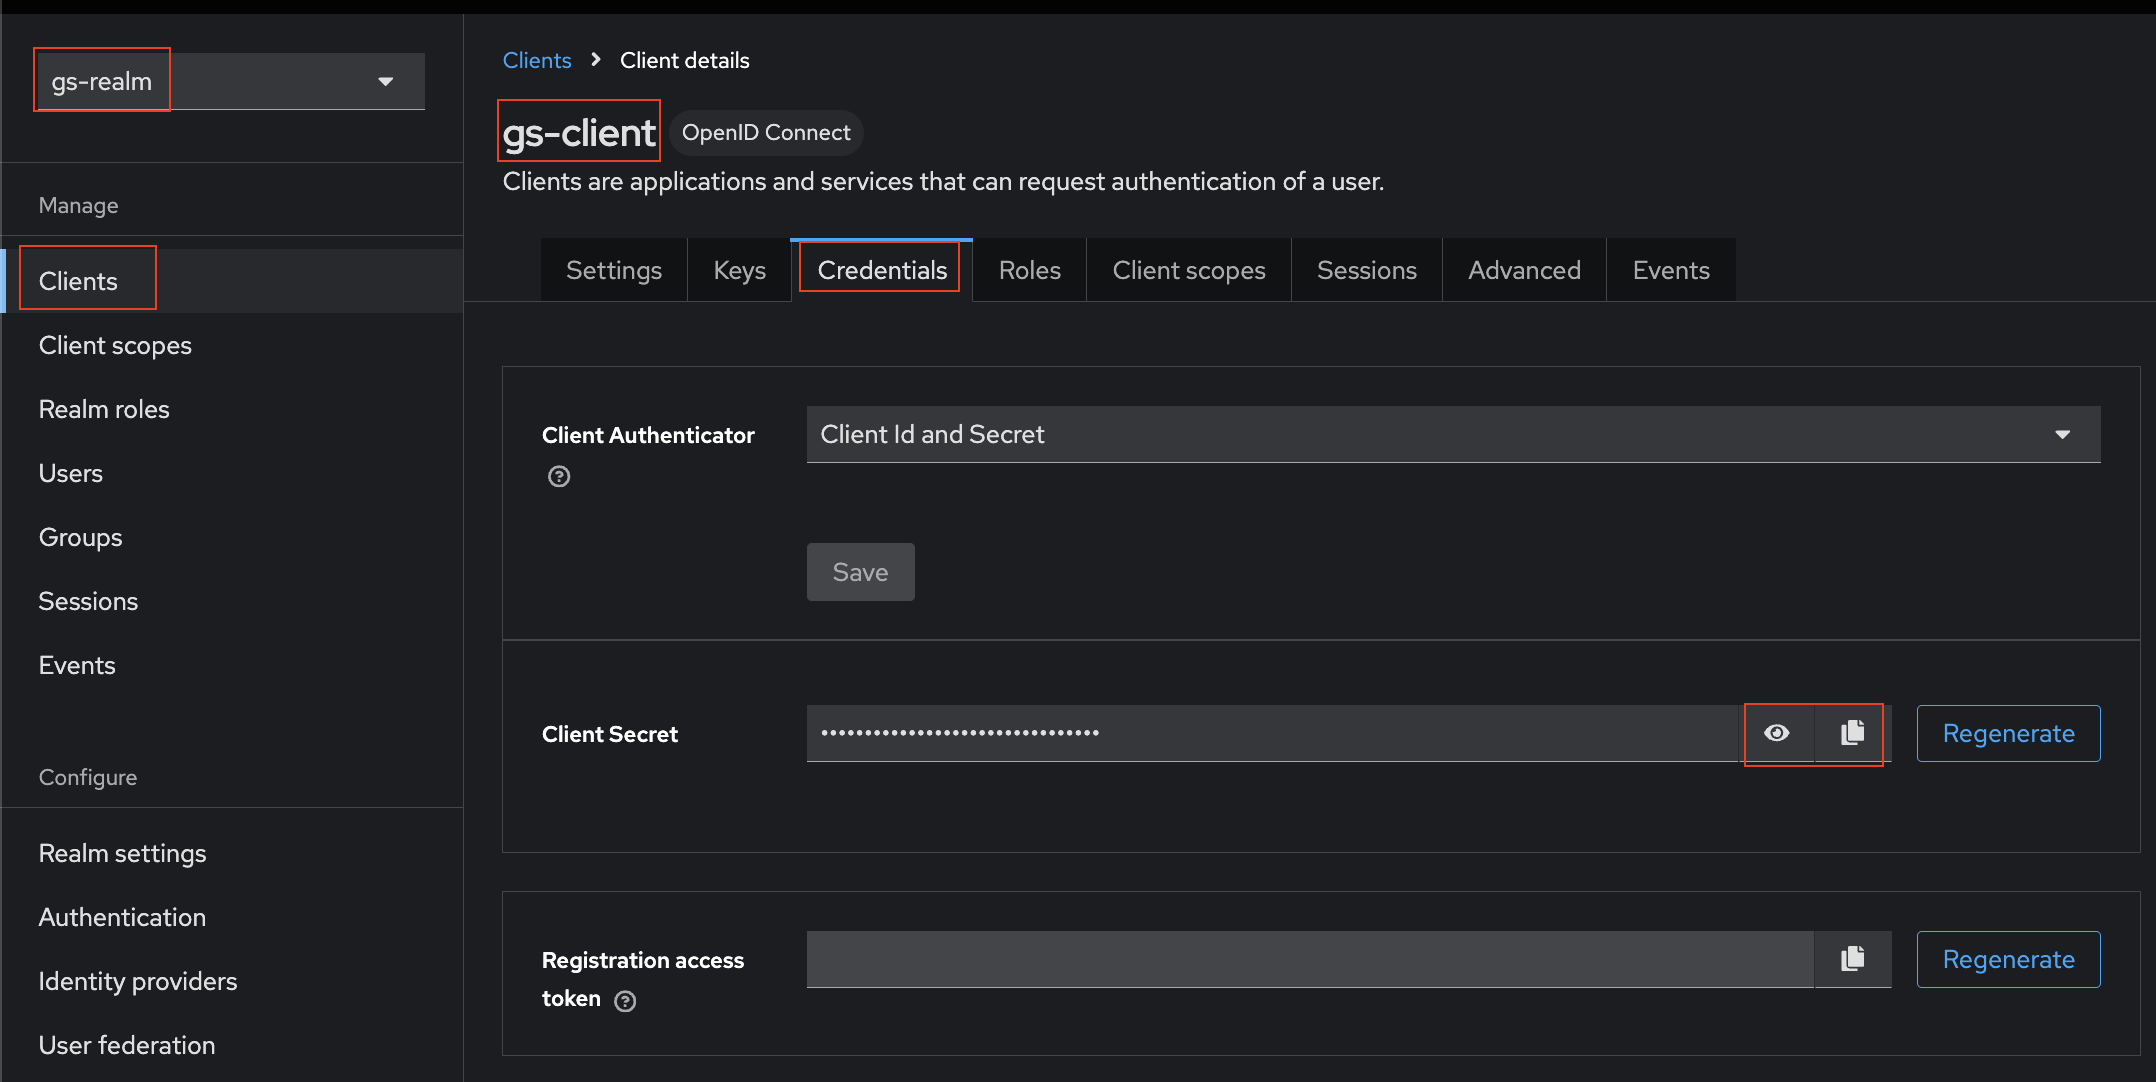
Save your Client Secret for use in the GeoServer Configuration
Debugging
This is for technical people wanting to see the Access Token, ID Token, and User Info for a user.
-
Navigate to your Client ("gs-client") in your Realm ("gs-realm")
- Make sure you are in the correct realm ("gs-realm") in the top left corner
- Click on "Clients" (left bar)
- Choose your client ("gs-client")
-
At the top, go to "Client Scopes", then press "Evaluate" (near the top), then select a User. You must not just type in the user's name, you must select it from the auto-complete pop-up!
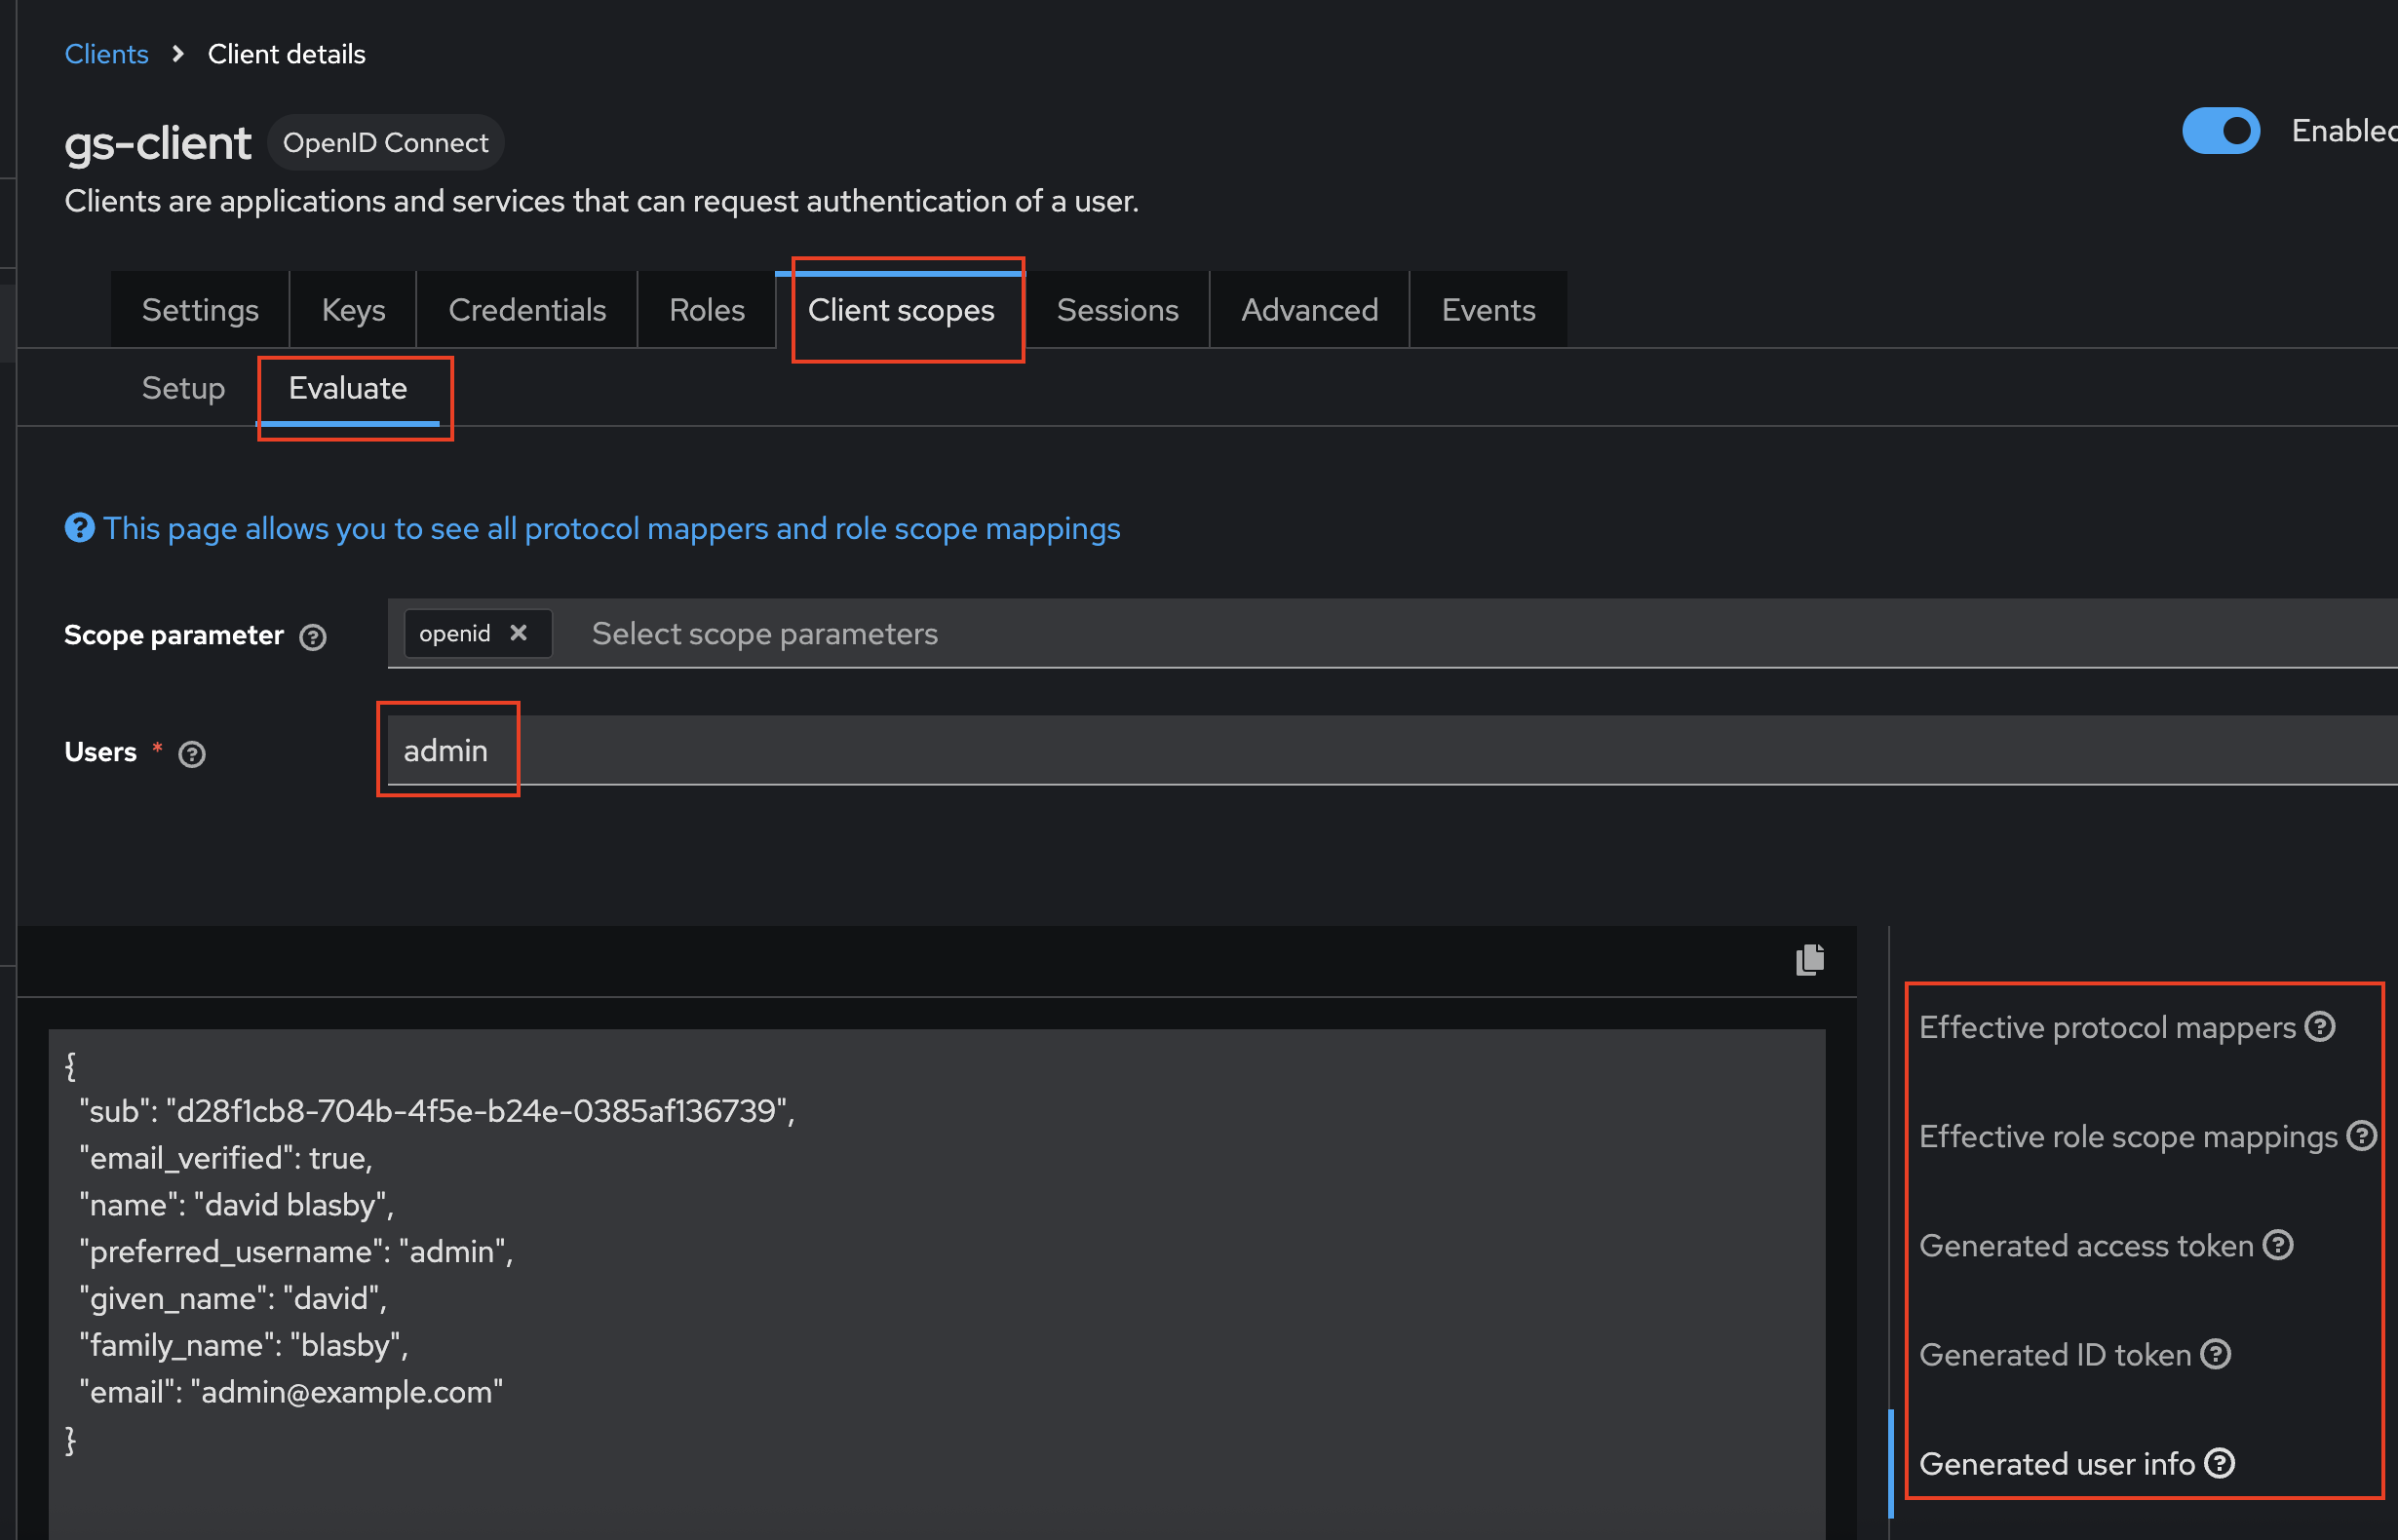
-
In the bottom right, you can look at the Access Token, ID Token, and Userinfo JSON claims payloads.
Sample Access Token (yours will be slightly different):
{
    "exp": 1759435301,
    "iat": 1759435001,
    "jti": "73171fc2-3827-414f-a03e-f862a550caf4",
    "iss": "http://localhost:7777/realms/gs-realm",
    "aud": "gs-client",
    "sub": "d28f1cb8-704b-4f5e-b24e-0385af136739",
    "typ": "ID",
    "azp": "gs-client",
    "sid": "1b897b54-e4d7-4a3f-9204-7b3e045d8900",
    "acr": "1",
    "resource_access": {
        "gs-client": {
        "roles": [
            "geoserverAdmin"
        ]
        },
        "account": {
        "roles": [
            "manage-account",
            "manage-account-links",
            "view-profile"
        ]
        }
    },
    "email_verified": true,
    "name": "david blasby",
    "preferred_username": "admin",
    "given_name": "david",
    "family_name": "blasby",
    "email": "admin@example.com"
}
Sample ID Token (yours will be slightly different):
{
    "exp": 1759435301,
    "iat": 1759435001,
    "jti": "e5366c1b-f669-44d4-a6c2-465a06f15997",
    "iss": "http://localhost:7777/realms/gs-realm",
    "aud": "account",
    "sub": "d28f1cb8-704b-4f5e-b24e-0385af136739",
    "typ": "Bearer",
    "azp": "gs-client",
    "sid": "27490dc0-05ef-4979-bafc-6d8f854cf6ad",
    "acr": "1",
    "allowed-origins": [
        "http://localhost:8080"
    ],
    "realm_access": {
        "roles": [
        "default-roles-gs-realm",
        "offline_access",
        "uma_authorization"
        ]
    },
    "resource_access": {
        "gs-client": {
        "roles": [
            "geoserverAdmin"
        ]
        },
        "account": {
        "roles": [
            "manage-account",
            "manage-account-links",
            "view-profile"
        ]
        }
    },
    "scope": "openid profile email",
    "email_verified": true,
    "name": "david blasby",
    "preferred_username": "admin",
    "given_name": "david",
    "family_name": "blasby",
    "email": "admin@example.com"
}
Sample userinfo (yours will be slightly different):
{
"sub": "d28f1cb8-704b-4f5e-b24e-0385af136739",
"resource_access": {
    "gs-client": {
    "roles": [
        "geoserverAdmin"
    ]
    },
    "account": {
    "roles": [
        "manage-account",
        "manage-account-links",
        "view-profile"
    ]
    }
},
"email_verified": true,
"name": "david blasby",
"preferred_username": "admin",
"given_name": "david",
"family_name": "blasby",
"email": "admin@example.com"
}
Configure GeoServer
The next step is to configure your Keycloak as the OIDC IDP for GeoServer. You will need the Client Id ("gs-client") and the Client Secret (see above).
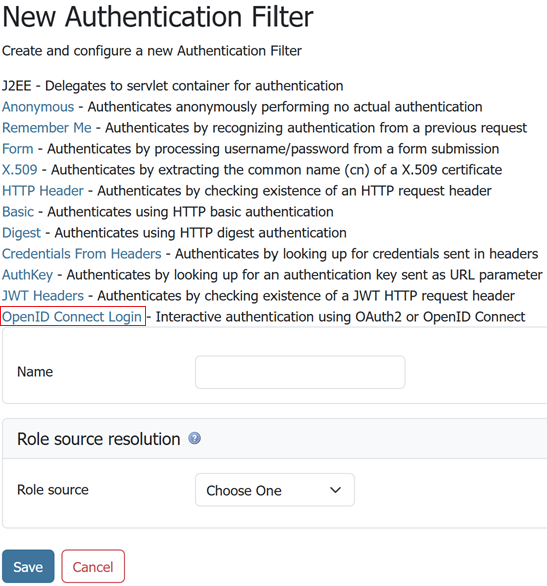
Create the OIDC Filter
-
Login to GeoServer as an Admin
-
On the left bar under "Security", click "Authentication", and then "OpenID Connect Login"
-
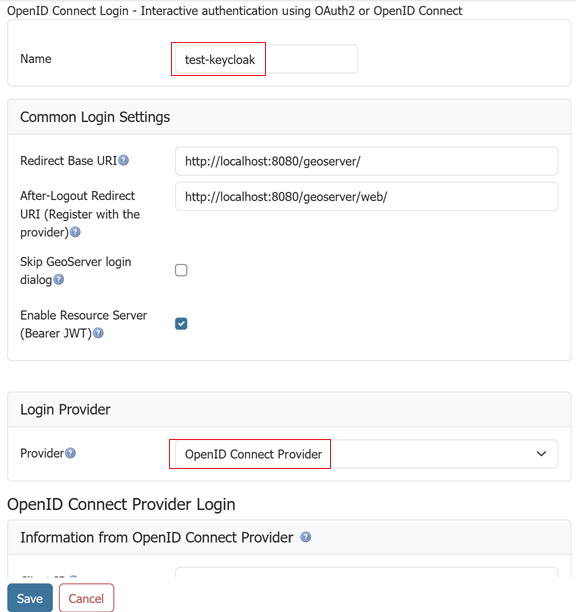
Give the it a name like "test-keycloak", then from the Provider dropdown select OpenID Connect Provider (this is the default selection).
-
Fill in the required information:
- "Client Id" is "gs-client" (name of the Keycloak client you created)
- "Client Secret" which was copied from the keycloak client's "Credentials" tab (see above)
- Turn off "Force Access Token URI HTTPS Secured Protocol" (at the bottom under "Advanced Settings")
- Turn off " Force User Authorization URI HTTPS Secured Protocol" (at the bottom under "Advanced Settings")
- In the "OpenID Discovery Document" type in "http://localhost:7777/realms/gs-realm/.well-known/openid-configuration"
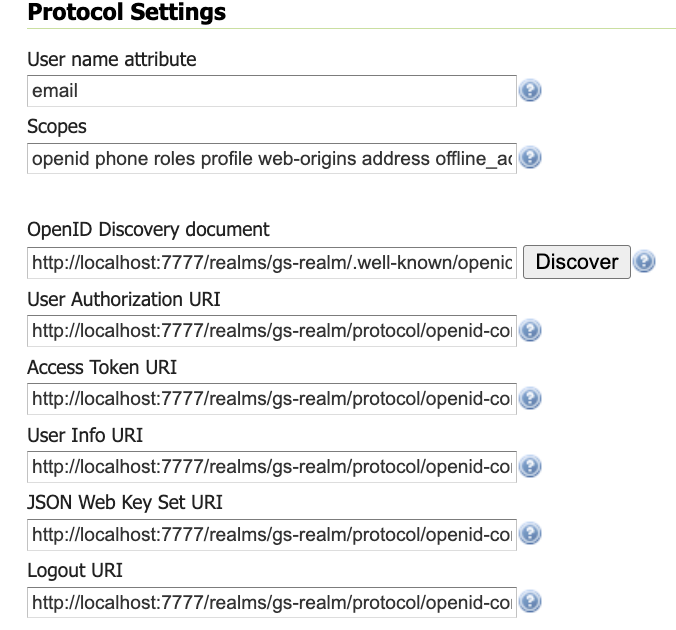
- Press "Discover" (this will download OIDC metadata from your keycloak client)
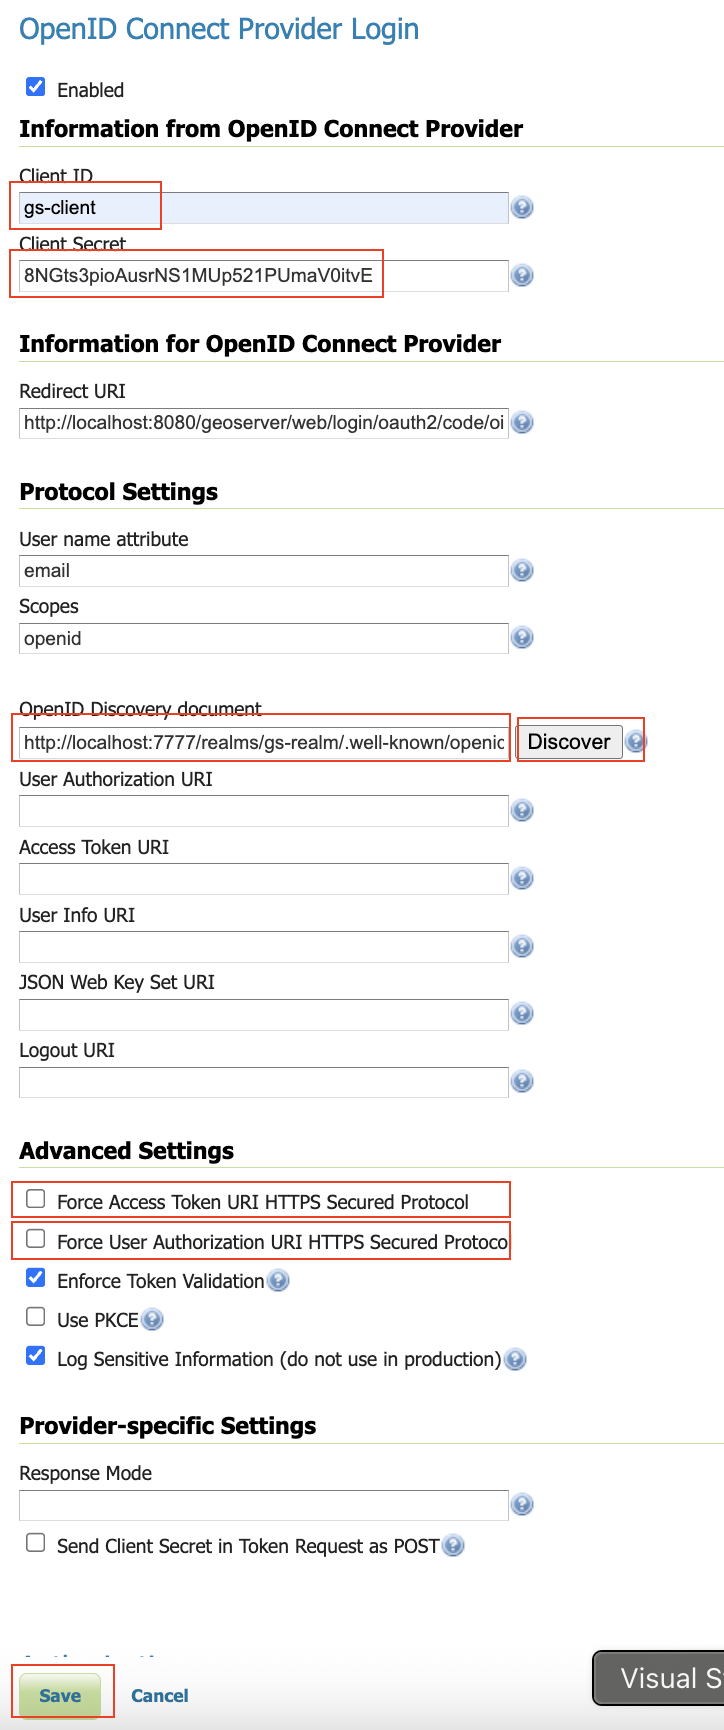
. After you press the "Discovery" button, most of the information will be filled out for you
Configure Role Source
One the same page, we will configure the Role source:
- Get the roles from the ID Token's "resource_access.gs-client.roles" claim
- Convert the keycloak "geoserverAdmin" role to GeoServer's "ROLE_ADMINISTRATOR".
. Go down to the bottom and configure the role source (for more info see role source).
- Choose "ID Token" as the "Role Source"
- Set "resource_access.gs-client.roles" as the "JSON Path"
- Set "geoserverAdmin=ROLE_ADMINISTRATOR" as the "Role Converter Map"
- (optionally) Check "Only allow External Roles that are explicitly named above"
- Press Save
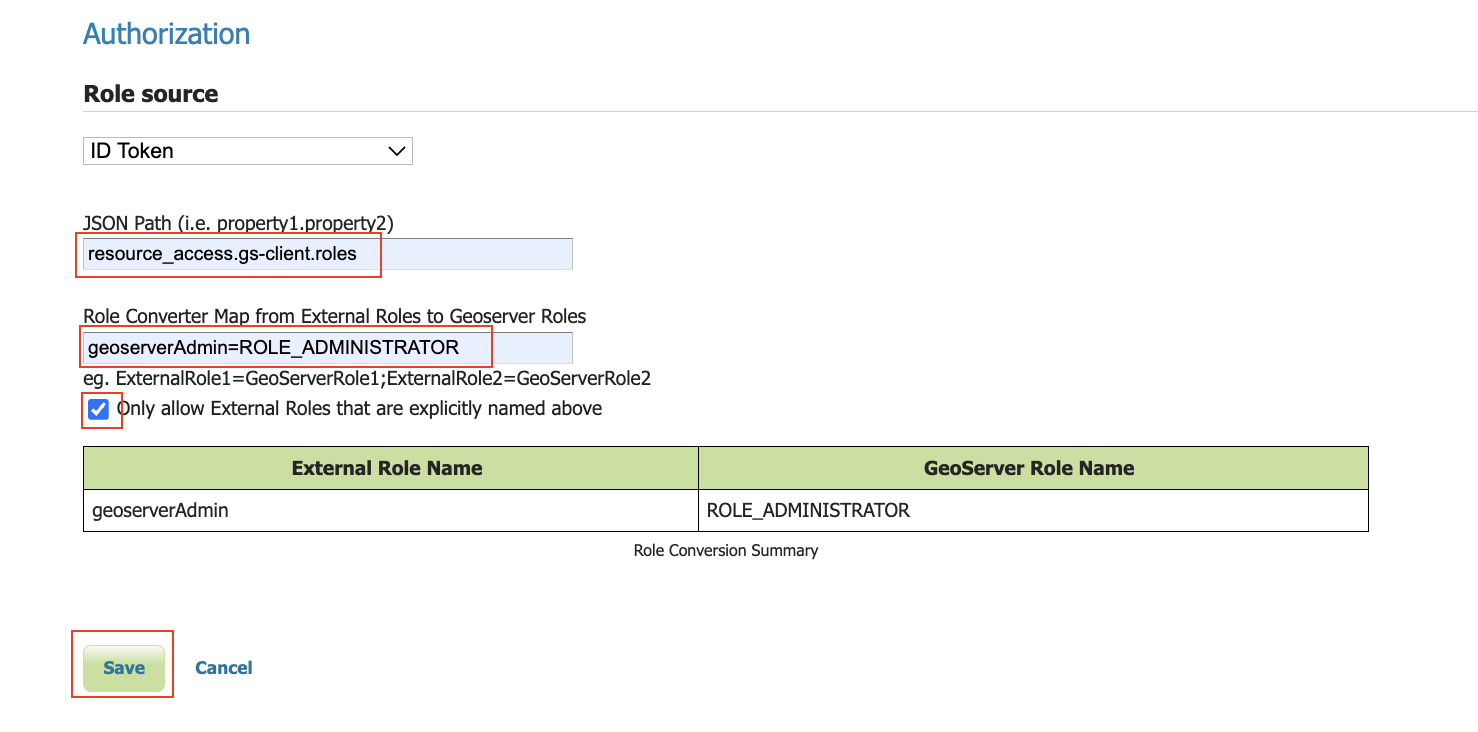
NOTE: You can also change the above to get the role from the ID Token, Access Token, or userinfo.
Configure Role Source — Keycloak Admin API (server-side fetch)
As an alternative to reading roles from a token claim, the OIDC plugin can fetch the user's role assignments directly from Keycloak's Admin REST API at login time. This is the recommended source when:
- The user's effective roles include group-inherited roles (Keycloak does not put group-role mappings into the token by default).
- You rely on Keycloak composite roles and want server-side transitive expansion.
The admin calls are authenticated via the OAuth2 client credentials grant against the same OIDC client used for user login. You therefore need to enable two Keycloak-side knobs on the gs-client client created above.
Step 1 — Enable Service Accounts on the OIDC client
- In the Keycloak admin console, open the realm (e.g.
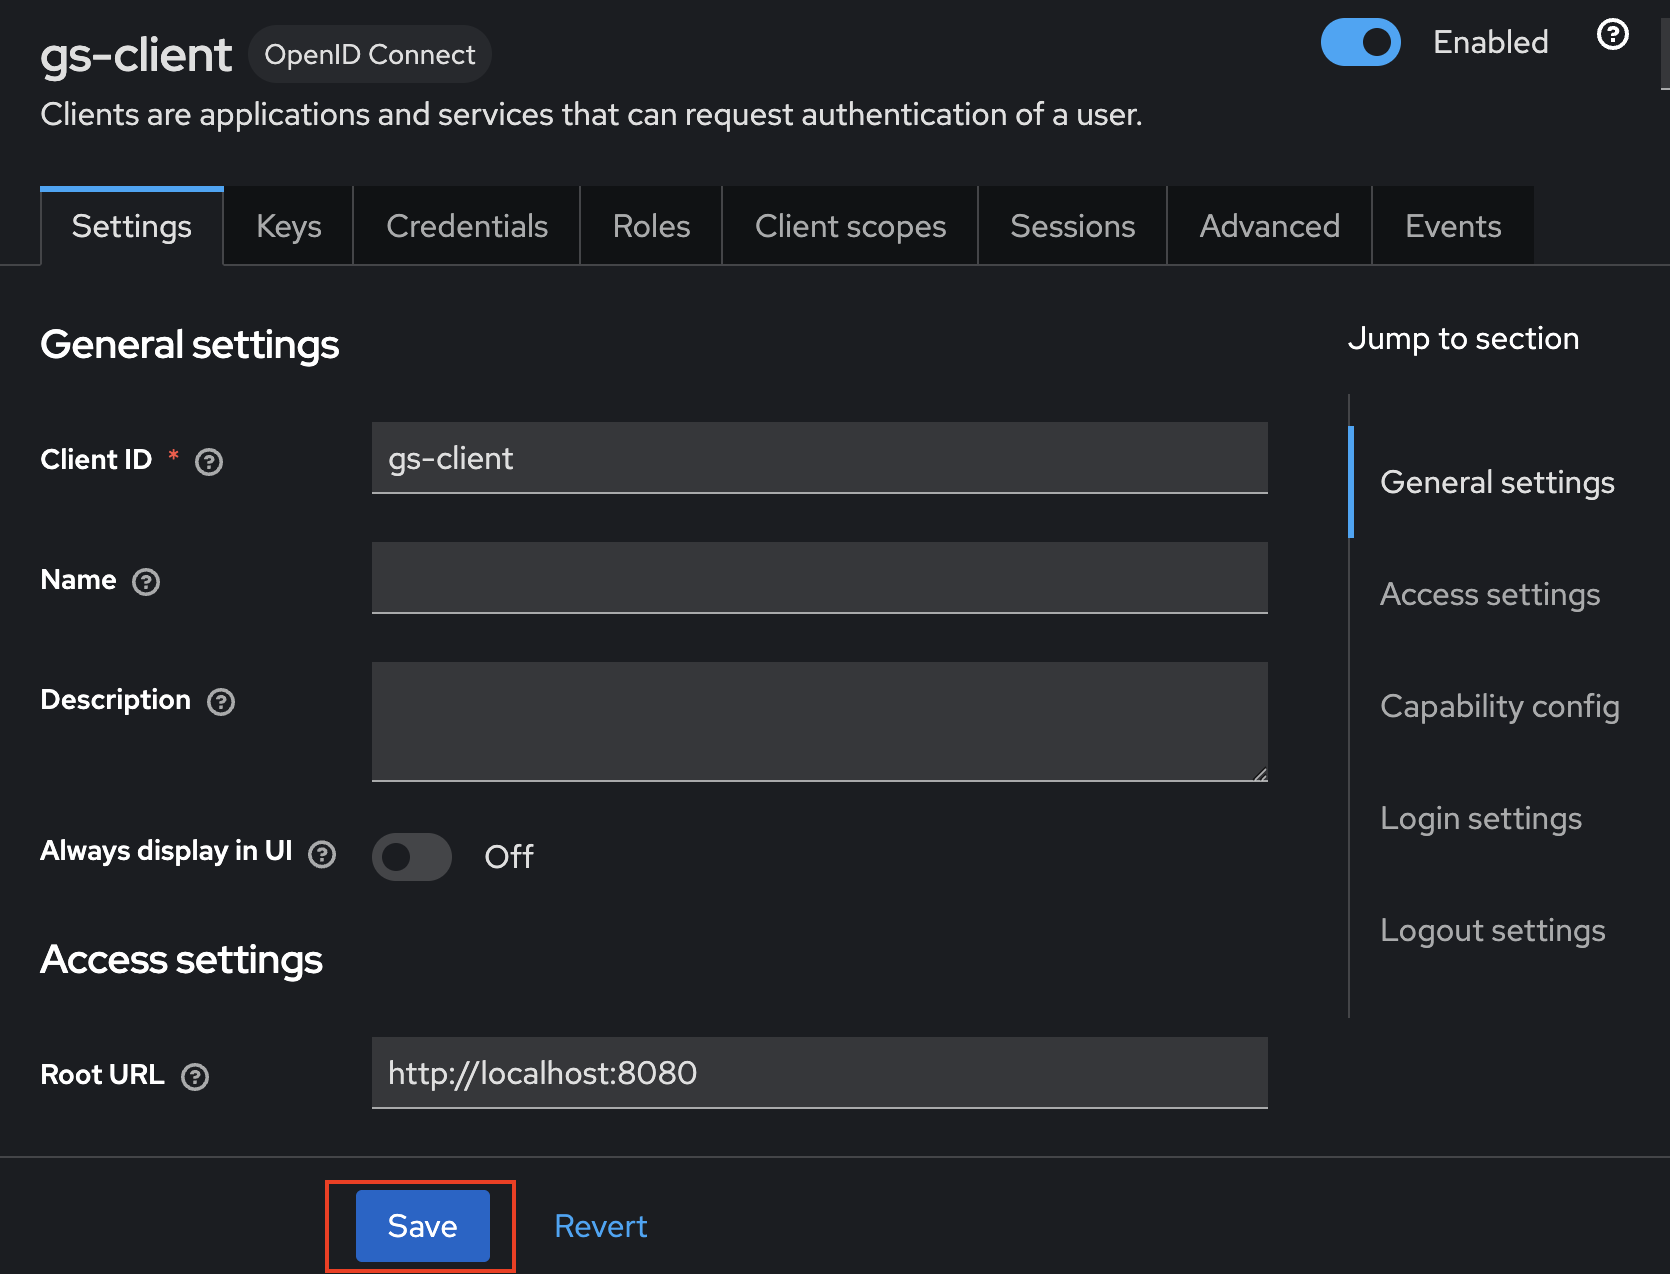
gs-realm), navigate to Clients → gs-client. - On the Settings tab, scroll to Capability config and toggle Service accounts roles to On. Press Save.
Step 2 — Grant realm-management roles to the service account
The service-account user (auto-created when the previous step is enabled, named service-account-gs-client) needs read access to the realm's users, clients and groups.
- Still on the
gs-clientpage, click the Service account roles tab (only visible after Step 1). - Click Assign role. In the dialog filter, type
realm-managementand pick the appropriate realm's client → tick:view-realmview-usersview-clientsquery-groups
- Press Assign.
Tip
For a one-shot setup, the same can be done from a shell using kcadm.sh:
docker exec geoserver_keycloak /opt/keycloak/bin/kcadm.sh \
  config credentials --server http://localhost:7777 \
    --realm master --user geoserver --password geoserver

docker exec geoserver_keycloak /opt/keycloak/bin/kcadm.sh \
  add-roles -r gs-realm \
  --uusername service-account-gs-client \
  --cclientid realm-management \
  --rolename view-realm --rolename view-users \
  --rolename view-clients --rolename query-groups
Step 3 — Switch the OIDC filter to Keycloak Admin API
Back in the GeoServer OIDC filter form, scroll to Authorization → Role source resolution and select Keycloak Admin API from the dropdown. The Server URL, Realm and admin-client credentials are derived from the OIDC configuration you already entered above — the only mandatory input is the role source itself.
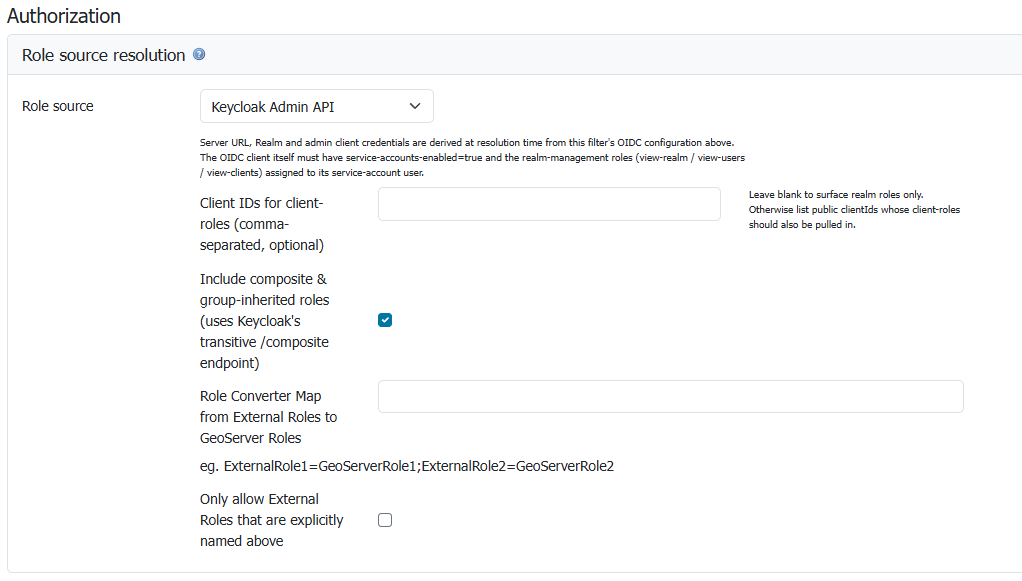
Keycloak Admin API role source. Server URL, Realm and admin client credentials are derived at resolution time from this filter's OIDC configuration; only the optional client-roles list, the composite-roles toggle and the role-converter mapping are exposed inline.
Optional fields:
- Client IDs for client-roles — leave blank to surface realm roles only. List client IDs here if your roles live under specific Keycloak clients.
- Include composite & group-inherited roles — leave on (default) so Keycloak's
/compositeendpoint flattens group + composite-role memberships server-side. -
Role Converter Map — translates external Keycloak role names to GeoServer role names. To make holders of the Keycloak
geoserverAdminrole full GeoServer admins, set this togeoserverAdmin=ROLE_ADMINISTRATOR.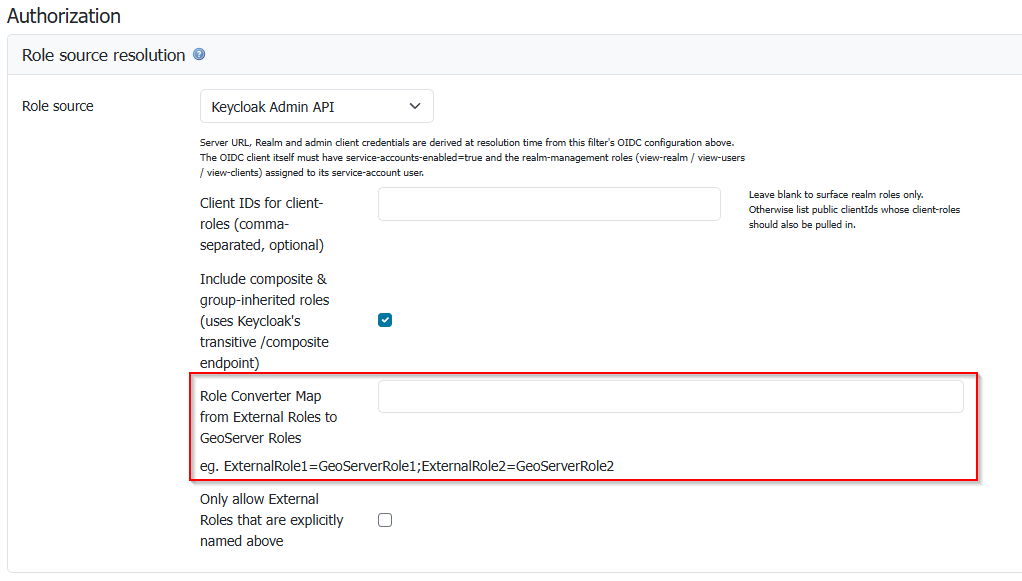
The Role Converter Map field — same semantics as the ID-Token-based source; commonly used to map a Keycloak admin role to GeoServer's built-in
ROLE_ADMINISTRATOR.
Press Save.
Verifying
After a successful login with role source = Keycloak Admin API, the GeoServer log (at DEBUG / FINE for org.geoserver.security.oauth2.common) shows two lines:
Role assignments for '<username>' from Keycloak Admin API (realm '<realm>'): <comma-list-of-roles>
User '<username>' received roles from roleSource=KeycloakAPI: <converted-roles>,ROLE_AUTHENTICATED
If you see Non-2xx from .../admin/realms/.../users?...: 403, the service-account user is missing one or more realm-management roles — redo Step 2.
Allow Web Access (Filter Chain)
-
On the left bar under "Security", click "Authentication", and then click "Web" under "Filter Chains"

- Scroll down, and move the new Keycloak OIDC Filter to the Selected side by pressing the "->" button.
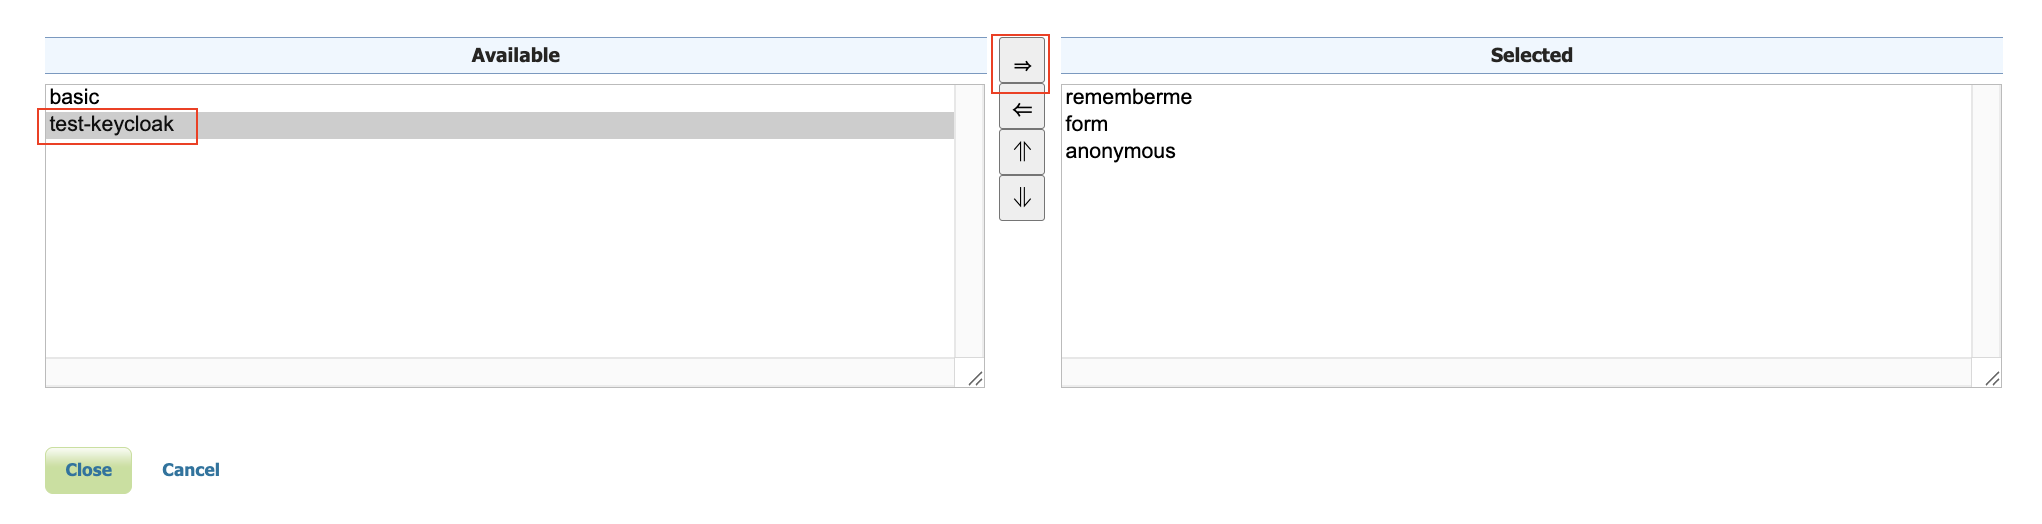
- Move the new Keycloak OIDC Filter above "anonymous" by pressing the up arrow button.

- Press "Close"
- Press "Save"
Testing
See troubleshooting.
-
log out of GeoServer (or open an incognito tab)
-
Press the OIDC login button in the top left of the GeoServer Main Page

-
The keycloak Login screen will appear. Login as:
- user "admin", password "admin"
- user "user", password "user"
-
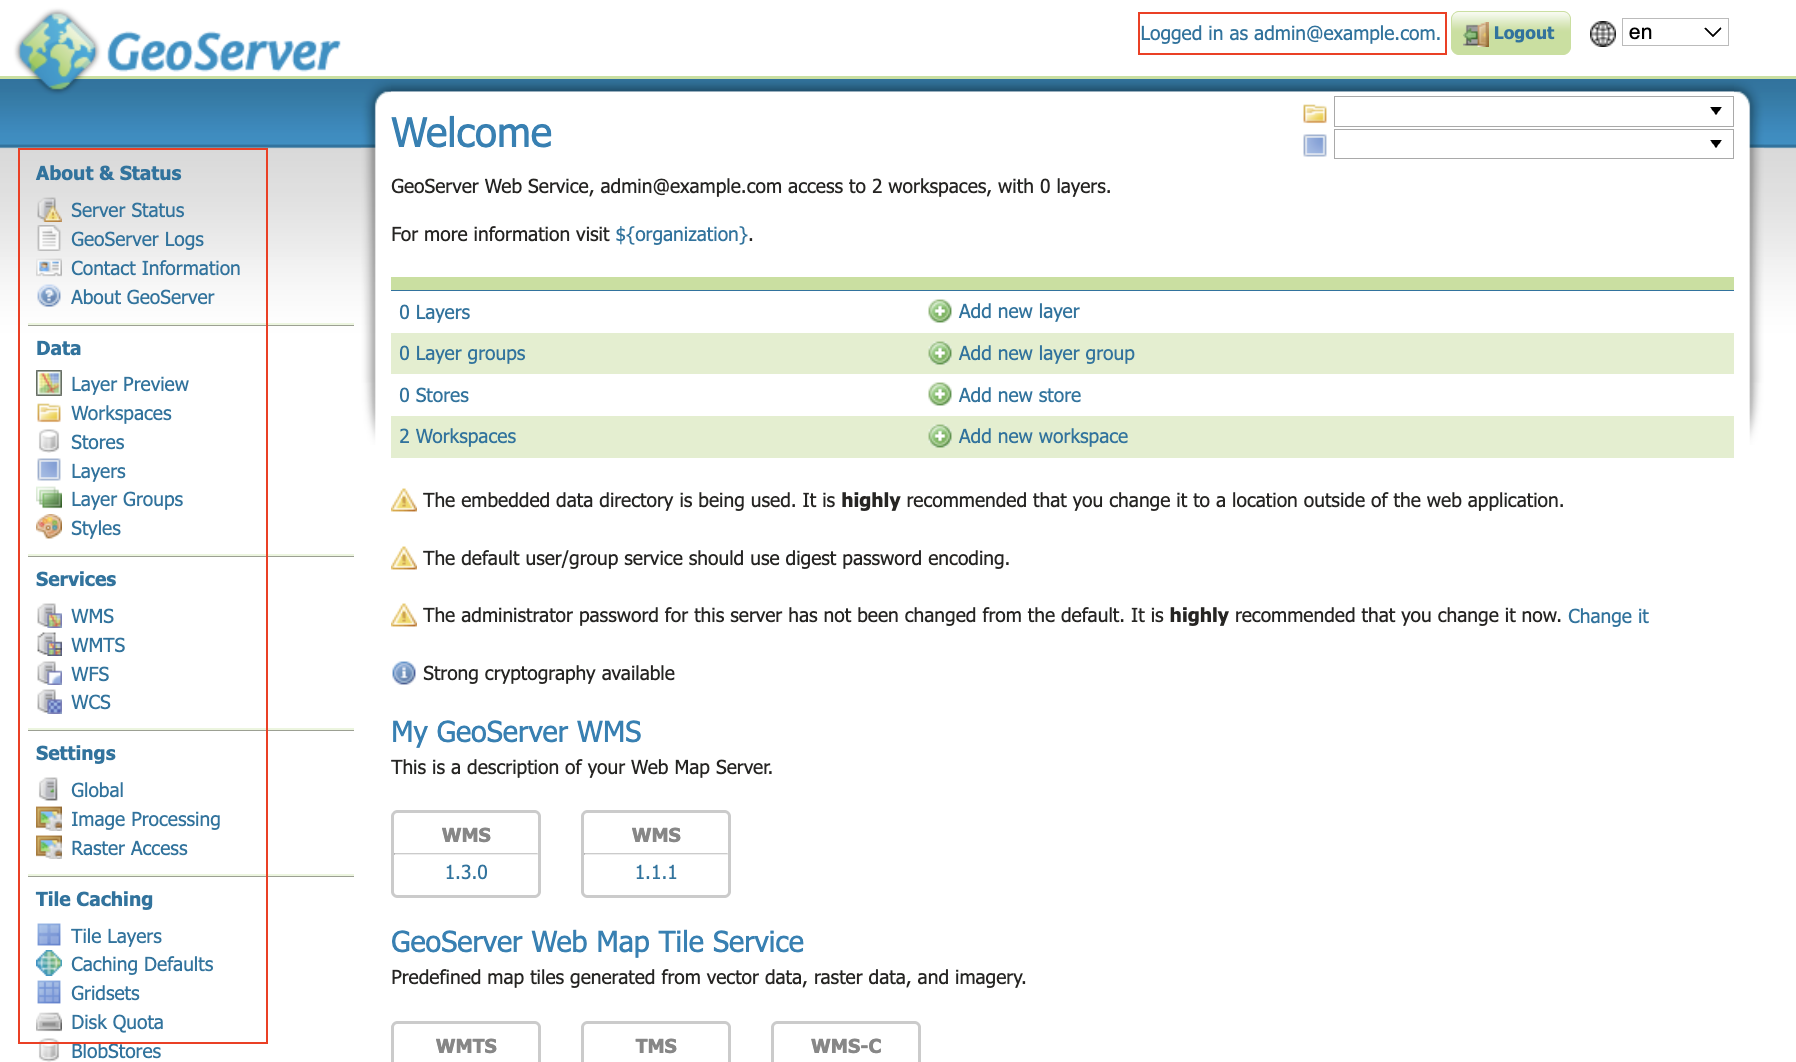
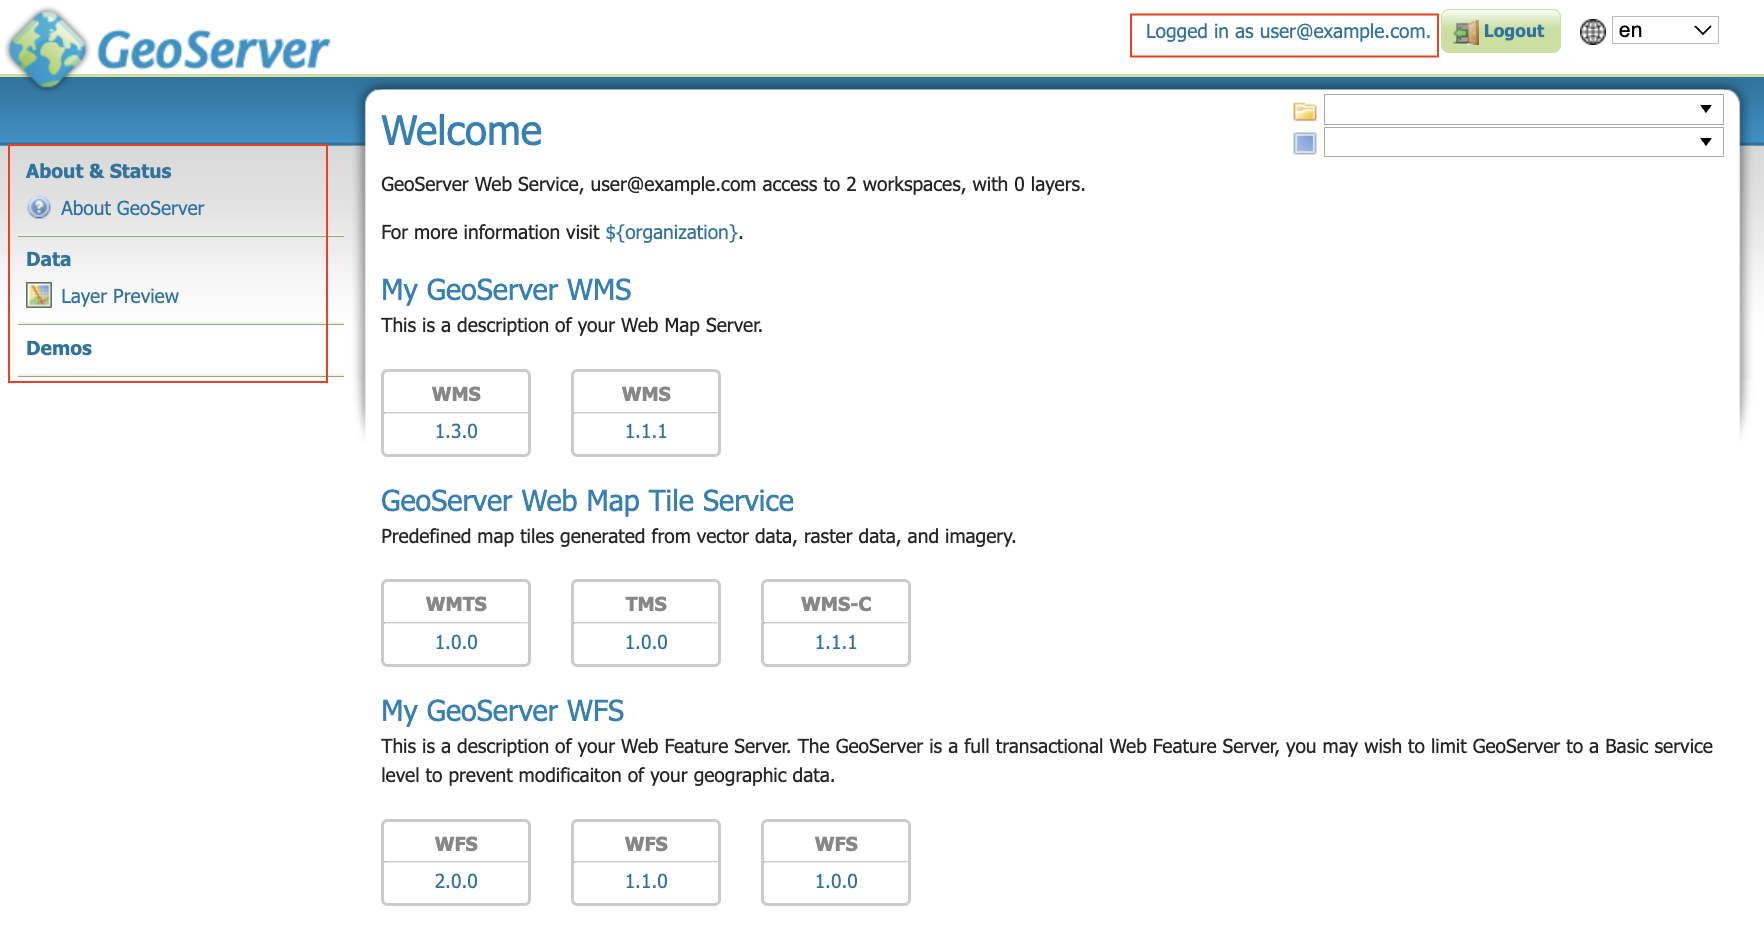
If you login as "admin", you should see the GeoServer administration screens. If you login as "user", you will not.
-
Admin
-
User
-