Preflight Checklist
This quickstart walks through common configuration steps before sharing your GeoServer publicly.
Note
This tutorial assumes that GeoServer is running at http://localhost:8080/geoserver.
Reference:
Security
There are several warnings shown when we first start up GeoServer and login as admin:
-
Change the default login from admin/geoserver.

Default admin password warning
Click on the change it to open Edit user for the
adminuser. You may also reach this screen by navigating to Security > Users, Groups, and Roles. Change to the Users/Groups tab, and select theadminuser.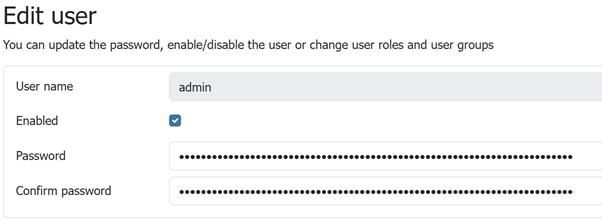
Change Admin Password
Use this screen to change the
adminuser password from the default:User name adminPassword (make up a new password) Confirm password (confirm new password) -
Change keystore password:

Keystore password warning
Click on the change it to open Change Keystore Password. You may also reach this screen by navigating to Security > Passwords, and pressing Change password.
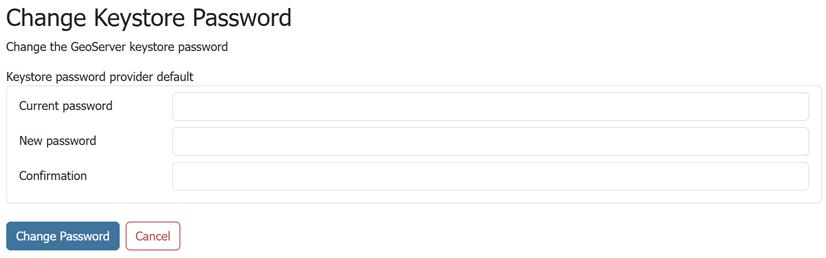
Change Keystore Password
Use this screen to change the keystore password.
Current password geoserverNew password (make up a new password) Confirmation (confirm new password) If you do not know the current password, navigate to Security > Passwords and there is an option to recover the password (either to a local file or via REST API).
For more information see Keystore password.
Note
What is the keystore password or master password?
- The keystore password used to store security credentials and encryption keys.
- Optional: When experimenting with security configuration, you can enable use of the root account.
Global Settings
-
By default GeoServer logs provide a record of every interaction.
This is useful when initially configuring GeoServer, however once you are comfortable everything is working correctly you can configure GeoServer to only record warnings and errors.
Navigate to Server > Global Settings. Locate the heading Internal Settings and adjust Logging profile to
PRODUCTION_LOGGING.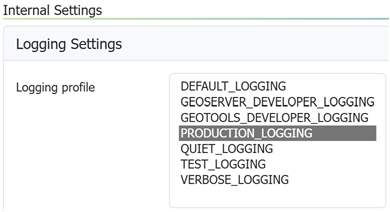
PRODUCTION_LOGGING profile
For more information see Logging Profile.
Contact Information
-
Navigate to About & Status > Contact Information.
- Filling in this information is shown initial Welcome page.
- This information is included in web service description information.
- Contact information may be provided for each workspace.
For more information Contact Information.