Importer interface reference
The Layer Importer user interface is a component of the GeoServer web interface. You can access it from the GeoServer web interface by clicking the Import Data link, found on the left side of the screen after logging in.
Data sources page
The front page of the Layer Importer is where the data source and format are set. The following options are displayed:
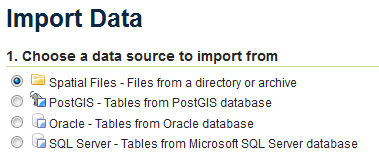
Choose a data source to import from
Select one of the following data sources to use for the import:
Spatial Files (see Supported data formats for more details)
PostGIS database
Oracle database
SQL Server database
Choose a data source
The contents of the next section is dependent on the data source chosen here.
Configure the data source: Spatial Files
There is a single box for selecting a file or directory. Click the Browse link to bring up a file chooser. To select a file, click on it. To select a directory, click on a directory name to open it and then click OK.
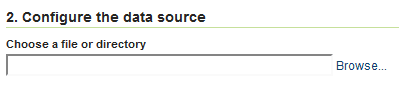
Spatial file data source
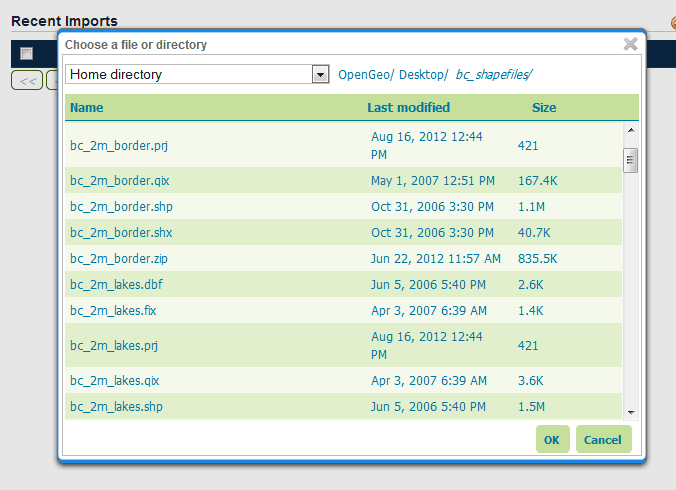
File chooser for selecting spatial files
Configure the data source: PostGIS
Fill out fields for Connection type (Default or JNDI) Host, Port, Database name, Schema, Username to connect with, and Password.
There are also advanced connection options, which are common to the standard PostGIS store loading procedure. (See the PostGIS data store page in the GeoServer reference documentation.)
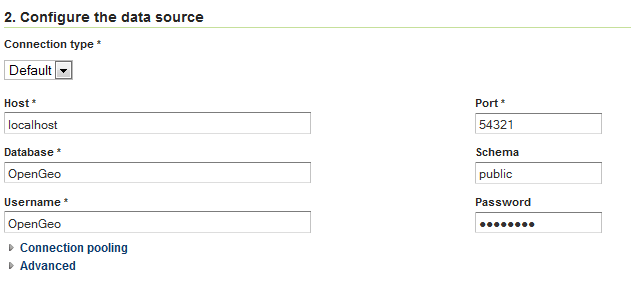
PostGIS data source connection
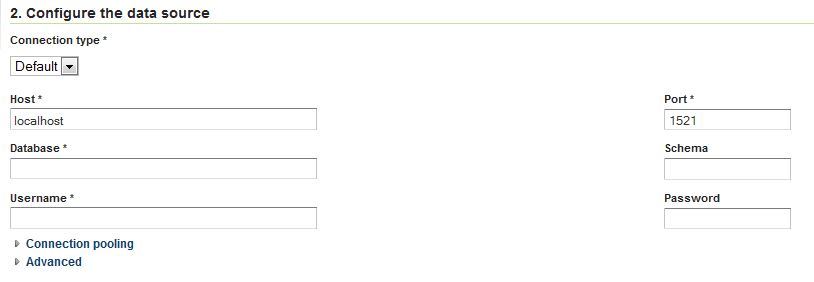
Configure the data source: Oracle
The parameter fields for the Oracle import are identical to that of PostGIS. The fields aren’t populated with default credentials with the exception of the port, which is set to 1521 by default.
Note
This option is only enabled if the Oracle extension is installed.
Oracle data source connection
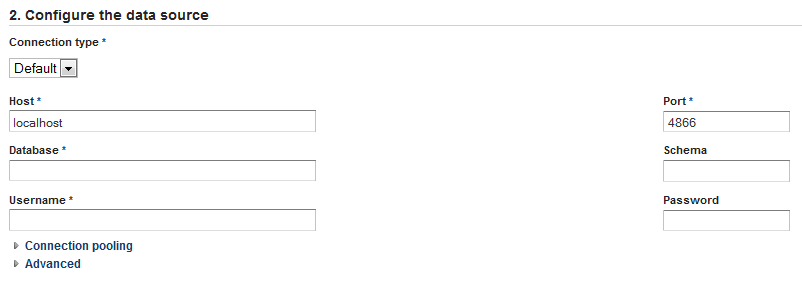
Configure the data source: SQL Server
The parameter fields for the SQL Server import are identical to that of PostGIS. The fields aren’t populated with default credentials with the exception of the port, which is set to 4866 by default.
Note
This option is only enabled if the SQL Server extension is installed.
SQL Server data source connection
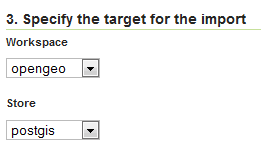
Specify the target for the import
This area specifies where in the GeoServer catalog the new data source will be stored. This does not affect file placement.
Select the name of an existing workspace and store.
Target workspace and store in GeoServer
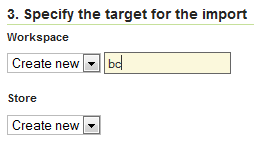
Alternately, select Create New and type in a names for a new workspace or store. During the import process, these will be created.
Creating a new workspace and store
Recent imports
This section will list previous imports, and whether they were successful or not. Items can be removed from this list with the Remove button, but otherwise cannot be edited.

Recent imports
When ready to continue to the next page, click Next.
Layer listing page
On the next page will be a list of layers found by the Layer Importer. The layers will be named according to the source content’s name (file name of database table name). For each entry there will be a Status showing if the source is ready to be imported.
All layers will be selected for import by default, but can be deselected here by unchecking the box next to each entry.
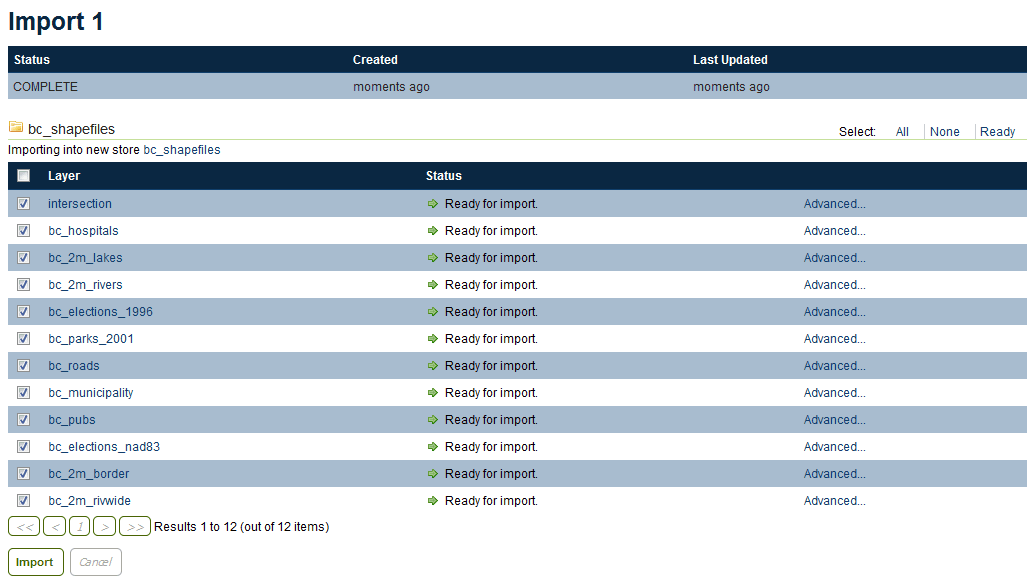
List of layers to be imported
A common issue during the import process is when a CRS cannot be determined for a given layer. In this case, a dialog box will display where the CRS can be declared explicitly. Enter the CRS and Click Apply.

Declaring a CRS
When ready to perform the import, click Import.
Each selected layer will be added to the GeoServer catalog inside a new or existing store, and published as a layer.
After the import is complete the status area will refresh showing if the import was successful for each layer. If successful, a dialog box for previewing the layer will be displayed, with options for Layer Preview (OpenLayers), Google Earth, and GeoExplorer.
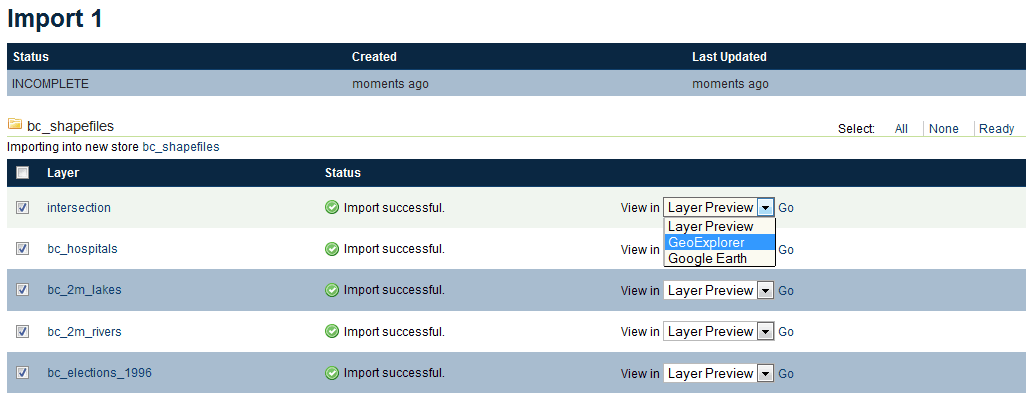
Layers successfully imported
Advanced import settings page
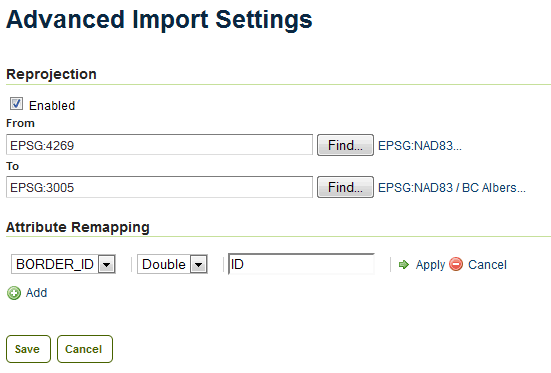
The Advanced link next to each layer will lead to the Advanced import settings page.
On this page, data can be set to be reprojected from one CRS to another during the import process. To enable reprojection, select the Reprojection box, and enter the source and target CRS.
In addition, on this page attributes can be renamed and their type changed. Click on the Add link under Attribute Remapping to select the attribute to alter, its type, and its new name. Click Apply when done.
Click Save when finished.
Advanced layer list page