Web archive
GeoServer is packaged as a standalone Web Archive (geoserver.war) file for use with existing application servers such as Apache Tomcat and Jetty.
JavaEE |
JakartaEE |
Application Server |
GeoServer |
|---|---|---|---|
Servlet API 6 |
Tomcat 10 |
not compatible |
|
Servlet API 4 |
Tomcat 9 |
GeoServer 2 |
|
Servlet API 3.1 |
Jetty 9.4 |
GeoServer 2 |
GeoServer is tested using Tomcat 9, and this is the recommended application server. Other application servers have been known to work, but are not tested regularly by community members.
Note
GeoServer is compatible with Tomcat 9 which provides the required Java Enterprise Edition Servlet API 4 and annotation processing.
Warning
GeoServer 2 is not compatible with Tomcat 10 or higher, which provides Jakarta EE Servlet API 6. Supporting the Jakarta EE APIs is the goal of GeoServer 3 crowdfunding.
Installation
Make sure you have a Java Runtime Environment (JRE) installed on your system. GeoServer requires a Java 11 or Java 17 environment, available from OpenJDK, Adoptium, or provided by your OS distribution.
Note
For more information about Java and GeoServer compatibility, please see the section on Java Considerations.
Navigate to the GeoServer Download page.
Select the version of GeoServer that you wish to download. If you’re not sure, select Stable release.
These instructions are for GeoServer 2.26-SNAPSHOT which is provided as a Nightly release. Testing a Nightly release is a great way to try out new features, and test community modules. Nightly releases change on an ongoing basis and are not suitable for a production environment.
Select Web Archive on the download page: geoserver-2.26.x-latest-war.zip
Download and unpack the archive.
Deploy the web archive as you would normally. Often, all that is necessary is to copy the
geoserver.warfile to the application server’swebappsdirectory, and the application will be deployed by the application server.Note
A restart of your application server may be necessary.
Tomcat Hardening
Hide the Tomcat version in error responses and its error details.
To remove the Tomcat version, create following file with empty parameters
cd $CATALINA_HOME (where Tomcat binaries are installed)
mkdir -p ./lib/org/apache/catalina/util/
cat > ./lib/org/apache/catalina/util/ServerInfo.properties <<EOF
server.info=
server.number=
server.built=
EOF
Additionally add to
server.xmlthe ErrorReportValve to disable showReport and showServerInfo. This is used to hide errors handled globally by tomcat in host section.vi ./conf/server.xmlAdd to
<Host name=...section this new ErrorReportValve entry:... <Host name="localhost" appBase="webapps" unpackWARs="true" autoDeploy="true"> ... <Valve className="org.apache.catalina.valves.ErrorReportValve" showReport="false" showServerInfo="false" /> </Host> </Engine> </Service> </Server>
Why, if security by obscurity does not work?
Even though this is not the final solution, it at least mitigates the visible eye-catcher of outdated software packages.
Let’s take the attackers point of view.
Response with just HTTP status:
HTTP Status 400 – Bad Request
Ok, it looks like a Tomcat is installed.
Default full response:
HTTP Status 400 – Bad Request
Type Status Report
Message Invalid URI
Description The server cannot or will not process the request due to something that is perceived to be a client error (e.g., malformed request syntax, invalid request message framing, or deceptive request routing).
Apache Tomcat/7.0.67
Ahh, great, the software is not really maintained. Tomcat is far outdated from Dec. 2015 (6 years old as of today Jan. 2022) with a lot of unfixed vulnerabilities.
Notice: For support reason, the local output of version.sh still outputs the current version
$CATALINA_HOME/bin/version.sh
 ...
 Server number:  7.0.67
 ...
Running
Use your container application’s method of starting and stopping webapps to run GeoServer.
To access the Web administration interface, open a browser and navigate to
http://SERVER/geoserver.For example, with Tomcat running on port 8080 on localhost, the URL would be
http://localhost:8080/geoserver.When you see the GeoServer Welcome page, GeoServer has been successfully installed.
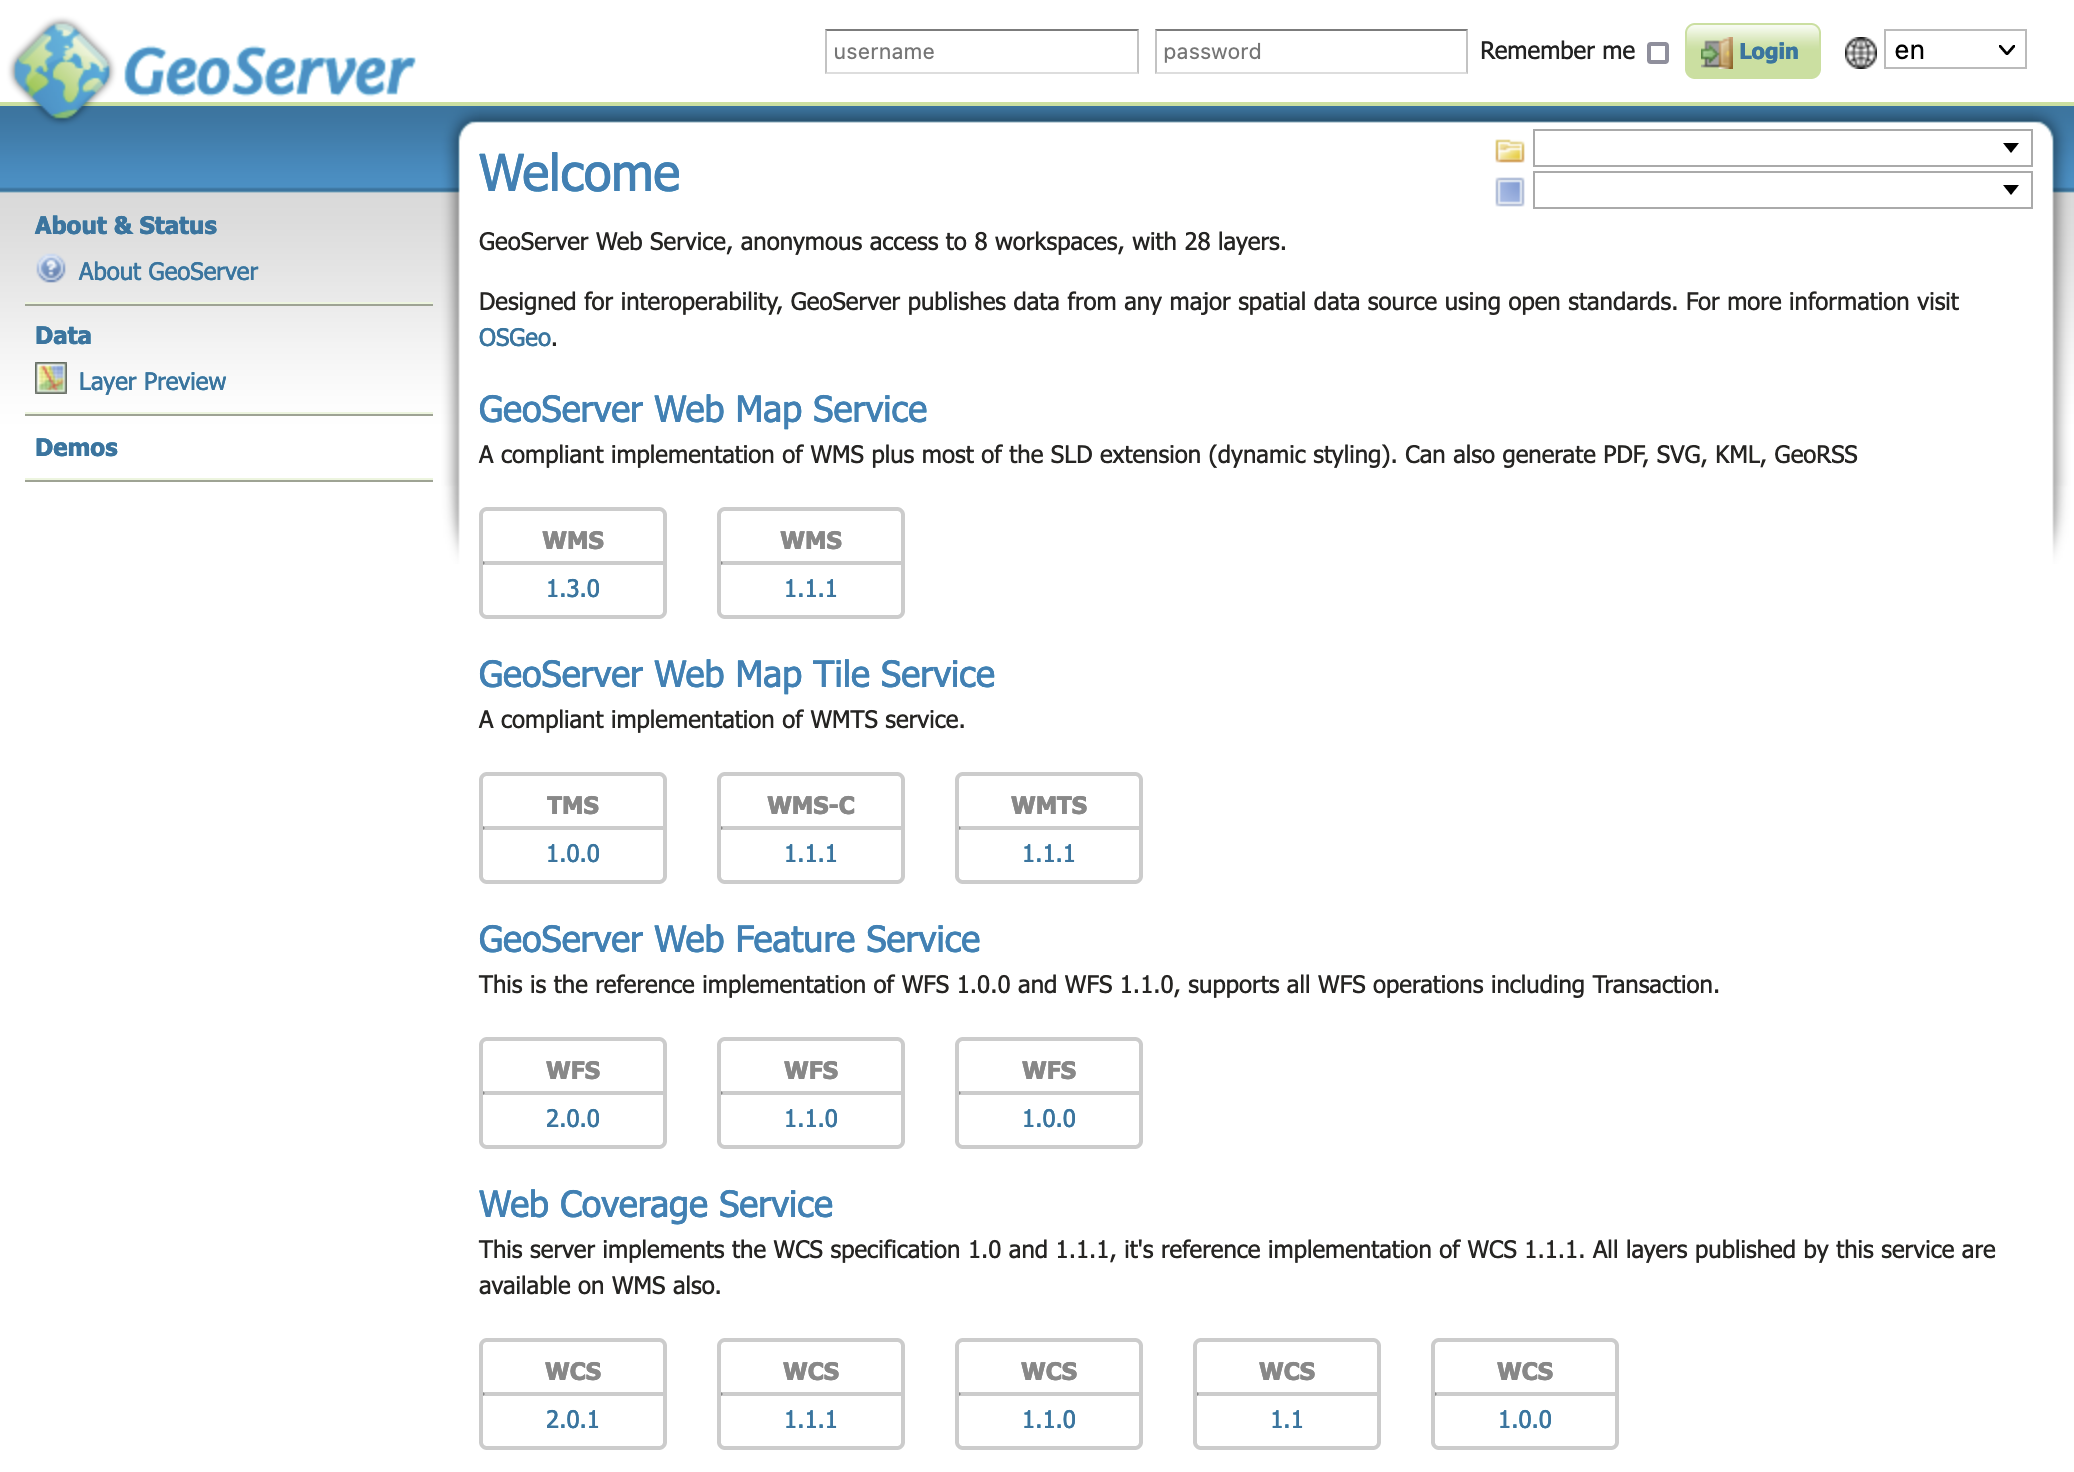
GeoServer Welcome Page
Update
Update GeoServer:
Backup any customizations you have made to
webapps/geoserver/web.xml.In general application properties should be configured using
conf/Catalina/localhost/geoserver.xmlrather than by modifyingweb.xmlwhich is replaced each update.Follow the Upgrading existing versions to update
geoserver.war.Before you start ensure you have moved your data directory to an external location not located inside the
webapps/geoserver/datafolder.Be sure to stop the application server before deploying updated
geoserver.war.This is important as when Tomcat is running it will replace the entire
webapps/geoserverfolder, including any configuration in the default GEOSERVER_DATA_DIR file:geoserver/data folder location or customizations made toweb.xml.Re-apply any customizations you have made to
webapps/geoserver/web.xml.
Update Tomcat:
Update regularly at least the container application! And repeat the hardening process.
There are a lot of geoserver installations visible with outdated Tomcat versions.
Uninstallation
Stop the container application.
Remove the GeoServer webapp from the container application’s
webappsdirectory. This will usually include thegeoserver.warfile as well as ageoserverdirectory.Remove
conf/Catalina/localhost/geoserver.xml.