Keycloak Role Service
This tutorial walks through how to set up Keycloak as a role service for GeoServer.
Note
In this example the Keycloak service runs on port 8080 while GeoServer runs on port 8181
Keycloak Client Configuration
Follow the Authentication with Keycloak guide to configure GeoServer to allow logging in via Keycloak. Two clients will need to be configured - one with the confidential access type, and another with the public access type. Only one authentication filter is required, and it is recommended to use the confidential client.
For both clients, ensure that:
Standard flow, implicit flow, and direct access grants are enabled
The base URL is set to
http://localhost:8181/geoserver/webThe following redirect URIs are enabled:
http://localhost:8181/geoserver*http://localhost:8080/auth/realms/master/broker/keycloak-oidc/endpoint*
For the public client, additionally ensure that:
The access type is set to public
The redirect URI
http://localhost:8181/*is enabledWeb origins is set to
*
For the confidential client, additionally ensure that:
The access type is set to confidential
Service accounts are enabled
Under the Service Account Roles tab, the realm role “admin” is assigned
Under the Roles tab of the confidential client, create a ROLE_ADMINISTRATOR role. For any user that should have
administrative privileges in GeoServer, assign them the ROLE_ADMINISTRATOR role.
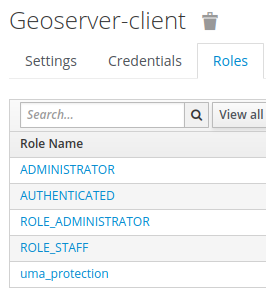
An example set of roles for GeoServer-client, with all required roles and an additional staff role.
To assign a user a role:
Under the users section in Keycloak, click the user’s ID (if there are missing users, click “View all users”).
In the role mappings tab, select the GeoStore client from the client roles dropdown.
Select the
ROLE_ADMINISTRATORrole from the available roles, and click add selected.
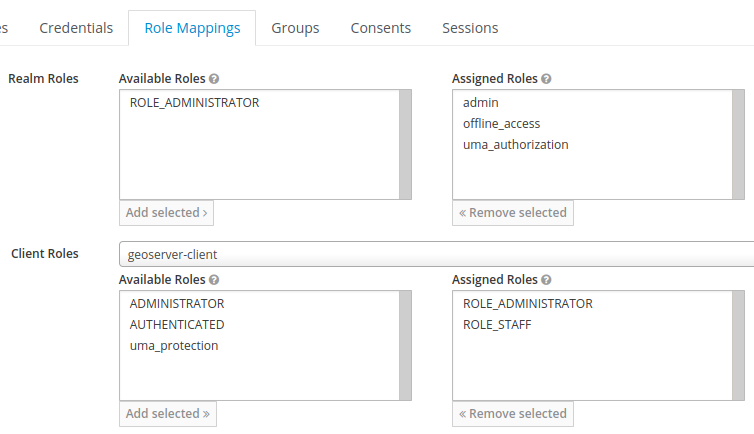
An example set of role mappings for a user who should be an administrator and staff in GeoServer.
When creating custom roles, ensure they begin with ROLE_ e.g. ROLE_STAFF.
GeoServer Configuration for Role Syncing
Role syncing with Keycloak will be tied to the confidential client.
In GeoServer as an admin, on the ‘Users, Groups, Roles’ page, add a new role service.
Select Keycloak from the list of provided options. All fillable fields are required, excluding the administrator and group administrator role dropdowns, which should initially have no options.
Base URL for Keycloak e.g. http://localhost:8080
The ID of the client may be retrieved from the URL when viewing the GeoServer client in Keycloak. URL format:
/auth/admin/master/console/#/realms/master/clients/{ID of client}The client secret is under the GeoServer client’s credentials tab in Keycloak
Ensure you click save to create the Keycloak role service.
Once the role service has been created, open the role service again and assign the administrator and group administrator roles to
ADMINISTRATOR.On the ‘Security Settings’ page, set the active role service to be the Keycloak role service
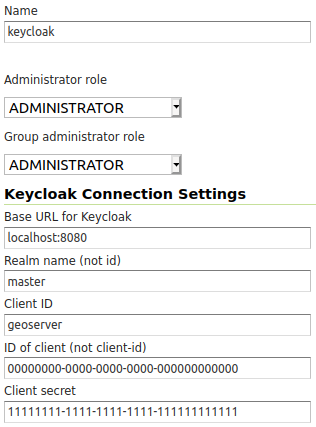
An example of a fully configured Keycloak role service.
GeoServer Configuration for Keycloak Authentication Filters
Under the Authentication section of GeoServer:
Add the Keycloak authentication filter to the top of the web and default filter chains.
Add geofence to the selected provider chains, and place it above the default.